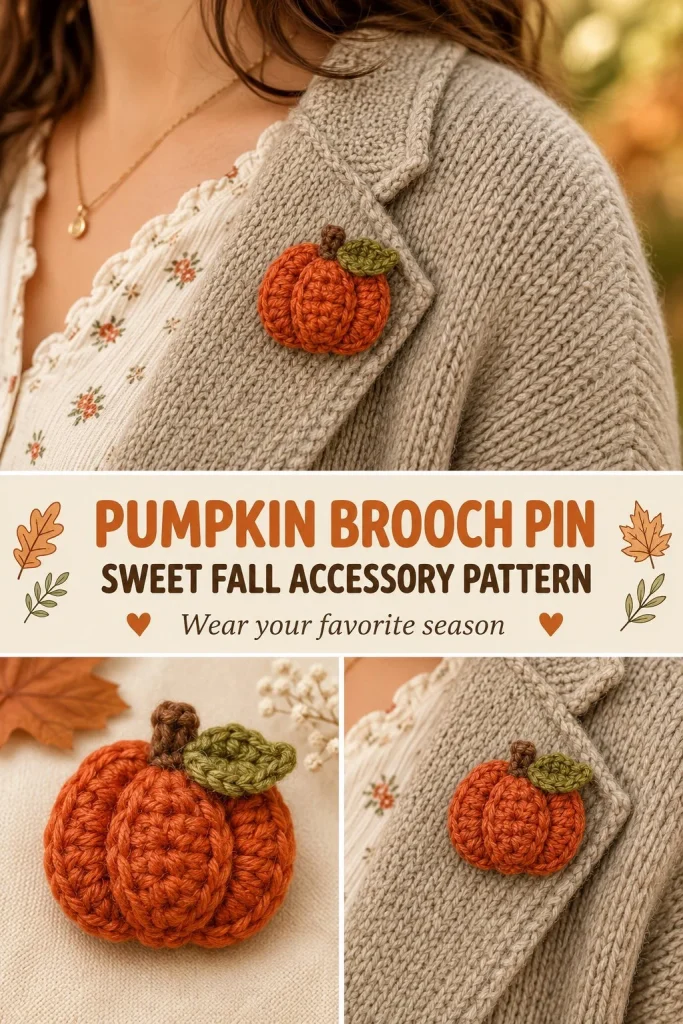
This delightful pumpkin brooch pin is a sweet, small crochet project that captures the coziness of fall in a wearable accessory. Perfect for beginners who want a quick, satisfying project, this pin adds a charming seasonal touch to coats, scarves, or bags and makes a thoughtful gift for crafty friends. The pattern uses basic stitches worked in rounds to create a cute pumpkin shape, with a tiny green leaf for detail. Stitching ridges on the surface gives it realistic texture, helping the pumpkin feel full and plump even though it’s flat. If you enjoy fall decor in crochet, you might also like this pumpkin mug cozy pattern, which pairs beautifully with wearable seasonal accents like this brooch.
Why You’ll Love This Crochet Pattern
- Uses basic single crochet stitches ideal for beginners yet satisfying for intermediate makers
- Quick to make with minimal materials and no stuffing required
- The surface stitching technique adds great texture and dimension
- Fun and practical: wear it yourself, gift it, or use it in autumn-themed decor
- The small size means it works well with leftover yarn and small hooks
- Helps build confidence in working magic rings and basic shaping
Finished Size
The pumpkin brooch measures approximately 2.5 inches (6.5 cm) in diameter. Size may vary depending on your yarn thickness, hook choice, and personal tension.
Skill Level
Easy – This pattern is suitable for beginners who are comfortable making a magic ring and working single crochet in rounds. The surface stitching and leaf construction are straightforward, making it a great project to develop finishing skills too.
Materials Needed
- Burnt-orange worsted weight yarn (small amount for pumpkin)
- Green worsted weight yarn (tiny amount for leaf)
- 3.5 mm (E) crochet hook
- Small pin-back finding for attaching the brooch
- Tapestry needle for weaving ends and surface stitching
- Scissors
- Optional: Stitch marker to mark rounds
Stitches and Abbreviations
- ch = chain
- sc = single crochet (insert hook in stitch, yarn over, pull up a loop, yarn over, pull through both loops)
- sl st = slip stitch (insert hook, yarn over, pull through stitch and loop on hook)
- magic ring = adjustable loop used to start crocheting in rounds without a hole
Gauge and Tension Notes
Gauge is not critical for this small brooch but try to keep your stitches consistent and not too loose so the pumpkin holds its shape well. Using a 3.5 mm hook with worsted yarn creates the ideal texture that is firm enough for surface stitching.
Pattern Notes Before You Start
This pumpkin is crocheted in joined rounds, starting from the center with a magic ring. The pumpkin body is worked in the round with increasing stitches, followed by one even round for shaping. The leaf is crocheted flat as a small rectangle and sewn on after the pumpkin is finished. Surface stitching adds the ridges that give the pumpkin its distinctive look. The pin-back is sewn securely on the reverse side at the end.
Step-by-Step Crochet Instructions
- Begin with a magic ring, ch 1, and work 6 sc into the ring (6 stitches).
- Round 2: Work 2 sc in each stitch around (12 stitches).
- Round 3: sc 1, 2 sc in next stitch repeat around (18 stitches).
- Round 4: sc evenly around all 18 stitches, sl st to join the round. Fasten off, but leave a long tail for surface stitching.
- With green yarn, chain 5 for the leaf. Starting in the 2nd chain from hook, sc 4 across. Fasten off leaving a long tail for sewing.
- Use the tapestry needle and the leftover orange yarn tail to stitch straight lines radiating from the center of the pumpkin to the edge, creating ridges that mimic pumpkin segments.
- Sew the green leaf securely onto one edge of the pumpkin.
- Sew the pin-back finding flat onto the reverse side of the pumpkin, ensuring it is centered.
Assembly and Finishing
Take care to weave in all ends securely to avoid any loose threads. The surface stitching is an essential detail—try to space the ridges evenly around the pumpkin for a balanced look. When attaching the leaf, position it so it slightly overlaps the pumpkin edge for a natural fit. The pin-back should be sewn on tightly and flat to avoid catching fabric or catching on items.
Helpful Tips
- Use a stitch marker on the first stitch of each round to keep track easily.
- Pull your surface stitches firmly but not too tight to prevent puckering.
- Blocking the pumpkin lightly on a flat surface can help smooth any uneven stitches.
- When practicing the magic ring, pull the starting loop tight so your center is neat with no hole.
- Keep the green yarn tail long enough to sew the leaf neatly without tugging.
Common Mistakes to Avoid
- Skipping the slip stitch join can make rounds unclear and distort shaping. Always join rounds with a slip stitch.
- Making uneven increases will cause the pumpkin to bulge oddly—count stitches carefully each round.
- Pulling surface stitching too tightly can pucker your work; keep tension moderate.
- Attaching the leaf loosely may cause it to flap or come off, so sew it firmly.
- Not securing the pin-back well will result in it falling off when wearing.
Customization Ideas
- Use variegated orange yarn for a multi-toned pumpkin effect.
- Add a tiny brown or tan stem on top with a few extra stitches or surface embroidery.
- Try a sparkly or metallic yarn for festive flair.
- Make a set of pins in different sizes or colors to match seasonal outfits.
- Pair this brooch with a coordinating project like the pumpkin bunting banner for seasonal decorating.
How to Use or Display This Crochet Project
This pumpkin brooch makes an adorable accent on jackets, scarves, hats, or bags. It’s a gentle, wearable nod to autumn and harvest themes, perfect for gifting at fall gatherings or using as a hostess gift. You can also attach it to lightweight decor like fabric pumpkins or wreaths as a removable touch.
Care Instructions
For best results, spot clean the brooch gently with a damp cloth. Avoid washing or soaking as the pin-back may rust or detach. Store flat in a dry place between uses to keep the shape crisp.
Frequently Asked Questions
Q: Can I make this with lighter or bulkier yarn?
A: Yes, but your finished pumpkin size and texture will change. Adjust hook size accordingly and expect looser or firmer fabric.
Q: How do I secure the magic ring after the first round?
A: Pull the ring tight to close the center completely, then join the round with a slip stitch to prevent loosening.
Q: Can I add stuffing inside the pumpkin?
A: The pattern is designed flat with surface stitching for shape, but you could lightly stuff before finishing if you want a puffier look.
Q: Is the leaf necessary?
A: The leaf adds a nice decorative touch but can be omitted for a simpler pumpkin pin.
Q: Can I use this pattern to make larger pumpkins?
A: You can increase the rounds, but you’ll need to adjust surface stitching and assembly accordingly.
Final Thoughts
This pumpkin brooch pin is a charming, easy way to celebrate autumn with your crochet skills. Its simple construction and cute details make it perfect for gifting or adding to your seasonal style. Enjoy making yours as a cozy fall accessory or a thoughtful handmade present for friends.




This pattern does not create the pin shown. Either AI or fake.
This is an Ai generated pattern /photo. No way will the brooch come out looking like the photo as it is not humanly possible with instructions provided. AI photos should be banned and crocheters need to educate themselves for falsly leading us to believe its real and can be achieved when in reality it can not be..