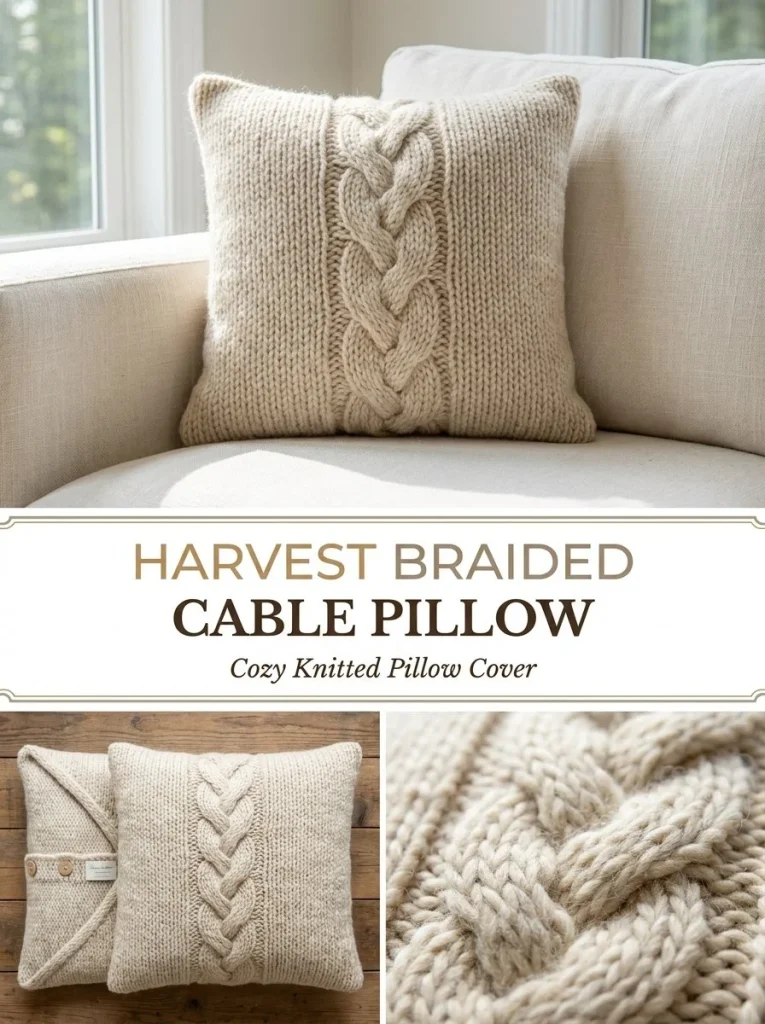
Creating a cozy and stylish pillow cover can enhance your home décor, and the Harvest Braided Cable Pillow Cover does just that. This project features beautiful braids and cables, making it an ideal piece for both beginners and seasoned crocheters looking to hone their skills. With detailed instructions and the right materials, you can easily create this warm and inviting piece. If you’re also interested in functional accessories, check out these blossom flip-flop strap covers for an easy crochet addition to your closet.
Skill Level
Intermediate. This project requires knowledge of knitting techniques including cable stitches and the ability to follow complex stitch patterns. An understanding of how to increase and decrease stitches is essential.
Materials
- Bulky #5 wool-blend yarn in oatmeal cream, approximately 500-600 yards
- US 10.5 (6.5 mm) knitting needles
- Cable needle
- 18 x 18 in pillow insert
- Tapestry needle
- Scissors
Abbreviations — US Terms
- K – knit
- P – purl
- RS – right side
- WS – wrong side
- sts – stitches
Special Stitches
Cables
Cables are formed by rearranging stitches to create a braided effect. For this project, two types of crosses will be utilized—Cross A and Cross B.
Cross A
- Slip 4 stitches onto the cable needle and hold it in front of the work.
- Knit the next 4 stitches from the left needle.
- Knit the 4 stitches from the cable needle.
Cross B
- Knit the first 4 stitches.
- Slip 4 stitches onto the cable needle and hold it at the back of the work.
- Knit the next 4 stitches from the left needle.
- Knit the 4 stitches from the cable needle.
Gauge
The target gauge is approximately 12 sts x 18 rows = 4 inches in stockinette after blocking. Achieving this gauge will ensure a well-fitting pillow cover.
Finished Size
The finished pillow cover will measure 18 x 18 inches, perfect for a standard pillow insert.
Pattern Notes
- The whole project is worked in rows.
- The pattern features a repeat, alternating between RS (right side) and WS (wrong side).
- Be sure to check your stitches—this pattern requires precise counting for the braids to align correctly.
Crochet Instructions
Front Panel
Cast On:
- Using the bulky yarn and the US 10.5 knitting needles, cast on 58 stitches.
- Work 6 rows in garter stitch: knit every row.
Establishing the Pattern:
- Begin working the established pattern.
- Row 1 (RS): K4, P19, [12-st cable], P19, K4
- Row 2 (WS): K4, K19, P12, K19, K4
Creating the Cable Panel:
-
For the 12-st cable panel, divide the 12 stitches into three groups of 4.
-
Alternate between Cross A and Cross B every 8th RS row after the first crossover.
- Cross A: Slip 4 stitches onto a cable needle and hold in front, knit 4, then knit 4 from the cable needle.
- Cross B: Knit 4, slip 4 stitches onto a cable needle and hold in back, knit 4, then knit 4 from the cable needle.
-
Continue this pattern, alternating A and B, until the panel measures approximately 17 inches from the cast-on edge.
-
Once the desired length is reached, work 6 more rows in garter stitch, then bind off all stitches.
Back Panels (Make 2)
- Cast on 58 stitches for each back panel.
- Work 6 rows in garter stitch.
- Switch to stockinette stitch, keeping K4 as garter edge on both sides.
- Work until the panel measures about 11 inches.
- Conclude with 6 garter rows and bind off the stitches.
Assembly
- Block all pieces to ensure even stitches.
- Place the front panel right-side down.
- Lay the two back panels over the front, overlapping the garter-finished edges by about 4 inches at the center.
- Pin the panels in place.
Seaming:
-
Using a mattress stitch, seam all four outer edges, ensuring to catch both back layers at the overlap ends.
-
Turn the pillow cover right-side out and insert the 18-inch pillow form.
Arrangement
Make sure to arrange the cable vertically at the center of the pillow when fully assembled for an appealing aesthetic.
For more crochet tips and resources, you can explore this blue crochet bun cover easy mesh hair accessory to complement your crocheted item.
Finishing
After turning the pillow right-side out, ensure all loose ends are woven in neatly, and give the entire cover a final block if needed to shape it properly. This will enhance the visual crispness of your braids and cables.
Care
For best results, check the yarn label for specific washing instructions to maintain the integrity of your bulky wool-blend yarn. Generally, hand washing and air drying are recommended for handmade items.
Congratulations on creating a lovely Harvest Braided Cable Pillow Cover! This pillow will not only add style but also a touch of personal crafting skill to your home. Enjoy the cozy comfort it brings to your space!



