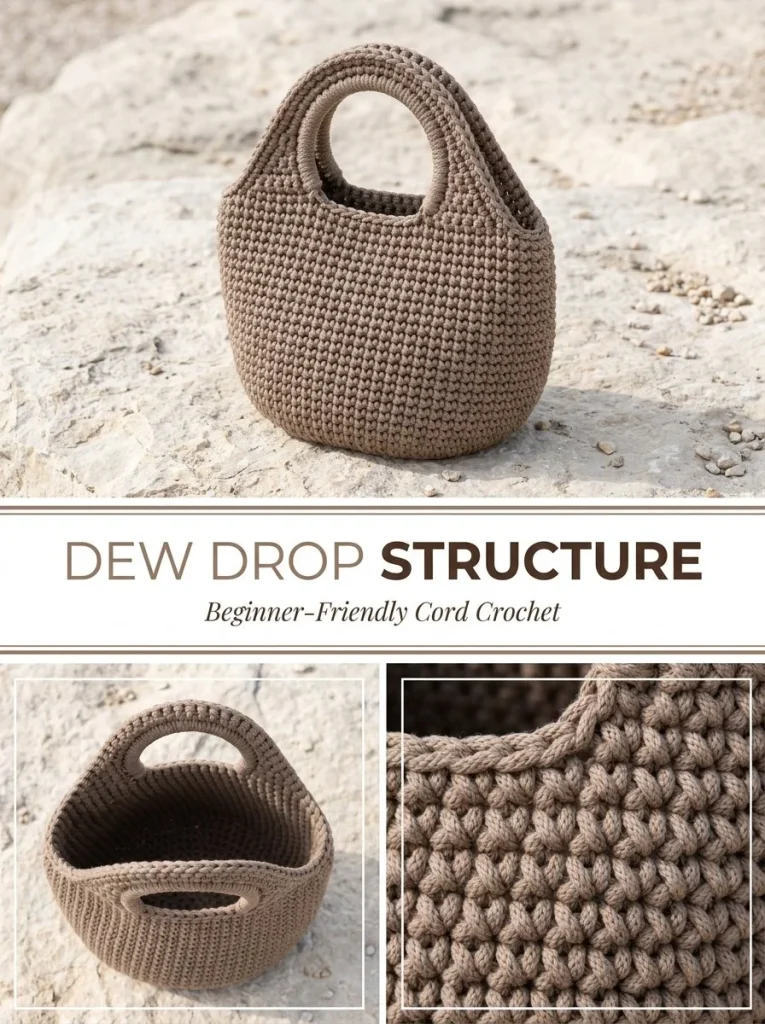
Creating a crochet bag can be a highly rewarding project, allowing you to showcase your creativity while crafting a functional item. In this post, we will create a medium bag that measures approximately 28 cm wide by 24 cm high, excluding handles. This structured crochet bag is designed using a sturdy and aesthetically pleasing taupe polyester cord, making it perfect for everyday use. Let’s dive into the materials and instructions that will guide you through this fun crochet pattern, encouraging you to explore further creations such as a charming bow bag charm to complement your project.
Skill Level
This project is suitable for an intermediate crocheter. It involves techniques such as working in the round, single crochet, and decreasing stitches, which may be challenging for a complete beginner but manageable with some practice.
Materials
To create the Dew Drop Structured Crochet Bag, you will need the following materials:
- 300-350 m of 3 mm polyester cord in taupe
- 4 mm crochet hook
- Stitch markers
- Tapestry needle
- Scissors
- Optional: removable fabric lining
Abbreviations — US Terms
- ch – chain
- sl st – slip stitch
- sc – single crochet
- st(s) – stitch(es)
- sp – space
- ch-sp – chain space
- BLO – back loop only
Special Stitches
For this project, only basic stitches are required, primarily focusing on single crochet.
Gauge
Gauge is not specifically essential for this bag, but consistent tension is crucial to ensure the bag’s shape and sturdiness.
Finished Size
The finished bag measures approximately 28 cm wide and 24 cm high, excluding handles. While the size can be adjusted if desired, instructions here focus on the specified dimensions.
Pattern Notes
- The bag will be constructed in the round without turning after the initial foundation.
- You will work continuously, marking the beginning of each round.
- The handle opening incorporates chains and skips to create a functional design while maintaining the bag’s structure.
Crochet Instructions
Part 1 – Base
Begin by creating the foundation of the bag.
Row 1
- Foundation chain: Chain 31.
- Single crochet: In the 2nd chain from the hook, make 1 sc and continue to sc across the chain for a total of 30 sc.
- Visual check: Upon completion, you should have a row of 30 sc.
Rows 2-10
- Turn: Chain 1 (this does not count as a stitch).
- Single crochet across: Working back into the same row, sc in each stitch across for a total of 30 sc.
- Repeat: Continue this process for a total of 10 rows.
- Ends: Do not fasten off at the end of Row 10.
Part 2 – Body Setup
You will now set up for the body of the bag.
- Sc evenly around: Sc evenly around the rectangular base to form the bag walls, placing 30 stitches along each long side and 10 stitches along each short side for a total of 80 stitches. Place a stitch marker at your starting point to indicate the beginning of the round.
- Work in a continuous spiral: This will keep the sides seamless.
Rounds 1-10
- BLO: For the next 10 rounds, work one sc in each stitch around, using only the back loop for a dense knit-look wall.
- Visual check: After completing these 10 rounds, you should see the walls of the bag beginning to rise.
Part 3 – Tapering
Next, you’ll taper the sides of the bag.
- Place markers: Mark the centers of both sides of the bag.
- Decrease: For the next 4 rounds, work 1 sc2tog (single crochet two together) immediately before and immediately after each side marker. This will decrease 4 stitches per round until you have 64 stitches remaining.
Round 1 (after tapering)
- Work 4 rounds evenly with 64 stitches per round. This keeps the foundation stable before creating the handle openings.
Handle-Opening Round
- Create openings: Work 12 sc, then ch 12 and skip the next 12 stitches.
- Sc again: Work 20 sc, then ch 12 and skip the next 12 stitches. Finally, sc in the remaining 8 stitches to complete this round.
Next Round
- Continue: Work 1 sc in each stitch and chain around the opening.
- Final rounds: Complete 3 more rounds of sc in every stitch for reinforcement.
Finish
-
Firming the edge: End with one reverse slip stitch round for a firm upper edge.
-
Burden of finishing: Fasten off and weave in all ends with a tapestry needle.
-
Optional lining: If you wish to add a removable fabric lining for added durability, simply sew it into the interior.
-
Final touch: Steam lightly from a distance to shape the bag, ensuring the polyester cord maintains enough structure to stand without collapsing.
To complement your new bag, consider adding a crochet leaf charm to enhance its aesthetic appeal.
Tips for the Best Result
- To ensure your single crochet stitches are consistent, keep an even tension throughout, especially while working in the back loops.
- Always count your stitches at the end of each round to avoid unintentional decreases or increases.
- Steam lightly to assist with the shaping but ensure you maintain the firmness of the polyester cord.
By following these detailed crochet instructions, you’ll create a beautiful Dew Drop Structured Crochet Bag that is not only functional but also stylish. Enjoy your time crocheting and feel free to share your finished project with the community!



