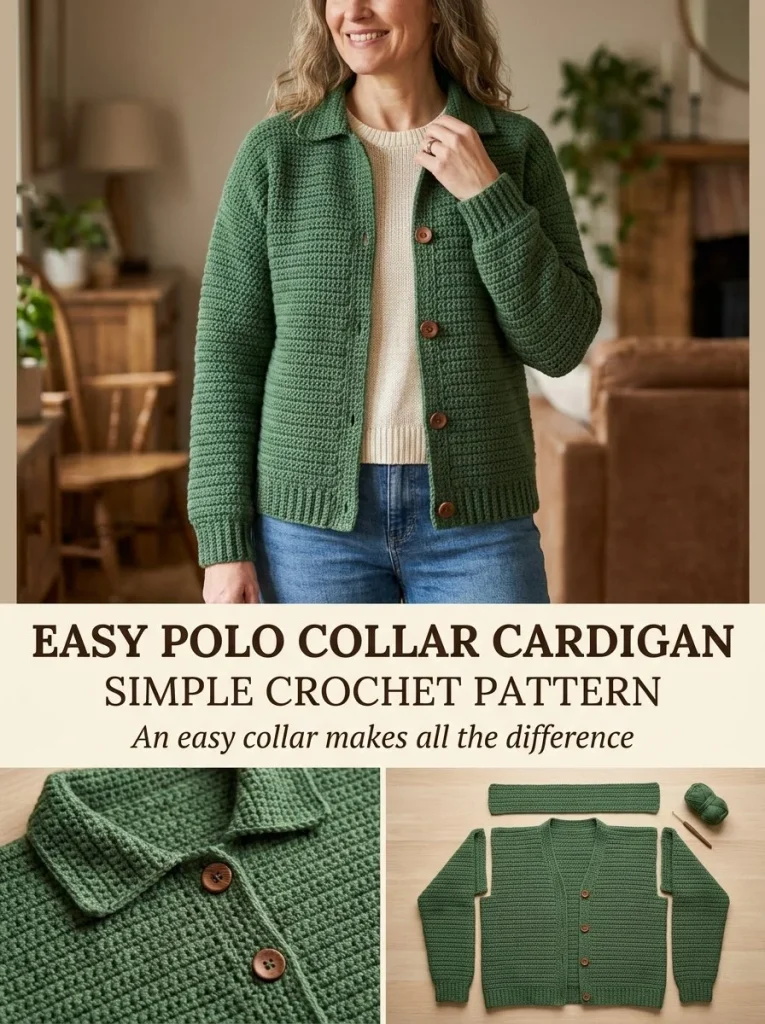
Creating your very own Easy Polo Collar Crochet Cardigan is a delightful project that combines simplicity with style. This cardigan features a classic collar and buttoned front, making it a versatile addition to your wardrobe. Whether you’re a beginner or a more confident crocheter, this pattern offers clear instructions to guide you from start to finish. If you’re interested in also learning a great accessory pattern, check out this cute easy crochet accessory pattern.
Skill Level
This project is best suited for the Confident Beginner. While basic crochet stitches are involved, some shaping techniques and assembly knowledge are beneficial for success. The pattern uses half double crochet (hdc), which is a simple yet effective stitch, along with some straightforward decreasing techniques.
Materials
To create the Easy Polo Collar Crochet Cardigan, you will need the following materials:
- Worsted-weight #4 yarn
- 5mm crochet hook
- 4 buttons
- Tapestry needle
- Stitch markers
- Measuring tape
- Gauge: approximately 14 hdc x 10 rows = 4 in/10 cm
Abbreviations — US Terms
- ch – chain
- sl st – slip stitch
- sc – single crochet
- hdc – half double crochet
- st(s) – stitch(es)
Special Stitches
There are no special stitches unique to this pattern; however, understanding the half double crochet (hdc) stitch is crucial.
Half Double Crochet (hdc)
To make a hdc, yarn over, insert your hook into the designated stitch, yarn over again, pull through, yarn over once more, and pull through all three loops on your hook.
Gauge
Gauge is essential for this pattern to ensure proper fit. The required gauge is approximately 14 hdc and 10 rows equals 4 inches (10 cm). Always check your gauge before starting, as it can vary based on yarn and tension.
Finished Size
The finished cardigan size should be chosen based on a bust measurement with about 4-6 inches of positive ease. To determine the back width, divide the finished bust measurement by 2.
Pattern Notes
- This cardigan is worked in rows.
- Chain stitches count as turning chains.
- The design consists of a back piece and two front panels.
- Decreasing occurs to shape the front panels gradually into a V-neck style.
- Ensure to mark your armhole positions before seaming.
Crochet Instructions
Part 1 – Back Panel
Foundation Chain:
- First, determine your desired back width using gauge. For instance, if your target bust measurement is 36 inches, your back width would be 18 inches.
- Chain enough stitches to reach your back width, including an additional turning chain. Use a gauge of 14 hdc per 4 inches for accuracy.
Row 1:
- Yarn over and insert the hook into the 2nd chain from the hook.
- Work 1 hdc in each chain across.
- Turn your work.
Total: This row will have the same number of hdc as the initial chain count minus 1.
Row 2:
- Begin with a turning chain of 1 (this does not count as a stitch).
- In the first stitch, work 1 hdc and continue working 1 hdc in each stitch across.
- Turn.
Repeat Rows 2 until you reach your desired hip-to-shoulder length.
Part 2 – Front Panels (Make 2)
For the front panels, the width should be approximately one-quarter of the finished bust measurement.
Foundation Chain:
- Chain the number of stitches equal to a quarter of your bust measurement plus 1 for turning.
Row 1:
- Work 1 hdc into the 2nd chain from hook.
- Continue working 1 hdc into each chain across the row.
- Turn.
Total: The row will end with the same number of hdc stitches as your chain count minus 1.
Rows 2-8:
- Begin each row with a turning chain of 1 and work hdc across until you have completed 6-8 rows.
Decreasing for V-neck:
- After finishing the last full row:
- Every 2nd row, decrease by 1 stitch at the inner front edge.
Example:
- Row 9: Start with your turning chain, work to the last 2 stitches, then hdc in the next stitch, and skip the last stitch.
Continue this until you reach the desired depth for the neckline.
Part 3 – Assembly
- Seam the shoulders and sides of the back and front panels, carefully leaving designated armholes.
- Attach the sleeves by joining two hdc rectangles at the armholes.
Sleeves:
- Foundation: Chain the width desired for the sleeves using the same gauge.
- Work hdc rows straight until desired length is achieved.
Part 4 – Front Band and Collar
Front Band:
- With right side facing, work 3-4 rows of single crochet (sc) around both front edges and around the neckline.
- To create buttonholes, evenly space 4 sc to accommodate 4 buttons on one side.
Collar:
- Create a long rectangle for the collar that fits around the neckline, approximately 3-4 inches deep.
- Sew the lower edge of the collar around the neckline, ensuring it naturally folds outward.
Final Touches:
- Add back-loop sc ribbing to cuffs and the hem for a professional finish.
- Weave in all ends and secure any fastenings.
Tips for the Best Result
- Use stitch markers to keep track of your armholes and decreases.
- Check your gauge regularly to ensure your panels maintain proper dimensions.
- When creating the collar, ensure that it fits comfortably around the neckline without being too tight.
Common Mistakes
Uneven Front Panels
Ensure that you are counting your stitches correctly, especially when decreasing. It’s easy to skip stitches, leading to uneven panels.
Misplaced Buttonholes
Double-check the placement of your buttonholes before proceeding to the sc around the neckline. It’s easiest to mark their location first against your buttons.
For finishing touches, you might want to explore additional patterns that can complement your cardigan like a lovely scarf. Check out this crochet scarf pattern for ideas that pair beautifully with your new creation!
Finishing
After all components are assembled, ensure that all ends are woven in neatly. Blocking the cardigan can enhance the stitches and help even out any tension variations.
Care
For the best longevity of your cardigan, care should align with the yarn you choose. Check the yarn label for specific washing instructions, and when in doubt, hand wash with cold water and lay flat to dry.
With this Easy Polo Collar Crochet Cardigan, you will not only have a beautiful garment but also the satisfaction of having crafted it with your own hands. Enjoy wearing it, and be proud of your creation!



