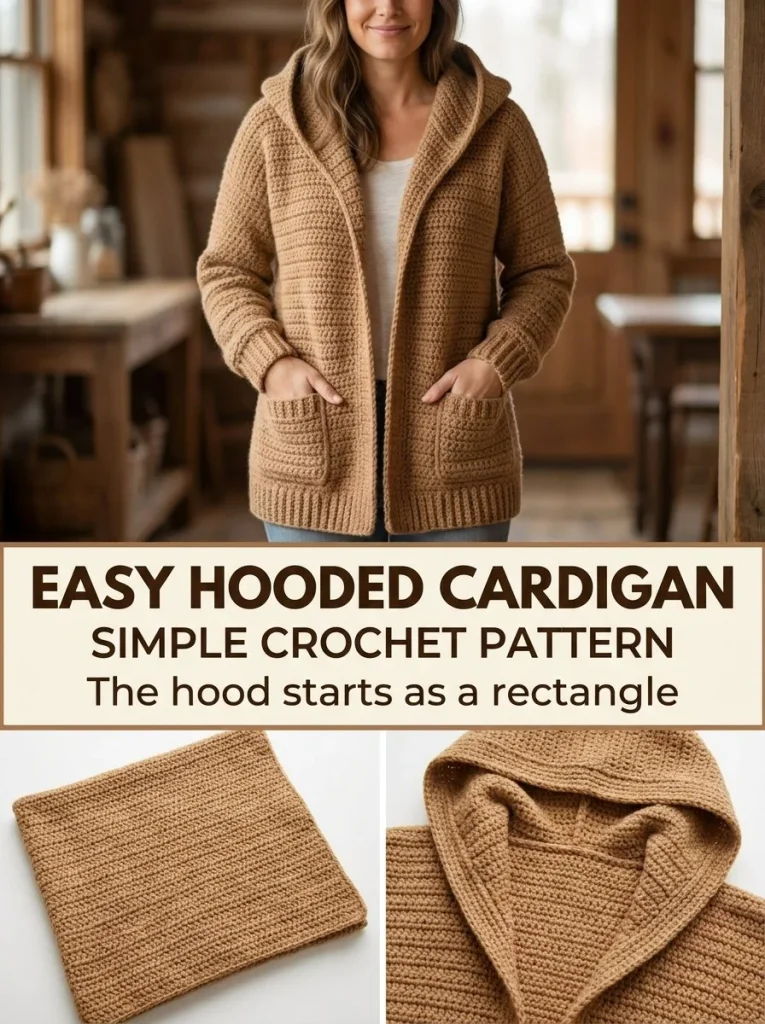
The Easy Hooded Crochet Cardigan is a fun and versatile project perfect for budding crocheters looking to expand their skill set. With the inclusion of pockets and a cozy hood, this cardigan is not only functional but fashionable. Whether you want to make something for yourself or as a gift, this pattern allows for customization and creativity. Let’s dive into the details of materials, techniques, and instructions for creating this stylish piece. You may also find Mini Amigurumi Pumpkin Easy Beginner Crochet Pattern useful.
Skill Level
Beginner – This cardigan pattern introduces basic crochet techniques such as half double crochet (hdc) and simple seaming, making it suitable for new crocheters.
Materials
Gather the following supplies to create your Easy Hooded Crochet Cardigan:
- Worsted-weight #4 yarn
- 5.5mm crochet hook
- Tapestry needle
- Stitch markers
- Measuring tape
- Gauge: approximately 13-14 hdc = 4 in/10 cm
Abbreviations — US Terms
- ch – chain
- sl st – slip stitch
- sc – single crochet
- hdc – half double crochet
- st(s) – stitch(es)
- sp – space
Special Stitches
Half Double Crochet (hdc)
To work an hdc, yarn over, insert the hook into the designated stitch, yarn over again, pull up a loop, yarn over once more, and pull through all three loops on your hook.
Gauge
Ensure your gauge matches 13-14 hdc per 4 inches (10 cm) to achieve the correct size. Consistent tension is crucial for uniform results in your garment.
Finished Size
This cardigan is designed to have a relaxed fit with 6-8 inches of positive ease. You can customize the size as needed, but be aware that adjustments may affect yarn usage.
Pattern Notes
- The cardigan is worked in separate panels: one back and two front panels.
- Each panel is constructed using half double crochet stitches.
- It remains open in the front, so keep your edges straight during the project.
- The sleeves can be crafted as straight or slightly tapered for added shaping.
- Pockets are sewn onto the lower front of the cardigan for practicality.
Crochet Instructions
Part 1 – Back Panel
To begin, create the back panel of your cardigan.
Row 1
- Start with a foundation chain of 58 stitches (adjust based on your size and desired ease).
- In the 3rd chain from your hook, work your first hdc (this counts as your first stitch).
- Hdc in each chain across (total of 56 hdc), turn your work.
- Total: 56 hdc
Rows 2–22
- Begin each row by chaining 2 (this does not count as a stitch) and hdc in each stitch across.
- Repeat until you reach your desired panel length, approximately 22 rows or your specified length.
- Total for each row: 56 hdc
Part 2 – Front Panels
Make two identical front panels.
Row 1
- Create a foundation chain of 30 stitches (adjust based on your size).
- Work hdc in the 3rd chain from the hook and in each chain across (total of 28 hdc), turn your work.
- Total: 28 hdc
Rows 2–22
- Chain 2 to begin, then hdc across each row.
- Continue until you reach the desired length of the front panels (approximately 22 rows).
- Total for each row: 28 hdc
Part 3 – Sleeve Panels
Make two sleeves.
Row 1
- Start with a foundation chain of 30 stitches (this can vary based on how fitted you want the sleeves).
- Work hdc in the 3rd chain from your hook and continue across (total of 28 hdc), turn your work.
- Total: 28 hdc
Rows 2–15
- Begin every row with a chain of 2 and hdc across.
- Work until you have approximately 15 rows.
- Total for each row: 28 hdc
Part 4 – Joining Panels
- Lay the back panel flat and position the front panels on top of each side.
- Using your tapestry needle, seam the shoulders together.
- Attach the sleeves by aligning the upper part of sleeves with the shoulder seams and seaming them down to the body of the cardigan.
Part 5 – Pockets
To create the pockets, you will crochet two rectangles.
Pocket Rectangle
- Start with a foundation chain of 30 stitches.
- Work hdc across for 9 rows, totaling 28 hdc, then fasten off.
- Make two of these rectangles.
Attaching Pockets
- Position one pocket on each lower front and sew them in place with a tapestry needle.
Part 6 – Hood
The hood is crafted from a single rectangle.
- Measure the neckline from one front edge around the back to the other edge (this length will vary).
- Chain this length and work hdc across for approximately 12-14 inches deep.
- Completing both ends of the rectangle should have consistent stitch counts.
- Fold the rectangle in half to create the hood and seam one short edge to form the back seam.
- Open the lower edge of the hood and sew it evenly around the cardigan neckline.
Finishing Touches
- Work 2-3 rows of sc around both front edges and the hood opening for added stability.
- If desired, add ribbed cuffs to the sleeves by working in the round with a smaller hook.
- Weave in any loose ends using a tapestry needle.
To see another crochet project that includes pockets, check out this long everyday crochet duster cardigan with pockets for further inspiration.
Care
For general care, always check the yarn label for specific washing instructions. It is generally recommended to hand wash and lay flat to dry for kept shape and longevity.
By following these detailed instructions and paying attention to gauge and stitch counts, you will create a beautifully finished easy hooded crochet cardigan that showcases your skills and creativity. Enjoy your crocheting journey!



