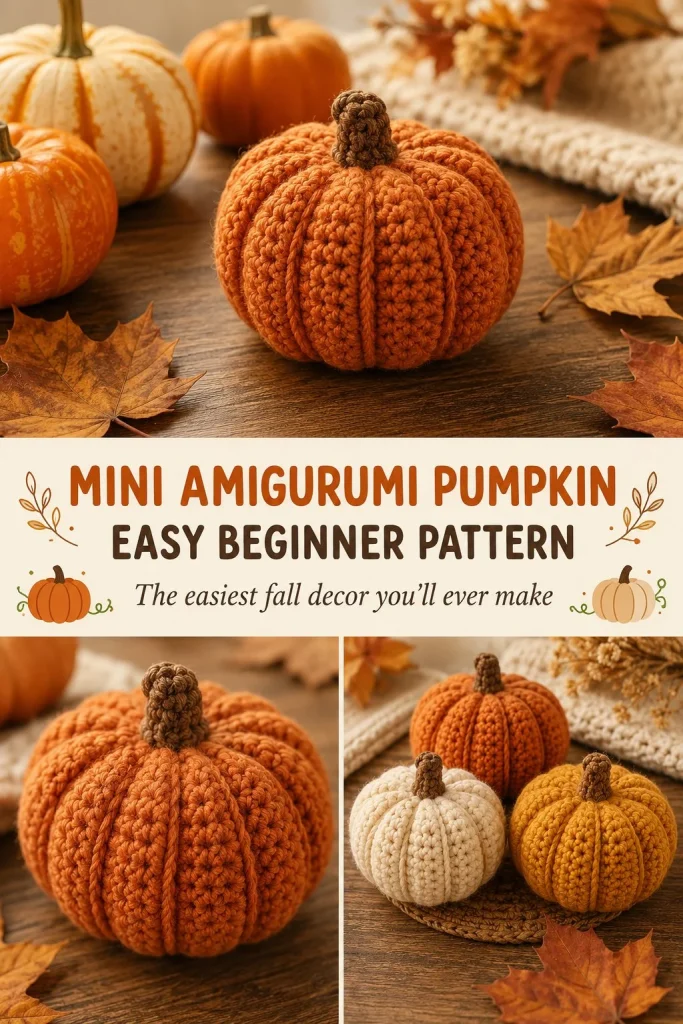
This Mini Amigurumi Pumpkin is a charming and easy-to-make crochet project perfect for bringing cozy fall vibes into your home or gifting to friends and family. Designed specifically for beginners, it uses simple stitches and basic shaping techniques to create a small, rounded pumpkin that’s both cute and decorative. I love how the ribbed pumpkin lines added with a tapestry needle really bring the piece to life, giving it that authentic pumpkin texture while keeping the process straightforward. This pattern requires minimal yarn and can be finished quickly, making it an ideal last-minute seasonal craft to add a handmade touch to your autumn décor. If you’re branching out into amigurumi or small 3D objects, this pumpkin is a satisfying first step that builds your confidence for future projects, much like working through a beginner-friendly cherry blossom crochet comb that I enjoy sharing with others.
Why You’ll Love This Crochet Pattern
- Simple stitch repeats and rounds make it beginner-friendly and easy to memorize.
- Worked in continuous rounds creating a smooth shape with minimal finishing.
- Small size means quick results and minimal yarn usage.
- Ribbing detail with embroidery adds texture without complexity.
- Stuffing as you go helps maintain a nicely rounded silhouette.
- Great practice for shaping concepts like increases and decreases.
Finished Size
The finished pumpkin measures approximately 3 inches (7.5 cm) tall including the stem. Size may vary slightly depending on your yarn choice, hook size, and personal tension, but it’s designed to be a small, sturdy amigurumi ideal for mantel or table display.
Skill Level
Easy beginner. This pattern uses only basic stitches—single crochet, chain, and simple increases and decreases—making it very accessible for new crocheters with some familiarity with magic rings and working in the round.
Materials Needed
- Worsted-weight (medium #4) yarn in burnt-orange for the pumpkin body
- Small amount of brown yarn for the stem
- Optional: small amount of green yarn for a tiny leaf detail
- 4 mm (G) crochet hook
- Polyester fiberfill stuffing
- Tapestry needle for sewing and finishing
- Stitch markers (optional but helpful)
- Scissors
Stitches and Abbreviations
- ch: chain
- sc: single crochet (insert hook, yarn over, pull loop through, yarn over, pull through both loops)
- sc2tog: single crochet 2 stitches together (decrease)
- magic ring: adjustable ring used to start crocheting in the round
Gauge and Tension Notes
Gauge is not critical for this small amigurumi project. However, maintaining even tension will help the pumpkin’s shape come out neat and firm, preventing gaps where stuffing might show. Using a slightly tighter tension than usual is beneficial to keep the stuffing securely inside.
Pattern Notes Before You Start
This pumpkin is worked entirely in continuous rounds from the top down using a magic ring start. The stem is crocheted separately using a small chain and then sewn on. After completing the pumpkin body, a tapestry needle is used to stitch vertical lines spaced evenly around the pumpkin, pulling gently to create classic ribbed grooves. You can skip or add the leaf detail afterward as desired.
Step-by-Step Crochet Instructions
- Body: Start with a magic ring, ch1, 6 sc into the ring (6 sts).
- Round 2: 2 sc in each stitch around (12 sts).
- Round 3: sc 1, 2 sc in next st around (18 sts).
- Round 4: sc 2, 2 sc in next st around (24 sts).
- Rounds 5–8: sc evenly in each stitch around (24 sts). Stuff lightly as you work these rounds to start shaping.
- Round 9: sc 2, sc2tog around (18 sts).
- Round 10: sc 1, sc2tog around (12 sts). Stuff firmly before finishing this round.
- Round 11: sc2tog around (6 sts). Fasten off leaving a long tail and cinch tightly closed to finish the pumpkin body.
- Stem: Using brown yarn, chain 6, sc into the 2nd ch from hook and across (5 sc). Fasten off, leaving a tail for sewing. Sew the stem to the center top of the pumpkin.
- Ribbing: Thread a length of orange yarn on a tapestry needle. Stitch from top to bottom evenly spaced around the pumpkin, pulling gently to create grooves that mimic natural pumpkin ribs.
Assembly and Finishing
Weave in all ends securely with your tapestry needle. When sewing the stem, position it firmly in the center top and make sure it’s tightly attached to withstand handling. If you choose to add a tiny green leaf, crochet a small chain of 4-5 stitches, sc back down the chain, and sew it beside the stem for added charm. Adding ribbed lines tight enough to create grooves will give your pumpkin a realistic, professional look without bulk.
Helpful Tips
- Use a stitch marker to mark the start of your rounds to avoid losing track, especially during shaping.
- Maintain firm stuffing, particularly in the later rounds, to help the pumpkin hold its shape and avoid lumps.
- When adding ribs, space them evenly for a balanced look—count the stitches to divide the pumpkin surface accurately.
- Keep your chain for the stem tight and compact for a neat, sturdy finish.
- Practice tension control on scraps to get comfortable with close, even sc stitches to prevent holes.
Common Mistakes to Avoid
- Skipping the magic ring start can cause a hole at the pumpkin top—always begin with a properly tightened ring.
- Overstuffing can stretch stitches and distort shape; stuff firmly but not packed.
- Missing decreases or miscounting stitches will affect shaping; count stitches carefully every round.
- Not pulling the ribbing yarn tightly enough results in less pronounced grooves.
- Ignoring end weaving can cause your work to unravel during handling.
Customization Ideas
- Use variegated yarn for a unique pumpkin color effect.
- Crochet multiple pumpkins in different sizes using different yarn weights and hooks.
- Add glitter yarn or metallic thread in the ribbing for a festive shimmer.
- Attach a small jingle bell or button on the stem for decorative flair.
How to Use or Display This Crochet Project
This mini amigurumi pumpkin makes a lovely fall centerpiece, mantel décor, or festive accent for your autumn wreath. It works well as a thoughtful handmade gift or a sweet kid’s toy. Try grouping several in a bowl with other miniature crochet gourds for seasonal decoration. It’s also a perfect desk companion or shelf display to brighten your workspace with cozy vibes.
Care Instructions
To clean, gently hand wash your pumpkin with mild soap and cool water. Avoid wringing to maintain shape; gently squeeze out excess water and reshape while damp. Dry flat away from direct sunlight. Store in a dry place to prevent mildew. If your yarn is machine washable, you may use delicate machine cycles inside a mesh bag but handle dried amigurumi with care.
Frequently Asked Questions
Q: Can I use a different hook size?
A: Yes, but smaller hooks create tighter stitches for less stuffing showing, while larger hooks can make the pumpkin looser and bigger.
Q: How do I avoid gaps when stuffing?
A: Use tighter tension and smaller amounts of stuffing added gradually, shaping as you crochet.
Q: Can I make the pumpkin without ribbing?
A: Absolutely—ribbing is optional but adds texture that looks more authentic.
Q: What yarn types work best?
A: Worsted-weight acrylic or cotton yarns give good stitch definition and durability.
Q: Can I make a bigger pumpkin?
A: Yes, continue rounds increasing proportionally for a larger shape.
This Mini Amigurumi Pumpkin pattern offers a cozy, accessible introduction to amigurumi with a seasonal flair. Whether you’re decorating your home or gifting a handmade token, this petite pumpkin adds just the right touch of autumn warmth. For other seasonally inspired beginner-friendly crochet projects, I recommend trying out this cherry blossom comb pattern that also focuses on simple shapes and stitches.
For more charming beginner patterns that develop your crochet skills while creating cute accessories, the cozy owl bookmark crochet pattern is a wonderful next project offering both fun and function at the hook. Happy crocheting!



