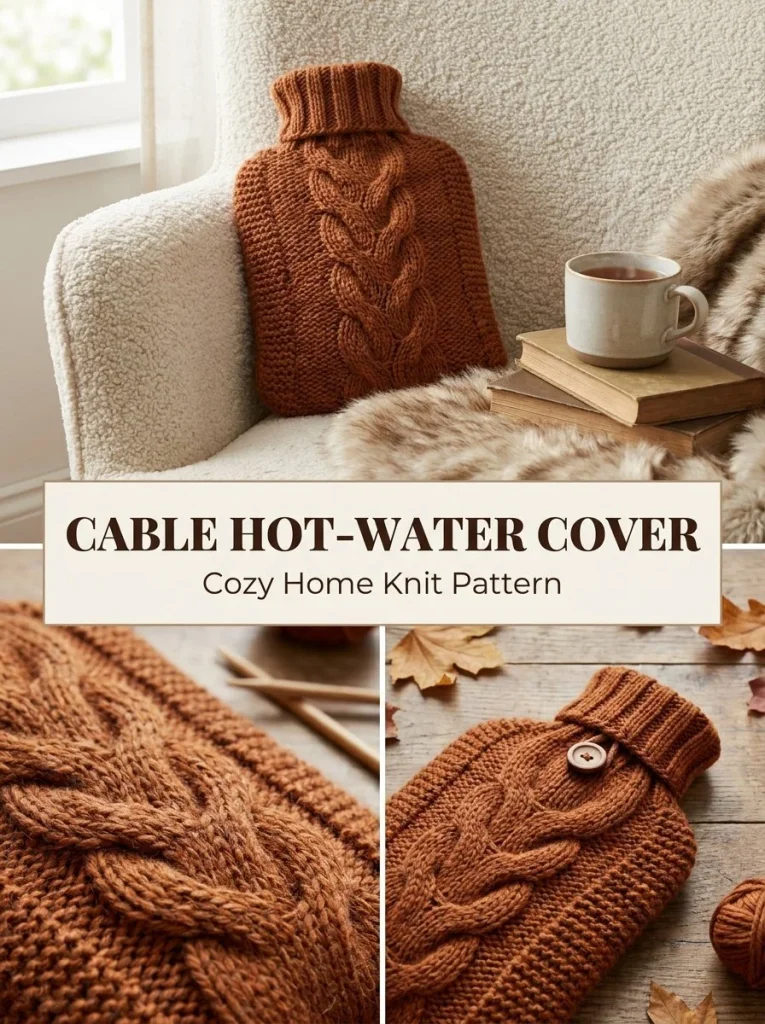
Creating a cozy, stylish hot-water bottle cover is a practical project that combines functionality with an elegant design. This cover not only protects the bottle but also adds a decorative touch to your space. The intricate cable pattern gives the piece a lovely texture, making it a delightful addition to your cold winter evenings.
Using a muted cinnamon or chestnut Aran-weight wool blend not only provides warmth but also ensures comfort. This project is relatively straightforward and can be tackled by individuals with basic knitting skills. By following this guide, you’ll be equipped to create a beautiful cover that will keep your hot-water bottle snug and your hands warm.
In this article, we’ll discuss the materials required, provide a full pattern breakdown, and share techniques to help you achieve a successful and satisfying crafting experience.
Pattern at a Glance
- Skill level: Intermediate
- Terminology: Standard knitting terms
- Construction: Knitted
- Finished size: Fits a standard 8 x 13 in hot-water bottle
- Yarn weight: Aran-weight wool or wool-blend
- Needles: US 8 / 5 mm
- Main stitch: K2, P2 rib and stockinette
- Gauge: About 18 sts x 24 rows = 4 in / 10 cm in stockinette
- Motifs: Cable pattern for the front panel
- Layout: Front panel and back panel construction
- Seaming: Seam edges together after knitting the panels
Materials
To make this hot-water bottle cover, you will need the following materials:
- Yarn: Aran-weight wool or wool-blend yarn in muted cinnamon/chestnut, approximately 220-260 yards
- Needles: US 8 / 5 mm knitting needles
- Cable needle for the cable stitch
- Tapestry needle for weaving in ends
- Scissors for cutting yarn
This project is designed to comfortably fit a standard hot-water bottle measuring approximately 8 x 13 inches, ensuring it is cozy and easy to use.
Yarn and Color Notes
For this project, choose an Aran-weight yarn that is soft and warm, making sure it can withstand regular use. Muted colors like cinnamon or chestnut blend beautifully with the textured cables and ribbing. A wool blend helps in providing stretchability and durability while maintaining warmth. Remember, if you choose to go for a variegated yarn, the intricate cable work may not stand out as prominently as with a solid color.
Finished Measurements
The finished dimensions of this cover will snugly fit a typical hot-water bottle measuring 8 x 13 inches. It’s important to keep the intended size in mind throughout the process, especially when knitting your front and back panels.
Gauge
Maintaining correct gauge is essential for ensuring that your piece fits as intended. The gauge for this project is 18 stitches x 24 rows = 4 inches (10 cm) in stockinette stitch.
To check your gauge, knit a swatch of at least 4 inches square. After washing and blocking your swatch, measure to confirm that you are getting the specified gauge.
If your gauge is larger than specified, your finished product will be bigger. Conversely, if your gauge is smaller, your hot-water bottle cover might not fit your bottle properly. It is always advisable to adjust your needle size if necessary to match the required gauge.
Abbreviations
In this pattern, you’ll encounter the following abbreviations:
- K: Knit
- P: Purl
- RS: Right Side
- WS: Wrong Side
Important Pattern Notes
- Turning Chains: When changing rows, note how the transition affects stitch appearance.
- Right Side / Wrong Side: Make sure to identify which side of the fabric you are working on, especially when treating cables.
- Stitch markers: Consider using them to mark the beginning of your rounds, especially useful when transitioning from ribbing to the cable sections.
- Color changes: In this project, you’ll predominantly use one color, reducing color management issues.
Special Stitches and Techniques
The main technique used here is the cable stitch. This involves temporarily holding a portion of stitches on a cable needle to create a twist in the fabric. Here’s how you’ll make the cable stitch:
- When instructed, slip 6 stitches to the cable needle and hold it in front of your work.
- Knit the next 6 stitches from the left needle.
- Then, knit the 6 stitches from the cable needle.
This method creates the lovely, twisted effect that defines the cable pattern.
Understanding the Construction
The hot-water bottle cover consists of two main panels: a front panel featuring the cable design and a back panel in stockinette. The ribbing at the neck gives it a snug fit around the hot-water bottle.
- The front panel is worked to include a ribbed section followed by a cable pattern.
- The back panel uses a simple stockinette stitch, which complements the front beautifully and allows the cable to be the focal point.
Once both panels are completed, they are stitched together to create the final product.
Full Pattern Instructions
Gauge
Gauge: About 18 sts x 24 rows = 4 in / 10 cm in stockinette.
Front Panel
- Cast on 42 stitches.
- Work in K2, P2 rib for 1.5 inches.
- Set up the cable section as follows:
- K5, P5, K12 (cable), P5, K5 (edges in stockinette).
- On WS rows, work stitches as they appear.
- Every 8th RS row, create the 12-st rope cable as described:
- Slip 6 sts to the cable needle and hold in front, K6 from the left needle, then K6 from the cable needle.
- Continue until the panel measures 10.5 inches from the cast-on edge.
Neck Shaping
- Bind off 8 stitches at the beginning of the next 2 rows, leaving 26 stitches centered.
- Work those 26 stitches in K2, P2 rib for 4 inches.
- Bind off loosely.
Back Panel
- Cast on 42 stitches.
- Work in K2, P2 rib for 1.5 inches, then switch to stockinette stitch until the panel measures 10.5 inches.
- Bind off 8 stitches at the beginning of the next 2 rows.
- Work remaining 26 stitches in K2, P2 rib for another 4 inches and bind off.
Assembly
- Block both panels to the same dimensions.
- Place right sides together and seam both sides and the bottom.
- Seam the sides of the ribbed neck together, leaving the top opening free.
- Turn the piece right side out. The hot-water bottle should slip easily through the stretchy neck opening.
Finishing
- Weave in ends securely using the tapestry needle.
- Be careful not to over-block the cable section; it should remain raised and dimensional.
Checkpoints
- After completing the front panel, it should measure approximately 10.5 inches.
- Ensure both pieces are blocked to matching dimensions before assembly.
- Once assembled, the cover should fit snugly yet comfortably over the hot-water bottle.
Resizing Options
To make the hot-water bottle cover larger or smaller, you can adjust the number of stitches cast on or the length of the ribbing and cable segments. Here are some guidelines:
- To make it larger: Add multiples of 2 stitches to the initial cast-on (e.g., 44, 46).
- To make it smaller: Decrease the cast-on by the same multiples.
- Adjust the lengths of panels as needed for your specific size requirements.
Useful Variations
Consider these variations:
- Different color combinations: Use a contrasting color for the rib and cable elements.
- One-solid color version: For traditional elegance, a single shade throughout can be comforting and classic.
- Larger version: Create a larger cover to fit a bigger hot-water bottle or a decorative cushion.
Troubleshooting
Why Is My Project Getting Wider?
This might happen if you are inadvertently adding stitches, so always count your stitches after each row.
Why Is My Edge Wavy?
An uneven tension during the K2, P2 ribbing can lead to wavy edges. Be conscious of maintaining even tension throughout.
Why Is My Fabric Curling?
If your projects are curling at the edges, ensure you are casting off loosely and consider blocking after finishing.
Why Are My Color Changes Messy?
When using multiple colors, make sure to carry your yarn tightly but not too tight, and always pull from the same side.
Frequently Asked Questions
Can I use a different yarn weight?
Yes, but if you use a lighter weight, you may need to adjust your stitch count and needle size to maintain gauge.
Can I make it larger?
Absolutely! Adjust the cast-on numbers according to the resizing options shared.
Is the pattern reversible?
No, the front is designed to feature the decorative cable stitch, while the back is plain.
How should I block it?
Lightly steam-block your finished project, focusing specifically on the cable areas to highlight their texture.
Creating this stylish hot-water bottle cover is an engaging project that delivers both functionality and beauty. You’ll enjoy the cozy warmth and the satisfaction of having crafted something special for chilly nights. For those interested in further knitting adventures, consider exploring other projects like the braided cable pillow cover or working on decorative straps for summer wearables as seen in the flip-flop strap covers. Embrace your knitting journey!



