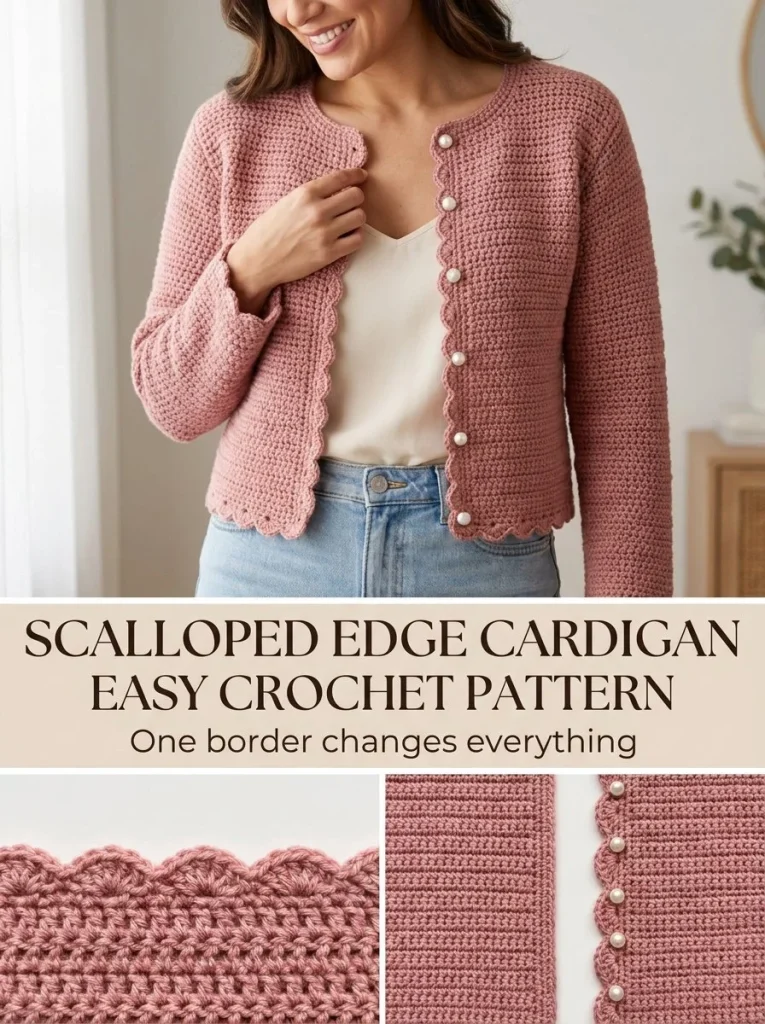
Creating a beautiful and casual cardigan is an exciting way to showcase your crochet skills. This project, featuring a scalloped edge design, is perfect for those looking to add a feminine touch to their wardrobe. With the right yarn and some basic crochet techniques, you can craft a stunning piece that is stylish and comfortable.
Skill Level
This pattern is best suited for confident beginners who are familiar with basic crochet stitches like half double crochet (hdc), slip stitches (sl st), and double crochet (dc). While the stitch count and assembly may seem complex at first, the clear step-by-step instructions will guide you through the entire process.
Materials
To successfully create your scalloped edge crochet cardigan, gather the following materials:
- Worsted-weight #4 yarn in dusty pink
- 4.5-5 mm crochet hook
- 5 small buttons
- Tapestry needle
- Stitch markers
- Measuring tape
Abbreviations — US Terms
Here are the abbreviations used in this pattern:
- ch – chain
- sl st – slip stitch
- sc – single crochet
- hdc – half double crochet
- dc – double crochet
- st(s) – stitch(es)
- sp – space
- ch-sp – chain space
Special Stitches
Shell Stitch
To create a shell stitch, work 5 double crochets (dc) into the same stitch or space. This stitch will be used for the scalloped edging around the cardigan.
Gauge
While there is no specific gauge provided, it is important to maintain consistent tension throughout your work. This will ensure that your cardigan fits properly and maintains its shape.
Finished Size
The completed cardigan will approximately fit waist length, but with 2-4 inches of positive ease, allowing for a comfortable and relaxed fit. Measurements may vary based on personal size preferences and tension during stitching.
Pattern Notes
- This cardigan is made in sections: one back panel, two front panels, and two sleeve panels.
- Work is done in rows for the panels and in rounds for the edging.
- A narrow single crochet (sc) button band is worked around the front opening and neckline.
- There are precisely five evenly spaced buttonholes for button placement.
Crochet Instructions
Part 1 – Body Panels
Back Panel
-
Foundation Chain: Start with a chain that is long enough to reach your desired width. For a standard size, chain 60 stitches.
-
Row 1: Hdc in the 3rd chain from the hook, and in each chain across. (Total: 58 hdc)
-
Rows 2-15: Turn, ch 2 (does not count as a stitch), hdc in each stitch across. After completing 15 rows, fasten off.
Front Panels
- Create 2 panels following the same method as the back panel, but chain 30 for each for a narrower fit.
Sleeve Panels
- For the sleeves, chain 40, then follow the same construction method for 10-12 rows, depending on the desired length.
Part 2 – Assembly
-
Joining the Panels:
- Lay the back panel flat. Align the front panels to the sides of the back with right sides together, and use a tapestry needle to sew the shoulder seams first.
- Attach the sleeves to the armholes, ensuring the seams align properly.
-
Sewing the Side Seams:
- With right sides together, sew the sides of the cardigan from hem to the underarm, leaving the sleeve seams as is.
Part 3 – Button Band
- Creating the Button Band:
- With the cardigan turned to the front side, rejoin your yarn at the lower corner of the right front panel.
- Work one row of sc across the front opening and neckline, making sure to evenly space out five buttonholes.
- To create a buttonhole: chain 2, skip two stitches, then continue with sc in the remaining stitches.
Part 4 – Scallop Edging
-
Starting Edging:
- Join your yarn at the lower front edge of the cardigan.
-
Scalloped Stitching:
- Work the scallop edging by repeating the following sequence around the lower hem, front edges, and neckline:
- sl st in the next st, skip 1 st, work 5 dc in the next st, skip 1 st.
- Adjust the scallops at the corners so the fabric lies flat.
- Repeat the same scallop stitch for the sleeve cuffs.
- Work the scallop edging by repeating the following sequence around the lower hem, front edges, and neckline:
Finishing
- Once you have completed the scallops, fasten off and weave in any loose ends using a tapestry needle.
- Sew on the buttons securely opposite the buttonholes.
Tips for the Best Result
- Keep stitches loose to prevent a tight fabric, allowing for stretch and comfort.
- Use stitch markers to keep your place, especially when working the button band and edges.
- When creating the scallops, be conscious of spacing for an even appearance.
Common Mistakes
Missed Stitches
Crocheters often accidentally skip stitches while transitioning between sections. Always double-check your stitch count after finishing each row or round to ensure accuracy.
Uneven Edging
If the edging is not consistent, check the spacing of your scallops and make sure to adhere to the instructed sequence.
Project Ideas or Variations
- For a more casual look, consider making a longer version for a cozy cardigan.
- Experiment with different yarn colors for a seasonal cardigan or gift option.
This feminine cardigan is ideal for layering and adds a charming detail to any outfit. Whether you’re heading out for a casual day or dressing up for an occasion, this design is versatile and stylish. If you enjoyed making this cardigan and would like to explore more crochet patterns, check out this cute crochet accessory pattern or create a complementary item like a scarf with the blue edge collar scarf crochet pattern. Happy crocheting!



