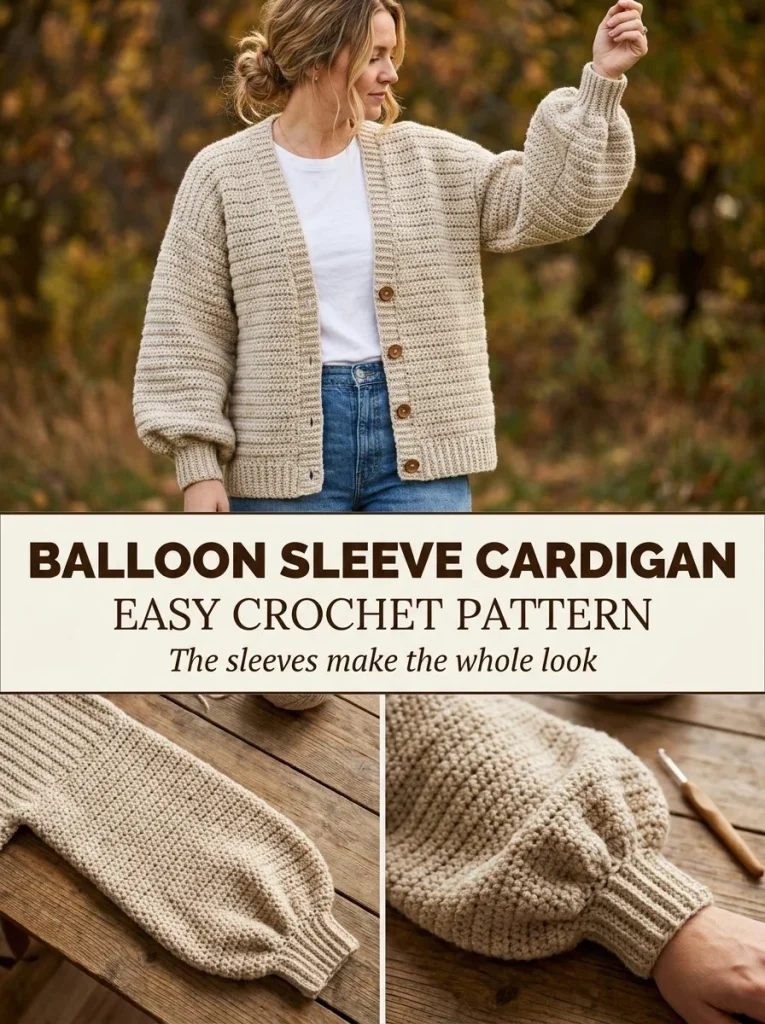
Discover the joy of crocheting a stylish and comfortable cardigan with the Balloon Sleeve Everyday Cardigan pattern. This easy-to-follow design features whimsical balloon sleeves, making it a perfect statement piece for any wardrobe. With a few crochet techniques and basic supplies, you can create a cozy garment that showcases your skills. This article will guide you through crafting this beautiful cardigan step-by-step. For additional inspiration on cardigans, you might want to explore this striped short sleeve button crochet cardigan pattern.
Skill Level
This project is categorized as Confident Beginner to Intermediate. It involves basic crochet stitches, shaping, and joining techniques, making it ideal for those looking to expand their skills while crafting a stylish item.
Materials
You’ll need the following materials to complete this project:
- Worsted-weight #4 yarn
- 5mm crochet hook
- 4 buttons
- Tapestry needle
- Stitch markers
- Measuring tape
- Gauge: approximately 14 hdc = 4 in/10 cm
Abbreviations — US Terms
- ch – chain
- sl st – slip stitch
- sc – single crochet
- hdc – half double crochet
- dc – double crochet
- st(s) – stitch(es)
- sp – space
- ch-sp – chain space
- BLO – back loop only
Special Stitches
While the pattern primarily uses standard stitches, it’s essential to clarify the hdc (half double crochet) stitch since it’s a key component of this design.
Half Double Crochet (hdc)
- Yarn over.
- Insert the hook into the stitch.
- Yarn over again and pull through.
- You will have three loops on your hook.
- Yarn over and pull through all three loops on the hook.
Gauge
The gauge for this project is approximately 14 hdc = 4 in/10 cm. It is important to check your gauge to ensure a proper fit for your cardigan.
Finished Size
The cardigan will have a relaxed, hip-length fit with about 4-6 inches of positive ease. This design can be adjusted slightly in the width or length according to personal preferences.
Pattern Notes
Before starting, keep the following in mind:
- The cardigan is worked in rows for the body and sleeves.
- Use stitch markers to keep track of decreases and important areas.
- The fronts are shaped with a V-neck decrease at the inner edges, while the sleeves are designed to have extra fullness.
- The work will be turned after each row, so keep track of the right side for a consistent appearance.
Crochet Instructions
Let’s break the project down into manageable parts:
Part 1 – Body
You will create one back panel and two front panels.
Back Panel
-
Foundation Chain:
- Chain 52 (or as per your size adjustment).
-
Row 1:
- Hdc in the 3rd ch from the hook and in each ch across.
- Total: 50 hdc.
-
Row 2:
- Ch 2 (counts as hdc), turn.
- Hdc in each st across.
- Total: 50 hdc.
-
Repeat Row 2 until the piece measures approximately 22 inches from the foundation chain.
Front Panels (make 2)
-
Foundation Chain:
- Chain 34.
-
Row 1:
- Hdc in the 3rd ch from the hook and in each ch across.
- Total: 32 hdc.
-
Row 2:
- Ch 2, turn.
- Hdc in each st across.
- Total: 32 hdc.
-
Row 3: (Shape V-neck)
- Dec Row: Ch 2, turn.
- Hdc in next 5 hdc, hdc2tog (decrease) in the next 2 sts, hdc in remaining 24 hdc.
- Total: 31 hdc.
-
Repeat Row 3 for 6 additional rows to create the V-shape (with a decrease at the beginning of each row).
-
Continue until the panel measures the same height as the back panel, then do not fasten off.
Joining the Body Panels
- With right sides facing, align the back with the front panels.
- Using the hdc stitch, join the shoulder seams. Leave armholes by not stitching the outermost 10 hdc on each side.
- Once assembled, fasten off the yarn.
Part 2 – Balloon Sleeves (make 2)
-
Foundation Chain:
- Decide your desired upper sleeve circumference, adding 6-10 inches for fullness. For this example, let’s chain 30.
-
Rows 1-5:
- Work hdc in the 2nd ch from hook and in each ch across.
- Keep going until the sleeve measures almost to your wrist.
-
Final Rows (Shaping the Cuff):
- For the last 2-4 rows, decrease evenly across each row until the circumference is reduced to about 10-12 inches (plus 1-2 inches for comfort).
-
Join the Sleeve:
- Seam the long edge of the sleeve lengthwise and then attach it to the armhole.
Part 3 – Cuffs and Button Bands
-
Cuff:
- Join yarn around the wrist edge.
- Work back-loop only single crochet (sc) for about 6 rounds for ribbing.
- Fasten off once you reach the desired cuff width.
-
Button Band:
- Work hdc rows around the fronts and neckline.
- Create exactly 4 buttonholes spaced evenly, ensuring to sew 4 buttons opposite after finishing the button band.
Tips for the Best Result
- Use stitch markers to mark the spots where you decrease or join.
- When creating the sleeves, be mindful of the stitch count during the decrease rounds to maintain symmetry.
- Blocking your work can help to even out the stitches and give your cardigan a polished finish.
Common Mistakes
Misaligned Sleeves
If your sleeves don’t align with the body, double-check the armhole measurements before attaching sleeves.
Too Tight Cuffs
To avoid snug cuffs, ensure to measure your wrist circumference and adjust the final rows if needed.
Project Ideas or Variations
This balloon sleeve design can inspire variations such as:
- A cropped version for warmer weather.
- Different yarn colors or textures to customize your cardigan.
- Adding pockets for added functionality.
Finishing
After completing the crochet, weave in all ends with a tapestry needle. Block the cardigan to shape it properly, ensuring all panels are even. Sew buttons opposite their buttonholes securely, then your chic Balloon Sleeve Everyday Cardigan is ready to wear!
Care
Check the yarn label for specific care instructions. Generally, hand wash and lay flat to dry to maintain the integrity of your garment.
Embrace the art of crochet with your newly crafted cardigan! If you enjoyed this project, consider tackling another similar piece, such as this two hexagon everyday crochet cardigan pattern. Happy crocheting!



