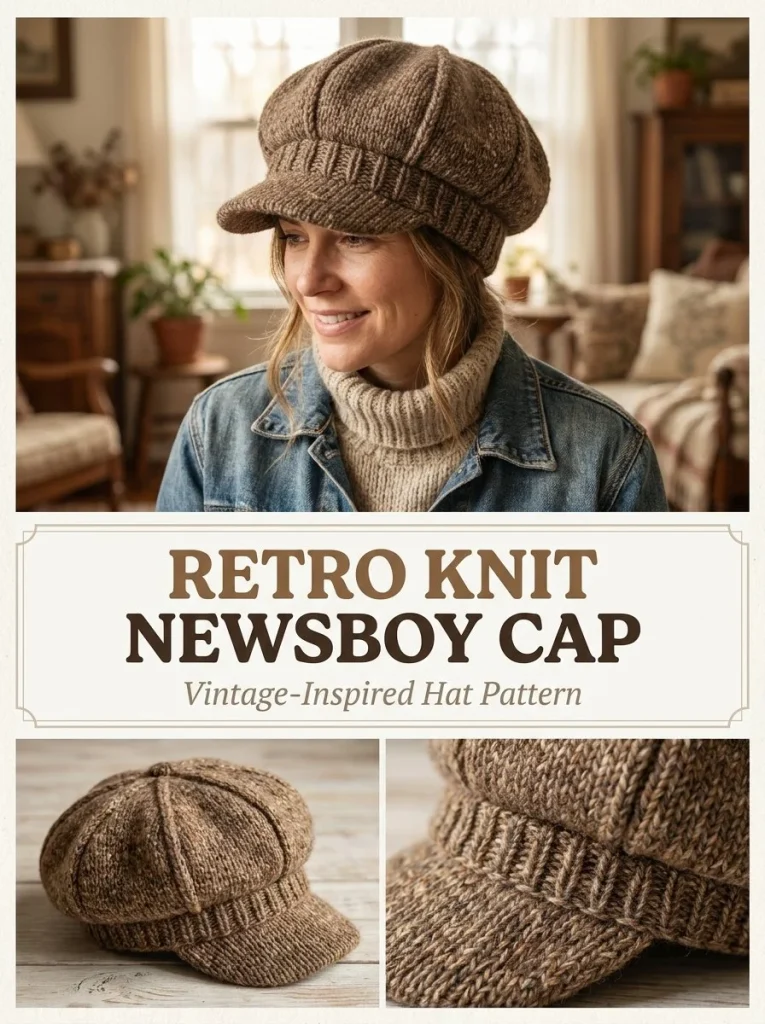
The Retro Knit Newsboy Cap is a stylish and versatile addition to any wardrobe, perfect for those cooler days. Crafted using a soft worsted wool-blend yarn, this cap features a unique combination of a ribbed band and a structured brim, making it both functional and fashionable. With the right materials and techniques, you can create this cap with ease. If you’re looking for additional patterns that match this style, consider checking out the Autumn Color Block Chunky Scarf Knitting Pattern for a complementary accessory!
Skill Level
This project is suitable for an Intermediate skill level. It requires a solid understanding of knitting techniques such as ribbing, increasing, and decreasing.
Materials
To create the Retro Knit Newsboy Cap, you’ll need the following materials:
- Yarn: 220–280 yd / 200–255 m worsted #4 heathered or tweed wool-blend yarn
- Needles:
- US 7 / 4.5 mm 16-in circular needle and DPNs/magic loop
- US 6 / 4 mm needle for rib band
- US 7 / 4.5 mm straight or circular needle for brim
- Notions:
- 6 stitch markers
- Tapestry needle
- Scissors
- Optional thin flexible plastic canvas insert for brim
Abbreviations — US Terms
- K – knit
- P – purl
- st(s) – stitch(es)
- M1L – make one left
- M1R – make one right
- K2tog – knit two together
- ssk – slip, slip, knit
Special Stitches
M1L (Make One Left)
To make a left increase, lift the bar between the stitches with the left needle and knit into the front.
M1R (Make One Right)
To make a right increase, lift the bar between the stitches with the left needle and knit into the back.
Gauge
While gauge is not specified for this pattern, consistent tension is important to ensure a well-fitting cap.
Finished Size
The finished size of the cap will fit an average adult head, but exact measurements can vary based on yarn choice and individual tension.
Pattern Notes
- This project is worked in rounds for the crown and rows for the brim.
- The band is constructed in a K1, P1 rib pattern, providing elasticity.
- Stitch markers are used to help keep track of decreases.
Crochet Instructions
Part 1 – Band
Round 1
With the US 6 / 4 mm circular needle, cast on 84 stitches. Join in the round, ensuring not to twist the stitches.
Round 2
Work in a K1, P1 rib for 1.75 in / 4.5 cm. You should have a snug and elastic band.
Part 2 – Full Crown
Round 1
Switch to the US 7 / 4.5 mm needle. Increase 24 stitches evenly around the next round. You will have 108 stitches total.
Rounds 2–13
Knit in stockinette stitch (knit all stitches) for 12 rounds.
Round 14
Place 6 stitch markers evenly around (18 sts per section).
Decrease Round
- Knit to 2 sts before the marker, K2tog, slip marker; repeat from * around. 6 stitches decreased.
- Knit 1 round even.
- Repeat these two rounds until you have 24 stitches remaining.
Final Decrease
Continue working the Decrease Round every round until you have 12 stitches remaining.
Finishing the Crown
Cut the yarn, draw it through the remaining stitches, and fasten securely. The cap should begin to have a dome shape.
Part 3 – Brim
Row 1
With the US 7 / 4.5 mm needle, cast on 36 stitches.
Rows 2–3
- Row 2: Knit all stitches.
- Row 3: K1, ssk, knit to the last 3 sts, k2tog, K, 1.
Row 4
Knit all stitches.
Rows 5–6
Repeat Rows 3–4 until you have 28 stitches remaining.
Rows 7–10
Knit all stitches evenly for 4 rows.
Next Right Side Row
K1, M1L, knit to the last stitch, M1R, K, 1.
Next Row
Knit all stitches.
Repeat the Last Two Rows
Continue repeating these two rows until you restore to 36 stitches.
Bind Off
Bind off all stitches loosely for a comfortable fit.
Part 4 – Assembling the Brim
Fold the brim in half so that the shaped halves align. If using a plastic canvas insert, cut it slightly smaller than the brim. Seam the curved edges together.
Center the brim over the front half of the rib band and sew it securely in place.
Finishing
Weave in all loose ends and steam lightly without flattening the tweed texture. The crown should have a fuller appearance than a standard beanie, and the brim should be short and softly structured.
If you’re interested in adding more knitted accessories to your wardrobe, the Acorn Brown Keyhole Scarf Knitting Pattern might be a great next project!
Tips for the Best Result
- Ensure that you keep an even tension throughout to avoid tight spots, especially in the ribbing.
- Use stitch markers generously to maintain your place in the rounds.
- Blocking may help the structure of the brim but should be done with care to preserve the yarn’s texture.
Common Mistakes
Crown Too Tight
If the crown feels too tight, ensure you performed the increases properly and kept an even tension.
Ribbing Flare
Ribbing can flare if not secured properly; extra stitches in the brim can help if you find this happening.
Ensure you follow these detailed instructions, and you’ll enjoy the process of creating a beautiful Retro Knit Newsboy Cap!



