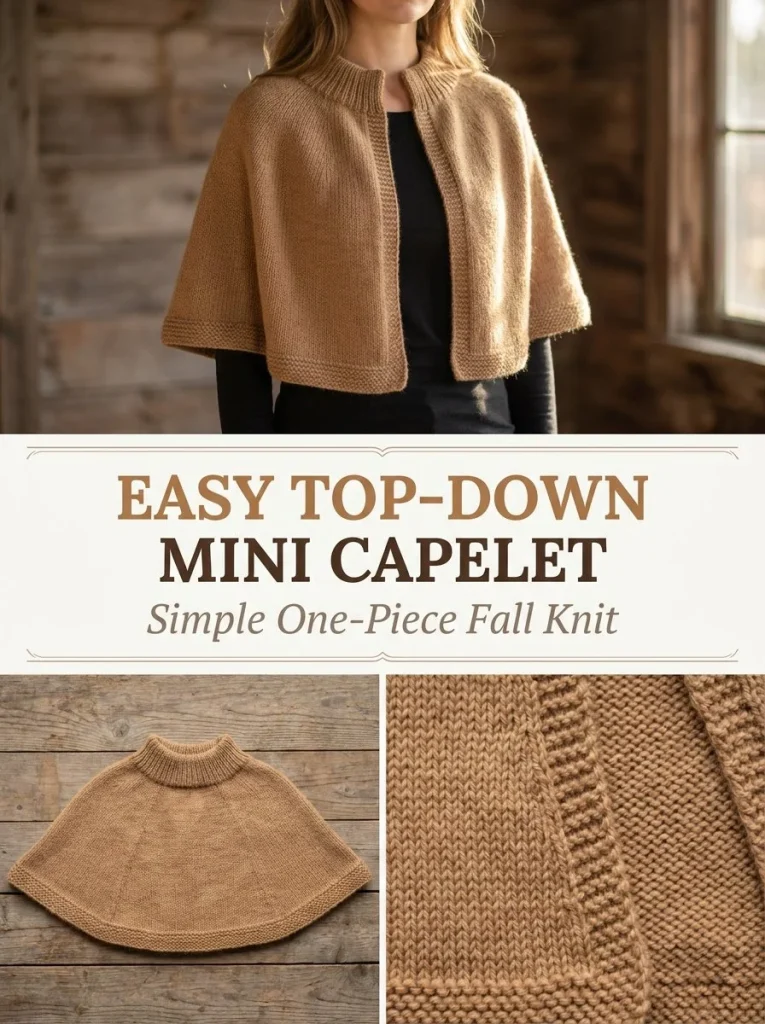
The Easy Top-Down Knit Mini Capelet is a delightful accessory that combines comfort and style in one simple pattern. Perfect for layering in different seasons, this mini capelet showcases a relaxed silhouette, making it a great addition to any wardrobe. Whether you’re a seasoned knitter or a confident beginner honing your skills, this project is an enjoyable way to practice techniques while creating a staple piece. If you’re also interested in other projects that utilize similar knitting techniques, check out this lace shoulder scarf pattern for additional inspiration.
Skill Level
This project is categorized as Confident Beginner. It requires basic knowledge of knitting techniques, including casting on, knitting, purling, and increasing. The straightforward construction of the capelet makes it accessible while offering an opportunity to enhance your skills.
Materials
To complete this project, gather the following materials:
- Yarn: 650–750 yd / 595–685 m worsted #4 wool or wool-blend yarn
- Needles: US 8 / 5 mm long circular needle
- Needles: US 7 / 4.5 mm circular needle for collar and borders
- Notions: stitch markers, tapestry needle, scissors
Abbreviations — US Terms
- K – knit
- P – purl
- M1 – make one
- st(s) – stitch(es)
Special Stitches
Make One (M1)
To create a make one increase, use the following method:
- Insert the left needle through the front of the bar between the two stitches on the right needle from front to back.
- Knit the new stitch.
Gauge
While gauge is not critical for this project, maintaining consistent tension is essential for an even fabric.
Finished Size
The finished capelet will comfortably drape over the shoulders, measuring approximately 11 inches (28 cm) in length from the base of the collar.
Pattern Notes
- The project is worked in rows, starting with the collar and then transitioning into the body.
- The body consists of increasing rows followed by even rows, making it easy to adjust the length if desired.
- Stitch markers can be used to indicate the edges of your work, especially during increases for better visibility.
Crochet Instructions
Collar
- With the smaller needle, cast on 96 sts. Do not join; work flat.
- Rows 1–18:
- Row 1: K4, K1, P1 to last 4 sts, K4.
- Repeat this row until you’ve completed 18 rows.
- This will create a relaxed collar approximately 3 inches (7.5 cm) in height with garter front edges.
Body
- Switch to the larger needle while maintaining the 4 garter sts at each front edge throughout the body.
- Work center sts in stockinette stitch (knit on right side, purl on wrong side).
RS Increase Rows
-
RS Increase Row 1:
- Begin with K4, then distribute 24 M1 increases evenly across the center section, ending with K4. This will give you a total of 120 sts.
- Work 5 rows even (knitting every stitch).
-
RS Increase Row 2:
- K4, then distribute 24 increases evenly. You should have 144 sts after this row.
- Work 5 rows even.
-
RS Increase Row 3:
- K4, distribute 24 increases evenly, resulting in 168 sts.
- Work 7 rows even.
-
RS Increase Row 4:
- K4, distribute 24 increases evenly, totaling 192 sts.
- Work 7 rows even.
-
RS Increase Row 5:
- K4, distribute 24 increases evenly, leading to 216 sts.
- Continue working even until the body measures 11 inches (28 cm) from the base of the collar.
Lower Border
- Switch back to the smaller needle.
- Work 8 rows of garter stitch across all stitches.
- When complete, bind off loosely.
Finishing
After binding off, weave in any loose ends using a tapestry needle, ensuring a clean finish. To shape the capelet, block it gently, encouraging a smooth circular drape. The two front garter edges should remain open, giving the piece a light, airy feel. There are no closures, buttons, or sleeves; the finished capelet will sit comfortably over your shoulders, resembling a short cape rather than a traditional poncho.
When you’re ready to expand your knitting repertoire, consider trying other themed projects such as this pumpkin trio pattern for a seasonal twist.
Care
For best results, follow the care instructions of your chosen yarn. Typically, wool blends may require gentle hand-washing and laying flat to dry to maintain their shape and texture. Always check the yarn label for specific care recommendations to ensure longevity.



