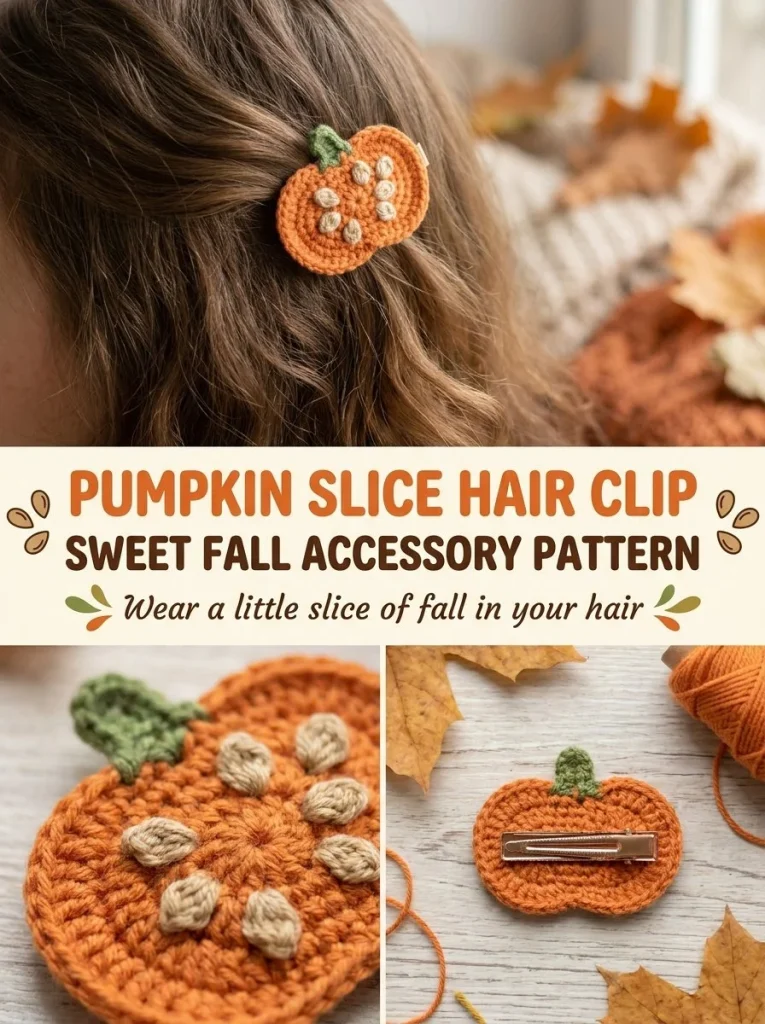
Crochet enthusiasts will find joy in creating this delightful pumpkin slice hair clip, a perfect accessory for the fall season. The charming design not only adds a touch of whimsy to everyday hairstyles but also makes for a thoughtful gift for friends or family who appreciate handmade items. As you crochet this piece, you’ll enjoy the satisfaction of using simple techniques to bring a seasonal motif to life. An important tip: when embroidering the seeds, keep your stitches light and spaced irregularly for a natural look.
Why You’ll Love This Crochet Pattern
- It’s a quick and easy project, ideal for beginners and those looking to enhance their skills.
- The finished clip adds a cozy fall feel to your outfits, celebrating the autumn season in a fun way.
- You can customize the colors to match your style or even create a themed collection.
- Making this hair clip could spark inspiration for other projects, like a complementary pumpkin brooch.
Finished Size
The estimated finished size of the pumpkin slice hair clip is about 3 inches in length and 2 inches in width. Keep in mind that the size may vary slightly depending on your tension and the yarn choice.
Skill Level
This pattern is suitable for beginners. The stitches used are basic and require minimal crochet experience, making it an approachable project even for those new to the craft.
Materials Needed
- Small amount of orange cotton thread
- Small amount of tan thread for seeds
- Small amount of green thread for the stem
- 2mm crochet hook
- Small flat-back hair clip finding
- Fabric glue
- Tapestry needle
- Scissors
Stitches and Abbreviations
- ch: chain
- sc: single crochet
- sc2tog: single crochet two together (decrease)
Gauge and Tension Notes
While gauge is not crucial for this project, achieving an even tension will make the final piece look polished. Practice maintaining consistent tension, especially when working in smaller sections like the stem.
Pattern Notes Before You Start
You will work this pattern in rows. The slice shape is created by tapering rows as specified. It’s important to pay attention to the shaping and ensure the rounded wedge is well-formed. You’ll also need to embroider the seeds after finishing the slice.
Step-by-Step Crochet Instructions
- Start by chaining 6.
- Row 1: Sc into the 2nd chain from the hook and across (5 sc).
- Row 2: Ch 1, turn, sc2tog, sc1, sc2tog (3 sc). Fasten off and weave in the end.
- Using tan thread, embroider 3-4 small, straight stitches scattered across the wedge to represent pumpkin seeds.
- Stem: Chain 3 in green thread. Sc into the 2nd ch from hook and across; fasten off.
- Sew the stem to the pointed end of the slice.
- Assembly: Glue the finished pumpkin slice motif flat onto the hair clip finding. Let it dry fully before use.
Assembly and Finishing
After gluing, ensure that the clip is flat and the pumpkin slice is secure. Use your tapestry needle to weave in any loose ends for a neater finish.
Helpful Tips
- When adding the seeds, vary the lengths and angles of your stitches to capture the natural look of pumpkin seeds.
- Hold the fabric glue in place for a few seconds to ensure the pumpkin slice adheres well.
- If you find the slice shape isn’t rounded enough, adjust the tension in your stitches for a smoother finish.
Common Mistakes to Avoid
- Be careful not to pull your stitches too tight, as this can distort the shape of your pumpkin slice.
- Ensure that you count your stitches accurately, especially during the decreases, to maintain the wedge shape.
- Don’t rush the drying process of the glue; ensure it’s fully set before using your hair clip.
Customization Ideas
- Try using different shades of orange or even variegated yarn to create a unique look.
- Experiment with adding embellishments like beads or glitter to the pumpkin slice.
- Adjust the size of the stem for a more pronounced effect, or try adding leaves to enhance the fall theme.
How to Use or Display This Crochet Project
The finished pumpkin slice hair clip is perfect for everyday wear, especially during the festive fall season. It also makes an excellent handmade gift or party favor when attending autumn-themed celebrations.
Care Instructions
To clean the hair clip, gently wipe with a damp cloth. Avoid submerging it in water, and store it in a cool, dry place to maintain its shape and integrity.
Frequently Asked Questions
Q: Can I use a different yarn weight?
A: While it’s best to use a lightweight yarn for this pattern, you can try thicker yarn for a larger clip; just adjust your hook size accordingly.
Q: Is fabric glue the best option for attaching the slice to the clip?
A: Fabric glue works well to hold the slice; however, you can also sew it on for added durability.
Q: Can I make this hair clip in different shapes?
A: Yes! This pattern can serve as a foundation for other fruit or vegetable shapes as well.
Q: How do I know if my tension is correct?
A: Aim for a consistent and even tension; practice with scraps if needed to gauge what feels right.
Q: What if my clip doesn’t hold the slice securely?
A: If the clip feels loose, ensure that the glue has fully dried or consider stitching it for extra security.
The pumpkin slice hair clip offers a fun way to embrace the season while honing your crochet skills. Enjoy the process of making this cozy accessory! For more delightful patterns, check out the pumpkin mug cozy for a perfect fall set.



