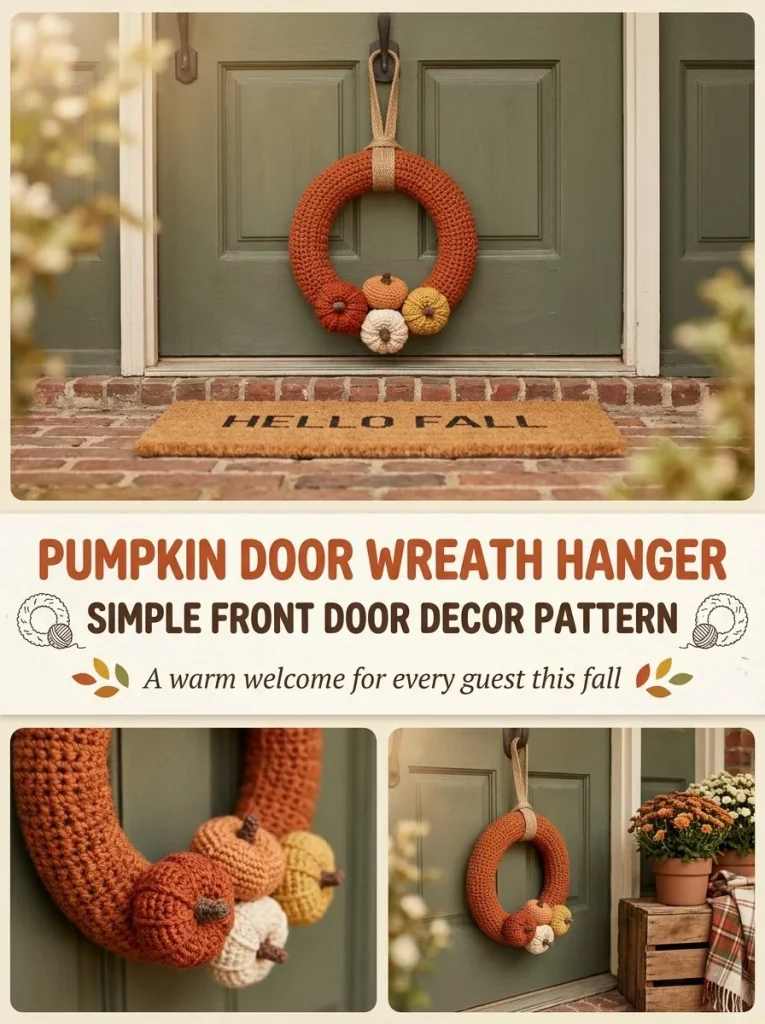
Crocheting a pumpkin-themed door wreath hanger is a delightful way to welcome the fall season into your home. This cheerful decor piece not only adds a seasonal touch but is also beginner-friendly, making it an excellent project for crafters looking to hone their skills. Plus, it’s a charming gift idea for friends who love handmade items. As a tip for achieving a perfectly round wreath, make sure not to twist the chain when forming your ring, as this is crucial for maintaining the shape.
Why You’ll Love This Crochet Pattern
- It’s a quick project that you can complete in an afternoon.
- The pattern is simple and easy to follow, perfect for beginners.
- You’ll learn to create adorable tiny pumpkins, enhancing your crochet skills.
- It adds a cozy, festive touch to your front door or can serve as a lovely gift.
- The bright colors can be customized to match your home decor.
Finished Size
The estimated finished size of your pumpkin door wreath hanger is approximately 12 inches in diameter. However, this may vary slightly based on your yarn choice, hook size, and tension.
Skill Level
This pattern is suitable for beginners and those with some crochet experience. The straightforward instructions allow crafters to easily follow along and produce a great-looking project.
Materials Needed
- Worsted-weight yarn in rust-orange for the wreath ring
- Small amounts of cream and mustard for the tiny pumpkins
- Small amount of brown yarn for stems
- 5mm hook
- Tapestry needle
- Twine for hanging loop
- Scissors
Stitches and Abbreviations
- ch = chain
- sc = single crochet
- sl st = slip stitch
- st = stitch
- sc2tog = single crochet two together (decrease)
Gauge and Tension Notes
While gauge is not critical for this project, maintaining an even tension will help your wreath look neat and professional.
Pattern Notes Before You Start
The wreath is worked in rounds, starting with a chain ring. Each piece is made as a separate part that is later sewn onto the main ring. This pattern allows for creative color mixing in the tiny pumpkins, adding a fun aspect to the project.
Step-by-Step Crochet Instructions
-
Create the Wreath Ring: Chain 24 and join with a slip stitch to form a ring, ensuring it is not twisted.
-
Round 1: Chain 1, single crochet into each chain around (24), then slip stitch to join.
-
Round 2: Repeat single crochet around (24), and slip stitch to join. Fasten off. This forms the base of the wreath ring.
-
Make Tiny Pumpkins (Make 3, mixing colors): Create a magic ring, chain 1, and work 6 single crochet into the ring (6).
-
Round 2: Work 2 single crochet in each stitch around (12).
-
Round 3: Single crochet around evenly (12) and stuff lightly.
-
Round 4: Single crochet two together around (6), fasten off, and cinch closed.
-
Add the Stem: Sew a small brown stem made of chain 3 and single crochet across the top of each pumpkin.
-
Attach Pumpkins: Evenly space the three pumpkins onto the wreath ring and sew them securely.
-
Finishing Touch: Tie a loop of twine at the top of the ring for hanging.
Assembly and Finishing
To add final touches, weave in all ends and ensure everything is securely attached. Adjust the placement of the pumpkins if necessary to achieve a visually appealing arrangement.
Helpful Tips
- Keep your tension consistent, especially when working on the tiny pumpkins, to help them maintain their shape.
- When sewing the pumpkins onto the wreath, make sure they are evenly spaced for a balanced look.
- If you want a fuller wreath, consider adding more pumpkins or other decorative elements like leaves.
Common Mistakes to Avoid
- Twisting the chain when forming the ring can lead to a misshapen wreath.
- Forgetting to stuff the pumpkins lightly can make them look flat.
- Not attaching the pumpkins securely may lead to them falling off.
Customization Ideas
- Experiment with different colors for the pumpkins to match your home decor.
- Use variegated yarn for a unique twist on the typical pumpkin colors.
- Consider adding small leaves or additional embellishments to enhance the wreath’s visual appeal.
How to Use or Display This Crochet Project
The finished pumpkin door wreath hanging can be displayed on your front door as a festive decoration that welcomes guests. It also makes a thoughtful and handmade gift for friends or family who appreciate seasonal crafts.
Care Instructions
Keep your crochet wreath looking fresh by gently spot cleaning it with a damp cloth. To store, hang it in a dry place to avoid any moisture that could affect the yarn.
Frequently Asked Questions
-
Can I use different yarn weights?
Yes, but keep in mind that this may affect the size and shape of your wreath. -
How do I clean my crochet wreath?
Spot clean with a damp cloth; avoid submerging it in water. -
What if I want a bigger wreath?
You can increase the number of chains in the initial ring and adjust the pattern accordingly. -
Are there similar patterns I can try?
Yes! If you enjoy this project, consider making a pumpkin bunting banner or a pumpkin garland string for added fall decor.
The pumpkin door wreath hanger is a simple yet charming project that invites the cozy essence of autumn into your home. Whether for yourself or as a gift, it showcases the joy of crafting and the warmth of handmade decor. Happy crocheting!



