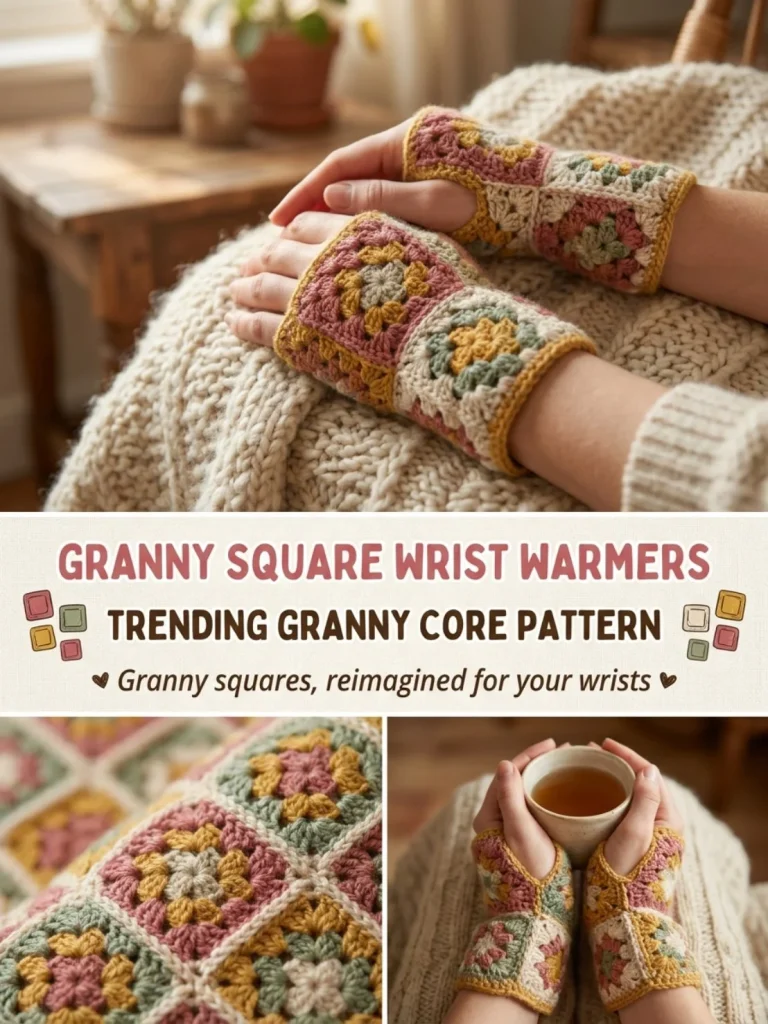
Creating a pair of Mini Granny Square Wrist Warmers is a delightful way to add some cozy flair to your wardrobe. This project not only serves a practical purpose during chilly days but is also a chic accessory that’s perfect for gifting to friends and family. With just a few simple granny squares, you can whip up these warmers, showcasing your crochet skills while experimenting with color combinations. One tip I’ve found helpful is to keep your tension consistent, which ensures your squares are uniform and neat. Let’s dive into the details of this fun crochet project!
Why You’ll Love This Crochet Pattern
- Easy to follow instructions make this pattern perfect for beginners.
- Mini granny squares allow for lots of creativity with color combinations.
- A functional accessory that keeps your wrists warm while looking stylish.
- Quick to make, ideal for last-minute gifts.
- Provides a satisfying finished product without requiring a large time commitment.
Finished Size
The estimated finished size of each wrist warmer is about 8 inches in circumference and 6 inches in length. However, the size may vary depending on your yarn choice, hook size, and tension.
Skill Level
This project is classified as easy. The pattern involves basic granny square techniques, making it suitable for beginner and intermediate crocheters alike.
Materials Needed
- Cotton yarn in rose, mustard, sage, and cream (small amounts of each)
- 4mm crochet hook
- Tapestry needle
- Scissors
Stitches and Abbreviations
- ch: chain
- dc: double crochet
- …: repeat instructions between asterisks
Gauge and Tension Notes
Gauge is not crucial for this project, but maintaining even tension will ensure a neat finished product. Aim for your squares to have a similar size to avoid discrepancies in the finished wrist warmers.
Pattern Notes Before You Start
This pattern involves creating mini granny squares worked in rounds. Each wrist warmer is formed from three joined squares, crafted to wrap neatly around your wrist. Color changes occur at the start of each new round, adding a lovely artistic touch to your warmers.
Step-by-Step Crochet Instructions
-
Make the Magic Ring: Begin with a magic ring; ch3 (counts as dc), then work 2dc, ch2, and 3dc, ch2 three times. Join and fasten off.
-
Round Two: Change color for the second round by joining in any corner space. Ch3, then work 2dc, ch2, and 3dc in the same space. Ch1, then (3dc, ch2, 3dc) in the next corner, ch1 around. Join and fasten off.
-
Repeat: Make a total of 6 mini squares (3 for each wrist warmer), mixing colors with each round.
-
Assembly: Join 3 mini squares together in a row using a whip stitch along their edges to form a rectangle. Fold the rectangle to wrap around your wrist, whip-stitching the two short ends together. Leave a thumb gap if desired.
-
Repeat: Complete the second wrist warmer in the same manner.
Assembly and Finishing
To join the pieces, use a whip stitch to connect the edges securely. Weave in any loose ends with a tapestry needle, shaping the wrist warmers to ensure they sit comfortably on your wrists.
Helpful Tips
- Make sure your magic ring is not too tight, as it may cause your squares to distort.
- Pin your squares together before stitching to visualize the final placement.
- For a neater finish, block your squares after completing them to ensure uniformity.
- Vary the colors in each square to create a playful, eclectic look.
Common Mistakes to Avoid
- Skipping the ch2 on the corners may result in a ruffled edge. Always include it for proper shaping.
- Not joining squares correctly can lead to an uneven finish. Take your time to align them.
- Pulling too tightly on yarn can create a stiff look. Aim for a gentle hand when crocheting.
Customization Ideas
- Experiment with different color palettes for a unique style; try pastel shades for a softer look or vibrant hues for a bold statement.
- Adjust the size of the wrist warmers by increasing or decreasing the number of squares used.
- Add decorative elements like buttons or crochet flowers for a personalized touch.
How to Use or Display This Crochet Project
These wrist warmers can be worn on a chilly day while lounging at home or running errands. They also make thoughtful gifts for friends who appreciate handmade items, as they can keep someone you care about warm and stylish.
Care Instructions
To clean your wrist warmers, hand wash in cold water and lay flat to dry. Avoid wringing them out to preserve their shape. Store in a cool dry place when not in use.
Frequently Asked Questions
1. Can I use different yarn types?
Yes, but be aware that yarn weight affects the size and fit of your wrist warmers.
2. How do I change colors neatly?
When finishing a round, pull the new color through the last stitch of the previous color to create a smooth transition.
3. How can I make my wrist warmers a bit longer?
You can add one or two more squares in the row to extend the length.
4. Are these warmers adjustable?
While not officially adjustable, leaving a thumb gap allows for flexibility in fit.
These Mini Granny Square Wrist Warmers can be a lovely addition to your crochet repertoire. If you enjoy working with granny squares, consider exploring other patterns like the mini granny square bag charm or a matching granny stripe ear warmer crochet pattern to complete your cozy collection. Happy crocheting!



