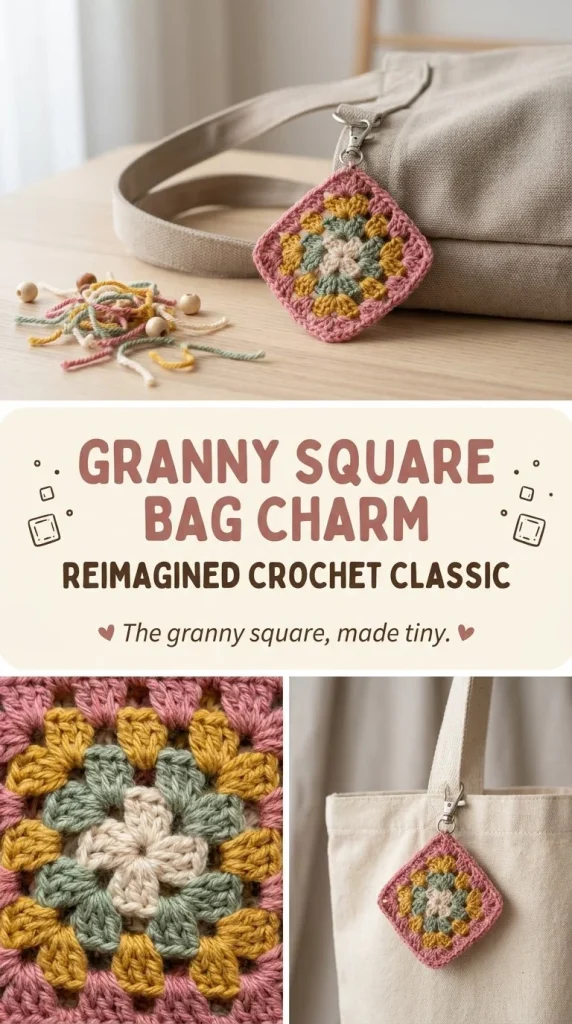
This mini granny square bag charm is a delightful and practical crochet accessory that’s perfect for adding a splash of color and charm to your keys, bags, or even as a little gift. Working in small rounds with soft cotton yarn gives this piece a lovely structure and a cozy feel, making it a joy to carry or gift. The pattern is designed with beginner-friendly techniques, but also offers enough detail to satisfy an intermediate crocheter who loves quick, colorful projects. I find that warming up the yarn by handling it before crocheting helps the stitches look smoother, which really makes the colors pop. If you enjoy creating small and vibrant accessories, this charm fits the bill nicely and can easily inspire variations — much like other fun, compact projects like the mini granny square coin pouch, which also uses the charm of the granny square stitch in a handy way.
Why You’ll Love This Crochet Pattern
- Quick to make with small amounts of yarn, perfect for stash-busting.
- Uses simple post stitches with only double crochets and chains, ideal for beginners.
- The square shape keeps the charm structured and neat.
- Makes a sweet, colorful gift that is easy to customize.
- Practical for adding to keys, bags, or as zipper pulls.
- Provides clear, round-by-round instructions that build gradually.
Finished Size
The finished mini granny square bag charm measures roughly 2.5 inches (6.5 cm) square. This can vary slightly depending on your yarn choice, hook size, and tension, but the charm should stay compact enough to fit comfortably on a keyring or bag zipper.
Skill Level
This pattern is ideal for beginners who are comfortable with basic crochet stitches like chain (ch), double crochet (dc), and magic ring. It’s straightforward yet teaches how to create rounds and corners within granny squares, a useful skill for more advanced projects later.
Materials Needed
- Small amounts of cotton yarn in these colors: rose, mustard, sage, and cream (light fingering to DK weight works well)
- 3.5mm (E/4) crochet hook
- Small keyring or split ring to attach the charm
- Tapestry needle for weaving in ends
- Scissors
- Optional: stitch markers to mark corners for easier counting
Stitches and Abbreviations
- ch = chain
- dc = double crochet
- magic ring = a technique to create a tight starting loop
- join = slip stitch to connect the last stitch to the beginning of the round
Gauge and Tension Notes
Gauge is not critical for fit since this is a small accessory, but keeping consistent tension will give you neat stitches and a square that lies flat. Too loose a tension might make the granny square floppy and uneven, while too tight may cause curling at the corners.
Pattern Notes Before You Start
You will work in joined rounds using the granny square method, starting from the center with the magic ring and building corners in each round. Color changes happen at the end of each round—fastening off and joining the next color in a corner space keeps the edges tidy. The final piece is a single square motif attached to a keyring at one corner, so no sewing other pieces together is necessary.
Step-by-Step Crochet Instructions
-
Round 1 (rose):
Create a magic ring, ch3 (counts as first dc), work 2 dc into ring, ch2, 3 dc, ch2 three times into the ring. You should have 4 corner groups separated by ch2 spaces. Join with slip stitch to top of ch3. Fasten off. -
Round 2 (mustard):
Join mustard yarn in any corner ch2 space, ch3 (counts as first dc), 2 dc, ch2, 3 dc in the same space (forming the corner). Ch1, (3 dc, ch2, 3 dc) in next corner space, ch1 repeat around. Join to top of ch3. Fasten off. -
Round 3 (sage):
Join sage yarn in any corner space, repeat same corner and ch1 spacing pattern as Round 2. Join and fasten off. -
Round 4 (cream):
Join cream yarn in any corner space, repeat once more as a border round to frame the charm. Join and fasten off. -
Finishing:
Weave in all ends carefully with a tapestry needle. Attach your keyring by threading it through any corner space for a secure hold.
Assembly and Finishing
This charm is a single structured granny square, so there are no separate pieces to join. Weaving in ends cleanly at each color change ensures a polished look. To attach the keyring, slip it through one corner ch2 space; this is especially secure because all four corners are sturdy clusters of 3 double crochets. Blocking isn’t necessary, but gently pressing the square flat with a cool iron over a damp cloth can help edges lie nicely.
Helpful Tips
- Use stitch markers to mark the beginning of each round or the first corner stitch to maintain stitch counts.
- Keep your tension consistent to avoid wavy edges.
- When changing colors, pull the new yarn through the last stitch loop of the previous color to create a seamless join.
- Swapping yarn colors with close shades can create a gradient effect for a subtle twist.
- If you want to add texture, consider using cotton yarn with a smooth finish to highlight your stitches.
- For a fun variation, try adding a simple crochet flower or bead before attaching the keyring, inspired by beginner-friendly accessories like the cherry blossom crochet hair comb pattern.
Common Mistakes to Avoid
- Forgetting to ch2 in corners can make your square curl or bunch up.
- Skipping the join step at the end of rounds leads to uneven edges.
- Not fastening off or weaving in ends neatly can result in loose or messy finishing.
- Crocheting too tightly causes stiffness and may distort the square’s shape.
- Miscounting stitches between corners makes the granny square one side longer than another; always double-check your stitch count after each round.
Customization Ideas
- Change yarn colors to match your favorite color palette or season.
- Use variegated or self-striping yarn for a unique multicolor effect.
- Make the square larger by adding extra rounds or smaller by stopping at round 3.
- Attach charms, beads, or small crochet appliques to the keyring for extra personality.
- Swap the keyring for a lobster clasp or bag clip to attach instantly to purses or backpacks.
How to Use or Display This Crochet Project
Attach your mini granny square bag charm to keys, backpacks, purse zippers, or even as a decorative zipper pull on jackets. It’s a sweet, practical way to brighten everyday items or a thoughtful handmade gift for friends and family. Because it’s lightweight and colorful, it can be a cheerful addition to your charm collection or a small giveaway at craft fairs.
Care Instructions
Hand wash your charm gently in cold water with mild soap to preserve cotton’s softness and color. Lay flat to dry to keep the shape intact. Avoid wringing or twisting, which may distort the square, and store it away from direct sunlight to prevent fading.
Frequently Asked Questions
Q: Can I use a different yarn weight?
A: You can, but the size and firmness of the square will change. Adjust your hook size accordingly to maintain a neat stitch.
Q: How do I keep my granny square flat?
A: Consistent tension and proper ch2 corners are key. Avoid tightening stitches excessively in corners to prevent cupping.
Q: Can I make this charm reversible?
A: This pattern is single-sided with visible joins, but using a slip stitch join and careful color changes may create a smoother back.
Q: How do I attach the keyring securely?
A: Use a sturdy metal or split keyring and thread it through one of the corner ch2 spaces for reliability.
Q: Is this pattern suitable for complete beginners?
A: It’s beginner-friendly if you know the basics like magic ring, chain, and double crochet, but a bit of practice with granny squares will help.
Final Thoughts
This mini granny square bag charm is a fun and versatile crochet project that fits easily into a maker’s collection. It’s quick, colorful, and perfect for gifting or personal use. With just a few rounds and a small amount of yarn, you can brighten up everyday items with a handmade accessory full of charm. Happy crocheting!



