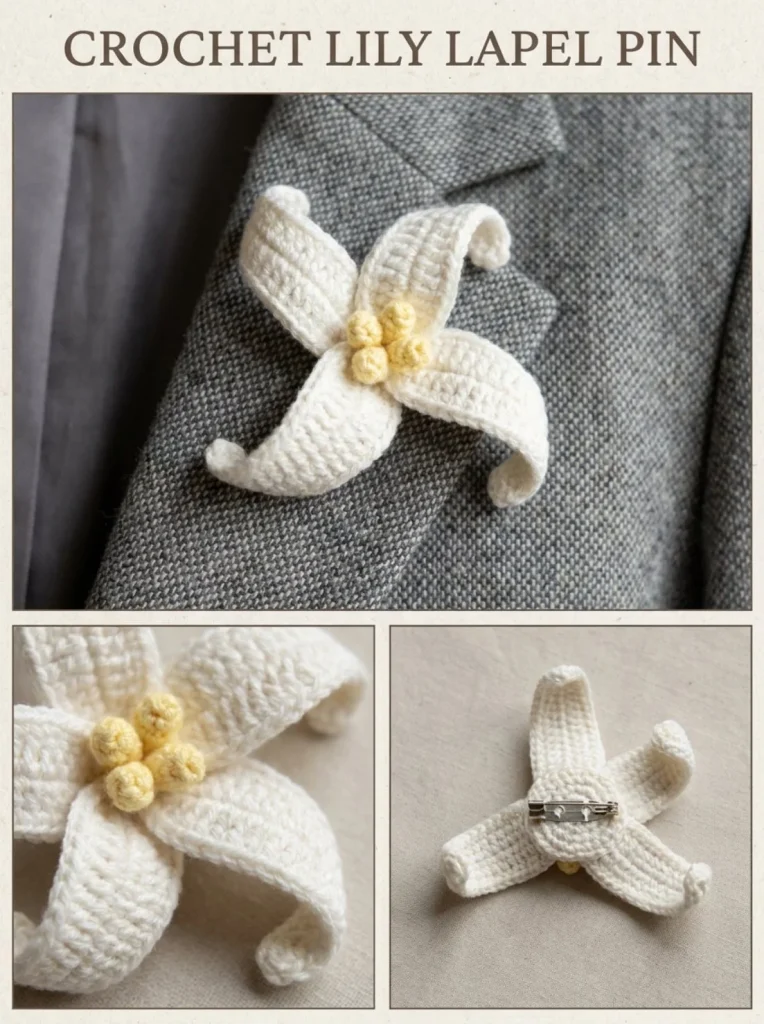
This lovely Lily Lapel Pin is a delightful project that combines simplicity with charm, making it the perfect accessory for any outfit. Whether you’re pinning it to a jacket, bag, or hat, this little flower brings a touch of nature and elegance. The crochet process is beginner-friendly, allowing newcomers to the craft a chance to practice basic stitches while creating something beautiful. One of my favorite aspects of this design is how the curled edges of the petals give it a natural, organic look, which is not only appealing but also surprisingly easy to achieve with back-loop crochet.
Why You’ll Love This Crochet Pattern
- It’s a quick project that can be completed in an afternoon, making it perfect for gifts.
- The natural curl of the petals gives an organic feel, enhancing the visual appeal.
- A great introduction to basic crochet techniques, making it suitable for beginners.
- You can customize it easily with different colors to match your style.
- Use leftover yarn scraps, so it’s an economical choice.
Finished Size
The finished Lily Lapel Pin measures approximately 3 to 4 inches across. However, the size may vary depending on your yarn choice, hook size, and personal tension.
Skill Level
This pattern is suitable for beginners. The straightforward instructions and minimal stitches required ensure that anyone, even those new to crochet, can successfully complete this project.
Materials Needed
- Soft yellow and white cotton crochet thread
- 2mm crochet hook
- 1 small gold pin-back finding
- Tapestry needle
- Scissors
Stitches and Abbreviations
- sc: single crochet
- sc2tog: single crochet two together (decrease)
Gauge and Tension Notes
Gauge is not crucial for this project. However, maintaining a consistent tension will help ensure that your petals curl nicely and give the pin a tidy look.
Pattern Notes Before You Start
The project consists of individual petals that are crocheted and then assembled together. Each petal is worked in rows, and the petals are sewn at their bases to create a three-petal design. The color change for the center cluster uses a simple knotting method or a small bobble, allowing for versatility.
Step-by-Step Crochet Instructions
- Petal (Make 3): Using white thread, chain 10.
- Row 1: sc into the 2nd ch from hook and across (9 sc).
- Row 2: Working in back loops only, sc across (9 sc). This creates the curled edge.
- Row 3: sc2tog at the tip end only, then sc across remaining sts (8 sc). Fasten off, leaving a tail for sewing.
- Center Cluster: Make 3 small clusters using a French-knot style technique, wrapping the yellow thread around the needle 4-5 times and stitching down. Alternatively, you can crochet a tiny 4-st bobble.
- Assembly: Arrange the three white petals so their base ends overlap slightly to form a tripod/lily shape. Stitch them together at the base only, allowing the tips to curl outward and slightly upward. Attach the yellow center cluster into the middle where the petals meet.
- Sew the pin-back finding flat to the reverse side of the assembled flower.
Assembly and Finishing
To finish the pin, ensure all threads are weaved in correctly to maintain a neat appearance. The pin-back should be secured well to allow for easy attachment to clothing or bags.
Helpful Tips
- When stitching the petals together, use a contrasting thread for visibility while sewing; you can always change it back to the original after completion.
- To enhance the shape of the petals, try blocking them lightly with a steam iron, ensuring they maintain their curl.
- Maintain even tension throughout to avoid any puckering in the edges.
- Don’t hesitate to use a small amount of fabric stiffener if you prefer a sturdier shape.
Common Mistakes to Avoid
- Skipping the back loop in Row 2 can result in straight edges rather than curled petals.
- Be cautious with tension when completing the center cluster; too tight or loose can affect the overall look.
- Ensure your stitches are consistent in size for a polished final product.
Customization Ideas
- Experiment with different yarn colors such as pastels or bold hues for a unique look.
- Use a textured yarn to add depth to the petals.
- Add small embellishments like beads in the center for a bit of sparkle.
- Create a larger version of the pin to use as a brooch or larger decorative piece.
How to Use or Display This Crochet Project
The Lily Lapel Pin can be a beautiful accessory on jackets, hats, or bags, adding a touch of handcrafted charm to your outfit. It also makes for a thoughtful gift when presented with a personal touch.
Care Instructions
To care for your pin, hand wash gently with mild soap and water. Lay it flat to dry, avoiding direct sunlight. Store in a cool, dry place to maintain its shape.
Frequently Asked Questions
Q: Can I make this lapel pin with other types of yarn?
A: Yes, you can experiment with different yarns, though cotton is recommended for maintain shape and durability.
Q: How do I secure the pin back properly?
A: Make sure to sew the pin back securely with several stitches to prevent it from falling off during use.
Q: What if I want to make a larger pin?
A: You can simply increase the chain length for the petals or make more petals to create a fuller appearance.
Q: Can I use this pattern for a hair accessory?
A: Absolutely! Just attach a hair clip instead of a pin back, and you have a lovely flower clip.
Q: What is the best way to store these lapel pins?
A: Keep them in a fabric pouch or jewelry box to protect them from damage.
The Lily Lapel Pin is not just a craft; it’s an expression of your creativity and style. Whether you’re a beginner or an experienced crocheter, this project is sure to bring you joy and satisfaction. If you’re looking for more crochet inspiration, check out an exciting pattern like the Pink Lily Bell Anklet or explore the unique design of the Alpine Moss One Row Repeat Throw. Happy crocheting!



