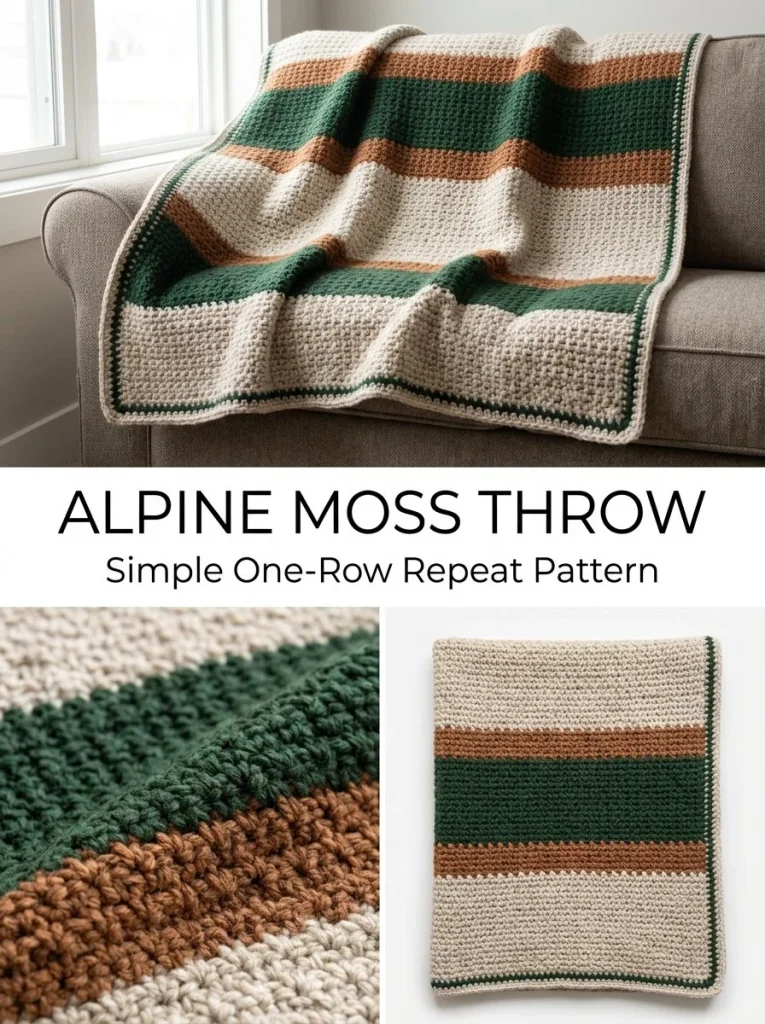
The Alpine Moss One-Row Repeat Throw is a wonderfully cozy blanket that showcases the beauty of simple crochet stitches while still allowing for a stylish design. This project is perfect for both beginners and more seasoned crocheters looking for a quick and satisfying make. The one-row repeat technique means you can easily memorize the pattern, making it a great option for those cozy nights spent crocheting while you unwind. Plus, the changes in color create a lovely visual texture that adds warmth and depth to any living space. Don’t forget to check out this charming crochet throw pattern for further inspiration on your crochet journey!
Why You’ll Love This Crochet Pattern
- It’s a beginner-friendly project, making it accessible to new crocheters.
- The simple one-row repeat means you can easily pick it up and put it down without losing your place.
- Customizable with your color choices, allowing you to add personal flair.
- This cozy throw is perfect for snuggling on the couch or gifting to a loved one.
- The finished texture is both plush and inviting, making it a delightful addition to any décor.
Finished Size
The estimated finished size of the throw is about 55 inches (140 cm) long, though it may vary based on your yarn choice, hook size, and tension.
Skill Level
This pattern is classified as beginner. The instructions are straightforward, and the repeating stitches make it a good starting project for those new to crochet.
Materials Needed
- Yarn: Bulky (#5) washable acrylic or wool blend in oatmeal, forest green, and clay brown
- Hook: 6.5 mm
- Tapestry needle
- Scissors
Stitches and Abbreviations
- Ch: chain
- Sc: single crochet
- Hdc: half double crochet
Gauge and Tension Notes
While gauge isn’t crucial for this blanket, making a swatch can help ensure your finished piece has the desired drape. Aim for a relaxed tension to keep the moss stitch looking fluffy.
Pattern Notes Before You Start
This throw is worked in rows with color changes made at the end of rows. You will maintain the same moss stitch throughout while alternating between colors. This creates a beautiful texture and look.
Step-by-Step Crochet Instructions
- With oatmeal, chain 147 (the foundation must be an odd number of chains).
- Row 1: Sc in the 2nd ch from the hook, ch 1, skip next ch, sc in next ch across, ending with a sc in the final chain. Turn.
- Row 2 and EVERY following body row: Ch 1, sc in the first sc, ch 1, sc in next ch-1 space across, ending with sc in last sc. Turn. This Row 2 is the only repeat used for the whole blanket.
- Work 18 rows in oatmeal.
- Work 10 rows in forest green.
- Work 8 rows in clay.
- Work 10 rows in forest green.
- Work 18 rows in oatmeal.
- Repeat Steps 6-9 once more, then finish with 18 rows in oatmeal.
- Continue until the body measures about 55 inches long. Adjust full rows as necessary to maintain the color proportions based on your gauge.
- With oatmeal, work R1 of sc evenly around the blanket’s edges.
- For each edge, work 1 sc in each sc and each ch-1 space. Along each side edge, work approximately 1 sc per row. Work 3 sc in every corner.
- For R2: Ch 1, hdc in each stitch around, working 3 hdc in the center corner stitch at each corner. Join.
- For R3 with forest green: Ch 1, sc in each stitch around, 3 sc in each corner. Join.
- Fasten off and weave in all ends. Steam lightly if the yarn allows; avoid overstretching the moss texture.
Assembly and Finishing
Make sure to weave in all ends neatly to keep the throw tidy. The steam blocking can help set your stitches, but ensure you don’t overdo it, preserving the height of your moss stitch.
Helpful Tips
- To keep your edges looking neat, maintain a consistent tension throughout the project.
- If you notice the blanket curling at the edges, it might be due to overly tight stitches; try loosening your tension.
- Use a stitch marker to help keep track of your color changes.
- Test your yarn to see how it responds to blocking to ensure the best finish.
Common Mistakes to Avoid
- Ensure your starting chain is an odd number; using an even number can disrupt the stitch repeat.
- Double-check each row to maintain the correct number of stitches; missing a ch-1 can cause your pattern to misalign.
- Pay attention to your color changes; changing at the end of rows is crucial for an even look.
Customization Ideas
- Experiment with different color combinations to match your home decor or personal style.
- Adjust the size by adding or removing rows while retaining the color pattern.
- Consider using a textured yarn for added interest.
How to Use or Display This Crochet Project
This throw works beautifully as a cozy addition to your living space or as a thoughtful gift for a friend moving into a new home. Its charm makes it versatile enough for both practical use and decorative purposes.
Care Instructions
For cleaning, follow the care label instructions on your yarn. Most washable acrylics can be gently hand washed and laid flat to dry to maintain their shape.
Frequently Asked Questions
- Can I use a different yarn type?
- Yes, feel free to use any bulky yarn that feels good to the touch.
- What should I do if the edges are curling up?
- This may be due to tight stitches; try loosening your tension or blocking the finished piece.
- How do I choose colors?
- Think about complementary colors in your home or colors that evoke a particular mood.
These practical tips and insights aim to make your crochet experience enjoyable and fulfilling. Happy crocheting, and enjoy the warmth of your Alpine Moss One-Row Repeat Throw!



