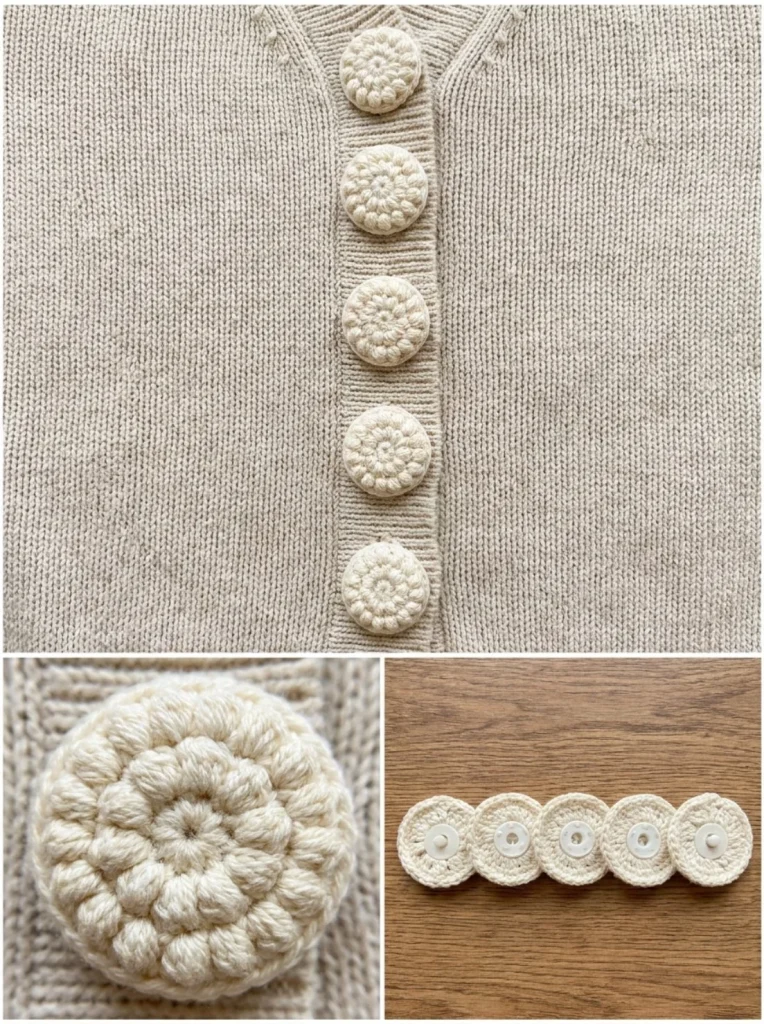
Creating a crochet button cover set is a delightful project that combines practicality with a touch of creativity. These cute crochet button covers can breathe new life into old garments and accessories, making them perfect for both personal use and gifting. With just a few simple materials and some easy techniques, even beginner crocheters can tackle this project. One useful tip is to ensure your tension remains consistent while working in the rounds; this will help your button covers fit snugly and look polished.
Why You’ll Love This Crochet Pattern
- Easy to follow instructions make this a great project for beginners.
- Perfect for personalizing hats, jackets, or other garments with drab buttons.
- A fun way to explore crochet techniques, like the popcorn stitch.
- Quick to make, ideal for last-minute gifts or embellishments.
Finished Size
The finished button covers will be approximately the size of a standard button, which may vary based on your yarn choice and tension but generally will fit most flat buttons.
Skill Level
This pattern is beginner-friendly. The stitches used are basic and straightforward, making it an excellent project for those just starting out in crochet.
Materials Needed
- Cream cotton crochet thread
- 1.75mm crochet hook
- 5 flat plastic snap-back button-cover findings
- Tapestry needle
- Scissors
Stitches and Abbreviations
- sc: single crochet
- dc: double crochet
Gauge and Tension Notes
Gauge is not crucial for this project, but maintaining an even tension will help each cover fit nicely over the button finding.
Pattern Notes Before You Start
Each button cover is worked in the round, starting from a magic ring. You will create five identical discs to cover the buttons completely.
Step-by-Step Crochet Instructions
- Make the Magic Ring: Start with a magic ring, ch 1, and work 6 sc into the ring (6).
- Round 2: Make 2 sc in each stitch around (12).
- Round 3 (Popcorn Center): Work 5 dc into the next stitch, drop the loop from your hook, insert your hook in the first dc of the 5, pick up the dropped loop, and pull through to close the popcorn. Then, sc around the remaining stitches of the round to finish it out evenly (12 sts total).
- Round 4: Sc evenly around (12), then slip stitch to join. Fasten off, leaving a tail.
- Repeat: Make 4 more identical discs.
Assembly and Finishing
Center each crocheted disc over a button-cover snap-back finding. Stretch the edge slightly over the back clasp and secure it in place by stitching the outer edge to the finding with a few small tacking stitches. Repeat for all 5 covers.
Helpful Tips
- Use a stitch marker to keep track of your rounds, especially when working in the round.
- If you struggle with the magic ring, you can start with a regular chain and join it into a circle, then crochet the first round into the ring.
- Keep stitches loose to avoid any puckering.
Common Mistakes to Avoid
- Make sure not to skip stitches during increases; it can throw off your stitch count.
- Watch your tension; if it’s too tight, the covers won’t fit over the buttons well.
- Not fastening off properly can leave your work unraveling, so ensure to secure the last stitches.
Customization Ideas
- Experiment with different yarn colors or textured yarn to create unique button covers.
- Add embellishments such as beads or small flowers to personalize your covers.
- Adjust the size by changing the hook and yarn weight.
How to Use or Display This Crochet Project
These button covers can easily be used to spruce up your wardrobe. They’re great for adding a personalized touch to jackets, bags, or hats. You can also create themed covers for holidays or special occasions.
Care Instructions
To clean your finished button covers, hand wash them gently in lukewarm water with mild detergent. Lay flat to dry, reshaping them if necessary to maintain their form.
Frequently Asked Questions
1. Can I use different yarn types?
Yes, any similar weight yarn can work, but be cautious of altering the final size.
2. What if I can’t make a magic ring?
You can substitute it with a chain and join it into a circle, then work your first round into that chain.
3. How do I secure my stitches?
Always finish your last stitch and weave in any loose ends with a tapestry needle.
4. Can I use these covers on large buttons?
While the pattern is designed for standard-sized buttons, you can adjust the stitch count in the pattern to modify the size of the covers.
You might also enjoy creating complementary accessories such as flower-themed hair clips. Check out this beginner-friendly hair comb pattern for an ideal next project. Alternatively, you can explore other lovely crochet items, such as the Lily Bell crochet shoe clips set to further embellish your wardrobe.
By taking on this crochet button cover set, you’ll not only enhance your skills but also create something genuinely useful and visually appealing. Happy crocheting!



