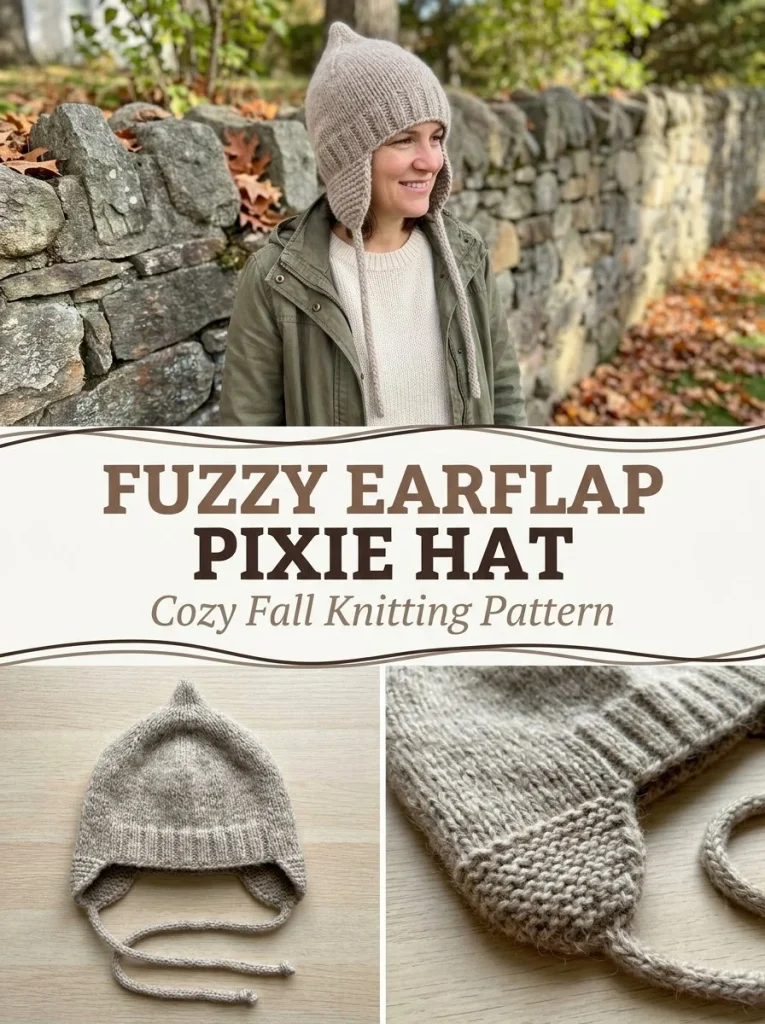
The Fuzzy Earflap Pixie Hat is a delightful project that is perfect for keeping warm during chilly weather. This charming hat not only provides warmth but also features adorable earflaps that add a bit of whimsy to your outfit. Using bulky brushed wool or a wool-blend yarn, you’ll create a cozy accessory with visual appeal. Whether you’re preparing for winter adventures or making a thoughtful gift, this pattern will guide you through each step to achieve a lovely finished piece. If you’re also seeking inspiration for other cozy accessories, consider checking out this acorn brown keyhole scarf knitting pattern.
Skill Level
This pattern is suitable for an intermediate skill level. It requires familiarity with basic knitting techniques, including casting on, ribbing, and decreases. The incorporation of special stitches and the construction of earflaps may require additional concentration but are achievable with a bit of practice.
Materials
To create your Fuzzy Earflap Pixie Hat, gather the following materials:
- Bulky #5 brushed wool or wool-blend yarn (180–220 yards / 165–200 meters)
- US 10 / 6 mm 16-inch circular needle
- DPNs or magic-loop needle for the crown
- Same size straight/circular needle for earflaps
- 8 stitch markers
- Tapestry needle
- Scissors
Abbreviations — US Terms
- K – knit
- P – purl
- ssk – slip, slip, knit (decrease)
- k2tog – knit two together (decrease)
- st(s) – stitch(es)
Special Stitches
ssk (slip, slip, knit)
- Slip the first stitch knitwise.
- Slip the second stitch knitwise.
- Insert the left needle into the front of both stitches and knit them together.
k2tog (knit two together)
- Insert the left needle into the front of the next two stitches.
- Knit them together.
Gauge
While gauge is not essential for this project, maintaining consistent tension will ensure a better fit. If you choose to check your gauge, aim for a stitch count of approximately 14 stitches per 4 inches in stockinette on the appropriate needle size.
Finished Size
The finished hat measures approximately 18–22 inches in circumference at the head. The earflaps add additional coverage.
Pattern Notes
- This project is worked in the round for the hat body and includes flat knitting for the earflaps.
- Be sure to join rounds carefully without twisting the stitches.
- Use stitch markers to help track your rounds easily.
- The hat begins with ribbing and transitions into stockinette stitch, forming a snug, warm piece.
Crochet Instructions
Hat Body
Round 1
- Cast on 72 stitches using your circular needle.
- Join to work in the round, ensuring that the stitches are not twisted.
- Place a stitch marker to signify the beginning of the round.
Rounds 2–11
- *K1, P1; repeat from * around until you reach approximately 2 inches (5 cm) of ribbing.
- This establishes the brim of your hat.
Rounds 12-Onward
- Continue working in stockinette stitch (knitting every round) until the piece measures 7 inches (18 cm) from the cast-on edge.
Pointed Crown
- Place 8 stitch markers evenly spaced around the hat—there should be 9 stitches between each marker.
- Decrease Round: Begin the round by knitting to 2 stitches before the marker, then knit 2 together (k2tog), and slip the marker. Repeat this action around the hat, resulting in 8 stitches decreased.
- Knit 2 rounds even. Repeat the decrease round followed by 2 plain rounds until 24 stitches remain.
- Next, work the decrease round every other round until 16 stitches remain.
- Knit 3 rounds even to elongate the point of the pixie hat.
- On your next round, *K2tog; repeat from * around until you have 8 stitches remaining.
- Cut the yarn, leaving a 10-inch (25-cm) tail. Draw it through the remaining stitches and fasten securely.
Earflaps
- Lay the hat flat, positioning the beginning-of-round marker at the back.
- Mark each side of the hat for earflap placement.
- First Earflap: With the right side facing you, pick up and knit 17 stitches along the lower edge, centered over one side of the hat.
Row 1 (WS)
- Purl every stitch across.
Row 2 (RS)
- K1.
- ssk.
- Knit to last 3 stitches, k2tog, then finish with K1.
- Repeat Rows 1–2 until 5 stitches remain.
Row 3 (RS)
-
K1, ssk, then k2tog. You will have 3 stitches remaining.
-
Work a 3-stitch I-cord for 9 inches (23 cm) and then bind off.
-
Repeat the steps above for the second earflap, ensuring both earflaps match in length before tying off.
Finishing
Once both earflaps have been completed, it’s time to weave in any loose ends with your tapestry needle. Lightly steam or wet block the hat, taking care not to flatten the fuzzy halo created by the yarn. The finished hat should fit snugly around the head, presenting two matching earflaps along with one soft pointed crown. For additional inspiration on accessories, the strawberry baby hat knitting pattern might be a lovely next project to consider!
Care
Due to the nature of brushed wool, it is advisable to hand wash the hat in cold water and lay it flat to dry to maintain its fuzzy texture. Always refer to the yarn label for specific care instructions.
With this thorough guide, you now have all the information needed to create your very own Fuzzy Earflap Pixie Hat. Happy knitting!



