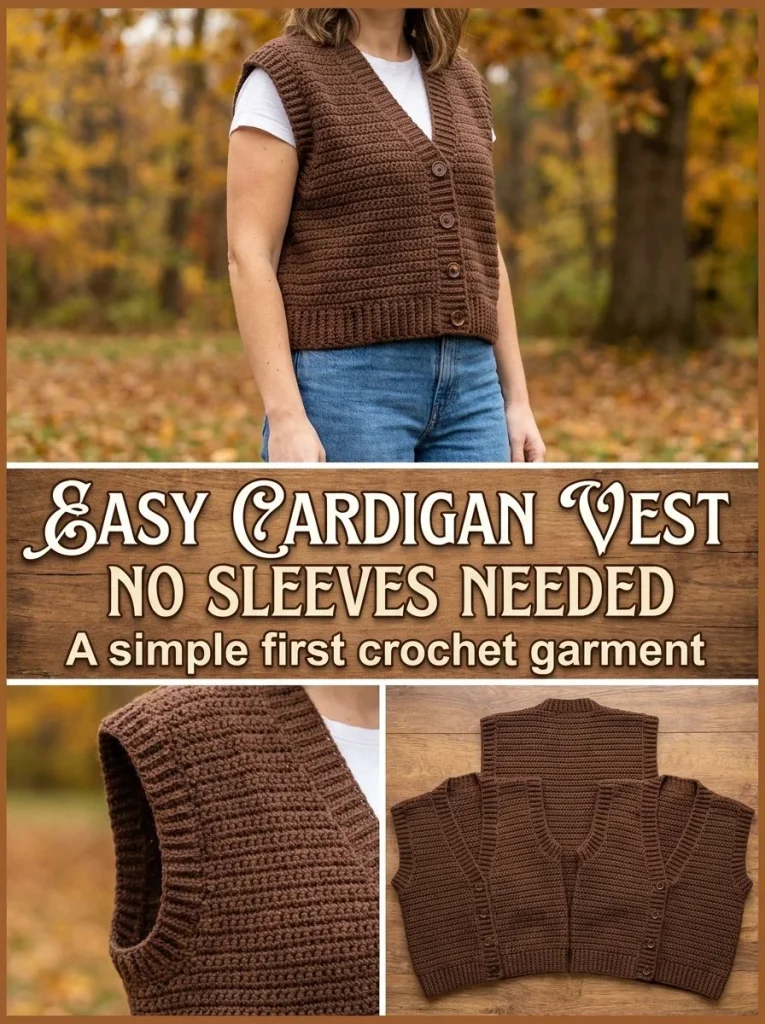
The Sleeveless Button Cardigan Vest is a fantastic addition to any wardrobe, providing a versatile layering piece that can complement multiple outfits. This vest, perfect for transition seasons, can be easily crafted with a few straightforward crochet techniques. Whether you’re looking to cozy up in a classic ribbed design or prefer the charm of stripes, either classic ribbed option or the striped version can enhance your skills and boost your crochet repertoire.
Skill Level
This project is suitable for the Confident Beginner crocheter. While it involves basic stitches, the techniques of decreasing and shaping require a bit of practice. Beginners who are comfortable with half double crochet stitches and have some experience with seam joining will find this project manageable and rewarding.
Materials
For this cardigan vest, you will need the following materials:
- Worsted-weight #4 yarn
- 5mm crochet hook
- 4 buttons
- Tapestry needle
- Stitch markers
- Measuring tape
- Gauge: approximately 14 hdc = 4 inches (10 cm)
Abbreviations — US Terms
- ch – chain
- sl st – slip stitch
- sc – single crochet
- hdc – half double crochet
- st(s) – stitch(es)
- sp – space
Special Stitches
Half Double Crochet (hdc)
To work a half double crochet stitch, yarn over, insert your hook into the stitch, yarn over again, pull through (three loops on the hook), yarn over once more and pull through all three loops.
Gauge
It’s important to check your gauge for this project. Achieving a gauge of approximately 14 hdc = 4 inches (10 cm) is essential for ensuring that your vest fits well.
Finished Size
The finished size of the cardigan vest will depend on the selected bust measurement. The design includes approximately 4-8 inches of positive ease for comfort and layering.
Pattern Notes
- The vest is constructed in rows.
- The back and front sections are worked separately.
- Shoulder seams are joined at the end.
- Ensure you use stitch markers to keep track of stitch counts and important points.
Crochet Instructions
Part 1 – Back of Vest
Foundation Chain:
Start by determining your finished bust size. Divide this value in half to calculate the width of the back piece. Chain to the calculated width + 1 for turning (e.g., if the finished bust width is 36 inches, chain 19).
Row 1
- Begin by yarn over and working 1 hdc into the second chain from the hook.
- Continue working 1 hdc in each chain across.
- At the end of the row, you should have the calculated number of hdc.
- Turn your work.
Total: [Calculated number] hdc
Row 2
- Chain 1 (this does not count as a stitch).
- Work 1 hdc into the first st and continue to the last st.
- Repeat Row 2 until the piece measures the desired length from hem to shoulder, approximately 14 inches.
Part 2 – Fronts of Vest
Each front piece begins at approximately one-quarter of the finished bust width:
Foundation Chain:
Chain to one-quarter of your total finished bust width + 1.
Row 1
- Yarn over and work 1 hdc into the second chain from the hook.
- Continue working hdc across.
- At the end of this row, you will have the calculated number of hdc.
- Turn your work.
Total: [Calculated number] hdc
Rows 2-10
Work in hdc for 8-10 inches, depending on how deep you’d like your V-neck.
Decrease for V-neck
Row 11 and forward:
- Work hdc across until you reach the last 2 stitches.
- For the next few rows, decrease by working 2 hdc together at the inner edge every second row.
- Continue until you have decreased down to three stitches.
Make a mirror image of this front piece.
Part 3 – Joining Seams
- Join shoulder seams by placing the two front pieces on top of the back piece and using slip stitching or whip stitch to connect.
- For side seams, join from the bottom hem to the measured armhole depth (approximately 8-10 inches).
Part 4 – Finishing Armholes and Neck
Armholes:
- Work 2-3 rounds of sc evenly around each armhole. This will provide a clean finish.
- For the neck, work 3-5 rounds of sc continuously around the front and back neck edges.
Part 5 – Buttonholes and Buttons
- On one front side, create exactly 4 evenly spaced buttonholes. These can be made by chaining 2 and skipping 2 stitches.
- On the opposite side, sew on the 4 buttons.
Part 6 – Hemming the Bottom
Add back-loop sc ribbing or simply work several rounds of sc around the bottom hem for added structure.
How to Resize
Resizing can be done easily during the foundation chain. Just ensure to maintain the same proportions for front and back pieces. If you want a looser fit, maintain the balance of positive ease and adjust your foundation chains accordingly.
Tips for the Best Result
- Use stitch markers to help maintain stitch counts, especially around corners and where you decrease.
- Pay attention to the joining of seams; this will affect the overall drape and fit of your vest.
- Don’t rush the finishing rounds around the neck and armholes; this provides a polished look.
Common Mistakes
Uneven Armholes
Ensure that both armholes are worked to the same depth before joining.
Buttonholes Misalignment
Double-check your measurements for buttonhole placement to ensure they align properly with the buttons on the opposing side.
Finishing
Once the vest is completed, weave in all ends using a tapestry needle. Blocking can help even out stitches and shape the vest as desired. Take care to lay the vest flat for drying to maintain its shape.
Care
Always refer to your yarn label for specific washing instructions. Generally, hand washing in cold water and laying flat to dry will extend the life of your crochet items.
In creating this stylish sleeveless vest, you not only enhance your crochet skills but also craft a timeless piece that can enrich your wardrobe. This layering vest is practical yet stylish, perfect for various occasions. Enjoy your crafting!



