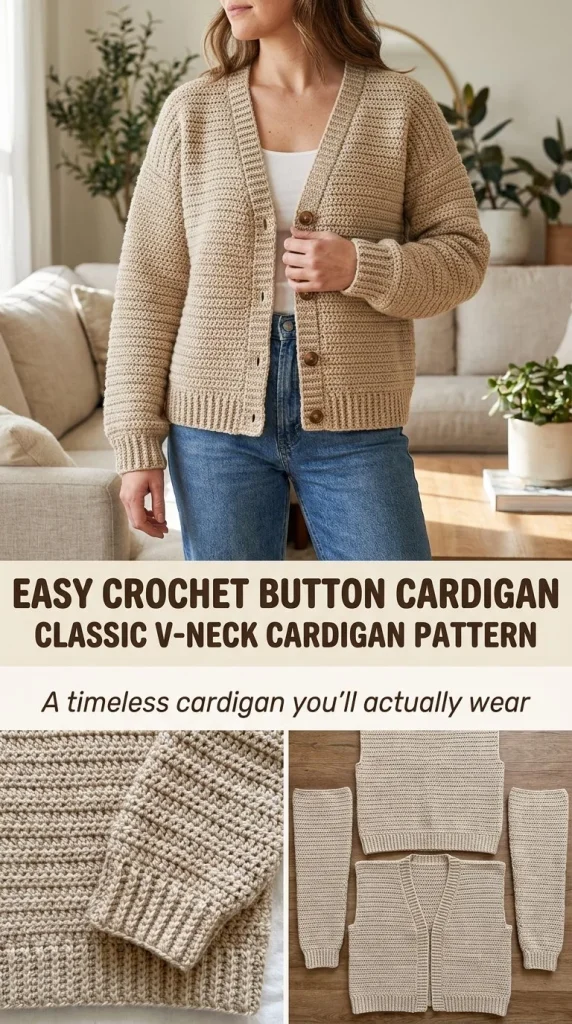
This Classic Ribbed V-Neck Button Cardigan pattern is an easy yet stylish crochet project that every crocheter can enjoy. It’s perfect for those looking to create a warm and fashionable addition to their wardrobe. With only a few materials and straightforward instructions, you can make a cardigan that will surely impress! If you’re also interested in enhancing your crochet accessories, consider checking out this cute bag charm pattern.
Skill Level
This pattern is suited for Confident Beginner crocheters. You should be comfortable with basic stitches like half double crochet and seaming, but the straightforward instructions will guide you clearly through the construction of the cardigan.
Materials
To get started, you will need the following materials:
- Worsted-weight #4 yarn
- 5mm crochet hook
- 4 medium buttons
- Tapestry needle
- Stitch markers
- Measuring tape
- Gauge: 14 hdc x 10 rows = 4 in/10 cm
Abbreviations — US Terms
Here are the abbreviations used in this pattern:
- ch – chain
- hdc – half double crochet
- st(s) – stitch(es)
- sp – space
- BLO – back loop only
Gauge
Make sure to maintain the correct gauge for your cardigan so that it fits well. The gauge for this pattern is 14 hdc × 10 rows = 4 in/10 cm. Achieving this ensures that your finished project matches the intended size.
Finished Size
The sizing of the cardigan can be adjusted based on the finished bust measurement you choose. The back panel width is calculated as half of the finished bust measurement, allowing for 4-6 inches of positive ease.
Pattern Notes
Before you begin, consider the following:
- The cardigan is worked in rows.
- Begin with a foundation chain that corresponds to your desired back width.
- Hdc stitches will create the body of the cardigan, and be sure to ch 1 at the end of each row as your turning chain.
- The cardigan consists of a back panel and two front panels, each with a rounded neckline formed by decreasing stitches.
Crochet Instructions
Back Panel
-
Foundation Chain: Choose the finished bust size you want to make and divide it by 2 to get the back panel width. Multiply that number by 3.5 (the gauge in stitches per inch) and round it to the nearest whole number. Chain that number plus 1.
-
Row 1: Hdc in the 2nd chain from the hook. Work across the chain to the end. You should have a total of X hdc (where X is your specified number).
-
Row 2: Ch 1, turn your work. Hdc in each st across.
-
Repeat Row 2: Continue this until you reach your desired hip-to-shoulder length.
Total hdc at end of this section: X (depends on your initial foundation chain).
Front Panels
-
Start: For each front panel, construct your foundation chain that begins approximately one-quarter of your finished bust width.
-
Rows: Work straight in hdc until you reach about 8-10 inches below the shoulder.
-
Decreases for Neckline:
- At the inner neckline edge (the side closest to the center), decrease 1 hdc every 2nd row until the shoulder section matches the corresponding width of the back shoulder.
- This will create the neckline shape.
-
Mirror Image: Make a second front panel as a mirror image of the first.
Sleeves
- Rectangles: Crochet two straight rectangles. Each should be wide enough to accommodate the upper arm along with 2-3 inches of ease. Make them long enough to reach from the dropped shoulder to the wrist.
Joining Sections
-
Seam Shoulders: With a slip stitch or whip stitch, seam the shoulders of the back panel to the front panels.
-
Attach Sleeves: Center the sleeves on the shoulder seams and sew them in place.
-
Seam Sides: Seam the sides of the body and sleeves together.
Ribbing Edges
-
Cuffs and Bottom Hem: Work back-loop single crochet (BLO sc) ribbing at the cuffs and bottom hem. This will create a neat finish.
-
Front Edges and Neck: Work 3-5 rows of sc around both front edges and the back neck.
Buttonholes and Buttons
-
Buttonholes: On one front band, create exactly 4 evenly spaced buttonholes by chaining 1 and skipping 1 stitch.
-
Buttons: Sew exactly 4 buttons opposite the buttonholes.
Finishing Touches
-
Blocking: Block your cardigan to the specified measurements, which will help even out the stitches and provide a polished finish.
-
Weaving in Ends: Finally, use a tapestry needle to weave in any yarn ends to ensure a clean look.
If you’re also interested in making some jewelry to pair with your new cardigan, consider this easy mini jewelry pattern for a lovely wrist cuff!
Care
To care for your cardigan, follow the washing instructions provided with your yarn. Typically, hand washing in cold water is recommended to maintain the integrity of the crochet stitches, ensuring your cardigan stays beautiful for years to come.
By following these detailed steps, you’ll create a beautiful Classic Ribbed V-Neck Button Cardigan that you can wear with confidence. Happy crocheting!



