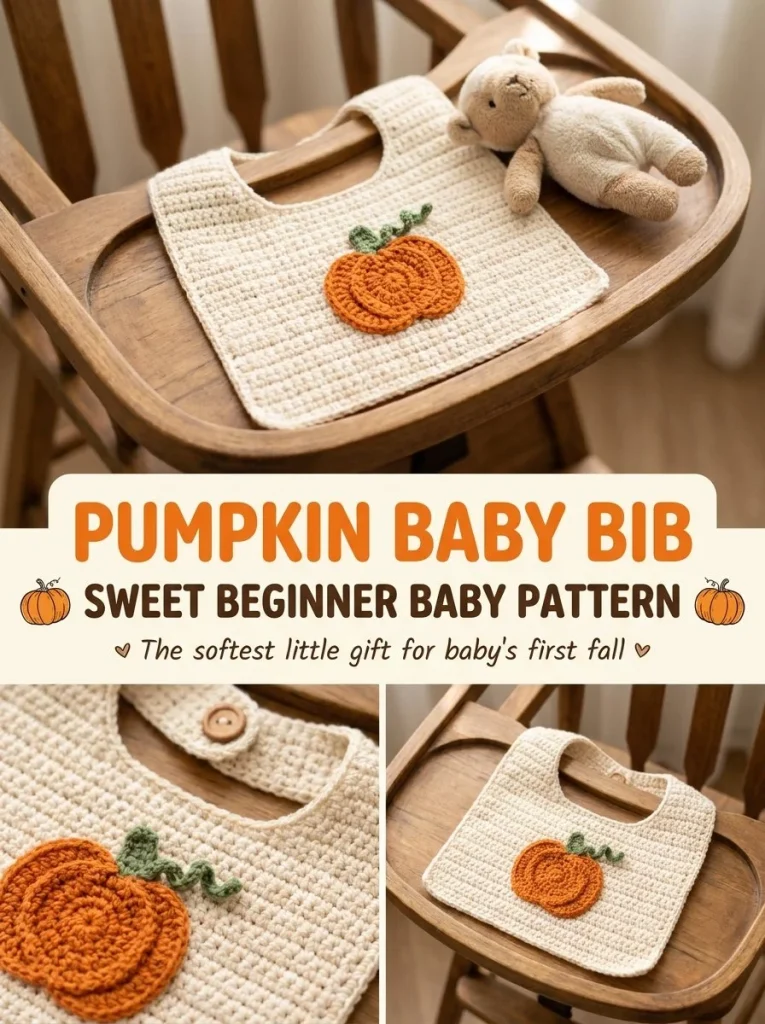
Creating a pumpkin baby bib is a delightful way to combine practicality with a touch of seasonal charm. This sweet beginner-friendly crochet pattern is perfect for new parents who want to add a cozy and adorable accessory to their baby’s wardrobe. Its simple construction makes it an excellent project for those just starting with crochet or for more experienced makers looking for a quick and enjoyable project. Plus, it can easily be a thoughtful gift for baby showers or birthdays. As you work, pay attention to the shaping; folding the top to create a rounded bib shape can help ensure a better fit and aesthetic.
Why You’ll Love This Crochet Pattern
- Quick and easy to make, ideal for beginner crocheters.
- Requires minimal materials and is budget-friendly.
- Perfect for gifting or for your own little pumpkin during autumn.
- Customizable: choose your favorite colors for the pumpkin motif.
- This bib serves practical use while being stylish at the same time.
Finished Size
The finished bib will measure approximately 7 inches across, but size may vary depending on the yarn, hook, and individual tension.
Skill Level
This pattern is rated as beginner. The straightforward stitches and simple construction provide a great opportunity for new crocheters to build their skills.
Materials Needed
- Soft cream cotton yarn (worsted weight)
- Small amount of orange yarn for the pumpkin motif
- Small amount of brown yarn for the stem
- 4mm crochet hook
- 1 button
- Tapestry needle
- Scissors
Stitches and Abbreviations
- sc: single crochet
- ch: chain
- st: stitch
Gauge and Tension Notes
Gauge is not critical for this pattern, but maintaining even tension will help your bib look neat. Aim for a firm yet flexible fabric to ensure a good shape.
Pattern Notes Before You Start
The bib is worked in rounds from the center out. You’ll be making increases regularly until reaching the desired size. Afterward, allow the fabric to flatten slightly by working one round evenly.
Step-by-Step Crochet Instructions
- Begin with a magic ring, ch1, and crochet 6 sc into the ring (6).
- Round 2: Work 2 sc in each st around (12).
- Round 3: sc1, 2sc in next st around (18).
- Round 4: sc2, 2sc in next st around (24).
- Continue following this increase pattern until your circle measures approximately 7 inches across.
- Stop increasing and work one round even to finish the base.
- Fasten off your work.
- For the strap, chain a length that fits comfortably around a baby’s neck and sc into the 2nd ch from the hook and across. Fasten off and sew to the top back of the bib on both sides, using a buttonhole and button closure.
- To create the pumpkin motif, again start with a magic ring, ch1, and 6 sc into the ring (6), fasten off. Use orange thread to stitch straight lines to mimic ridges, and sew the motif to the center front of the bib.
- Lastly, for the small brown stem, chain 3, sc across, then sew it above the pumpkin motif.
Assembly and Finishing
Join any ends securely and weave in all loose threads to give your bib a polished appearance. When shaping, ensure the bib has a nice round form, which adds to its cuteness. The button closure should be easy for caregivers to manage.
Helpful Tips
- Be mindful of your tension; this helps ensure your bib retains its shape.
- Use a stitch marker to keep your place, especially during increases.
- If the pumpkin motif looks flat, try using a slightly lighter tension for that section.
Common Mistakes to Avoid
- Forgetting to chain or increase as instructed can affect sizing.
- Not verifying the magic ring is closed can lead to holes.
- Over-tightening stitches can create an uncomfortable fit around the neck.
Customization Ideas
- Experiment with various colors for the bib or the pumpkin.
- Add embellishments like embroidery or small appliqués for a personal touch.
- Adjust the size by modifying your chain lengths and the number of rounds.
How to Use or Display This Crochet Project
The finished pumpkin baby bib is perfect for mealtime, helping to keep babies clean while adding a fun seasonal flair. It’s equally adorable for dressing up a baby for photos or gatherings.
Care Instructions
To keep the bib looking its best, hand wash in cold water and lay flat to dry. Avoid bleach, as it can damage the yarn fibers.
Frequently Asked Questions
-
Can I use a different yarn?
Yes, just ensure it is a soft, baby-friendly material to keep the bib comfortable. -
What if the bib is too large or too small?
Adjust your tension or the number of increase rounds according to the design suggestions. -
Can I make this pattern bigger?
Absolutely! Simply increase the number of stitches within the round before adding more even rounds. -
How do I clean the bib?
Hand washing is recommended to preserve the yarn integrity.
Final Thoughts
Creating a pumpkin baby bib is a wonderful way to practice your crochet skills while crafting something both useful and charming. Not only does it serve a practical purpose, but it also allows for creativity in color and design. Happy crocheting! If you enjoyed making this bib, consider trying other crochet projects like the pumpkin brooch pin for a complementary accessory. Alternatively, check out the mini amigurumi pumpkin pattern for added fun!



