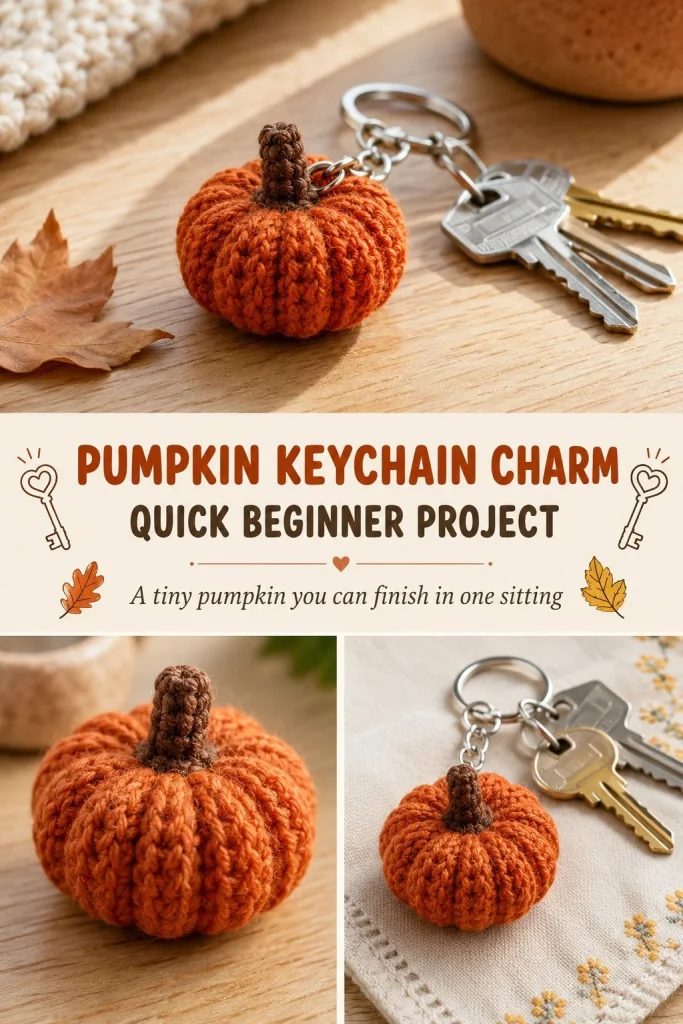
This pumpkin keychain charm is a quick, beginner-friendly crochet project that adds a cozy, seasonal touch to your everyday accessories. Crafted in a compact size, it’s perfect for tying onto bags, keys, or gifting as a small handmade token. Using basic stitches and easy shaping, you’ll create a plump little pumpkin with a neat brown stem, all crocheted in the round. The magic ring start and single crochet construction help keep the shape tight and satisfying to work up. Based on my experience with similar mini crochet projects, gently adjusting stuffing as you go makes all the difference in achieving a smooth, firm pumpkin that holds its charm well. If you’re exploring beginner designs, this pumpkin pairs nicely with other quick amigurumi projects like this mini amigurumi pumpkin pattern which also focuses on simple shaping and clean finishing.
Why You’ll Love This Crochet Pattern
- Quick to make with only about 20-30 minutes of focused crocheting
- Uses basic beginner stitches: magic ring, single crochet, and decreases
- Compact size makes it a great portable project for travel or breaks
- Small amount of yarn needed, ideal for scraps or color experiments
- Practical gift idea for holidays or autumn decor
- Firm shape is easy to achieve with simple stuffing and pinch closure
Finished Size
The pumpkin keychain charm measures approximately 2 inches (5 cm) tall without the stem, with some variation depending on yarn thickness, hook size, and individual tension. The delicate stem adds about 1 inch (2.5 cm) to the overall height, making it perfect for keyrings or bag charms.
Skill Level
This pattern is suitable for beginner crocheters who have basic knowledge of working in rounds and single crochet stitches. Learning the magic ring and single crochet decreases (sc2tog) will be key shaping techniques that provide a gentle challenge without overwhelming newcomers.
Materials Needed
- Light worsted weight (aran) yarn in rust-orange for the pumpkin body
- Small amount of brown yarn for the stem
- 3.5mm (E) crochet hook
- Polyester fiberfill stuffing, small amount
- Keyring or split ring for attaching
- Tapestry needle for sewing and weaving in ends
- Scissors
Stitches and Abbreviations
- ch: chain
- sc: single crochet – insert hook, yarn over, pull up a loop, yarn over, pull through both loops on hook
- sc2tog: single crochet two together (decrease) – insert hook into next stitch, yarn over and pull up loop, insert hook into following stitch, yarn over and pull up loop, yarn over and pull through all loops
- magic ring: adjustable loop to start work in the round
Gauge and Tension Notes
Gauge is not critical for this project since it’s a small amigurumi-style charm. However, maintaining a consistent, slightly firm tension is recommended to avoid gaps where the stuffing might show through. Avoid crocheting too loosely as this will affect the shape and neatness.
Pattern Notes Before You Start
This pumpkin is crocheted entirely in continuous rounds from the bottom up using the magic ring start. After shaping the body with increases and decreases, you will crochet a simple stem separately and sew it on. The stuffing is added during shaping rounds to maintain a firm and rounded silhouette. The rust-orange body and brown stem are worked in two separate sections and joined by sewing after completion.
Step-by-Step Crochet Instructions
- Using rust-orange yarn, create a magic ring.
- Round 1: ch 1, 6 sc into the magic ring (6 sts).
- Round 2: 2 sc in each stitch around (12 sts).
- Round 3: sc evenly around (12 sts). Begin lightly stuffing with fiberfill to keep the pumpkin firm.
- Round 4: sc 1, sc2tog repeat around (8 sts).
- Round 5: sc2tog around (4 sts).
- Fasten off, leaving a long tail. Pull the tail tight to cinch closed the pumpkin top firmly.
- With brown yarn, chain 5 for the stem.
- sc into the 2nd ch from the hook and across (4 sc).
- Fasten off, leaving a long tail for sewing.
- Using the tapestry needle, sew the stem flat to the top center of the pumpkin.
- Either use the stem yarn loop or add a small separate loop to attach the keyring securely.
- Weave in all ends inside the pumpkin to keep the finish clean.
- Adjust the stuffing density before closing tightly for the best shape.
- Attach the keyring through the stem loop.
Assembly and Finishing
Carefully sew the brown stem piece to the gathered top of the pumpkin, ensuring it lies flat for easy keyring attachment. Make sure all yarn tails are woven inside the pumpkin to avoid unraveling. Adjust stuffing as needed while closing the top cinch to maintain the rounded shape. Using a small loop from the stem yarn for the keyring keeps the project neat and prevents bulk.
Helpful Tips
- Slightly overstuff the pumpkin before the last decrease rounds to keep it plump but avoid lumps.
- If the stem feels flimsy, you can add a small wire inside before sewing it on to hold shape better.
- Pull the tail tightly after fastening off the top to create a neat, gathered appearance.
- Use a smaller crochet hook size if you notice gaps forming in the fabric.
- Practice the magic ring separately if it’s new to you; it makes amigurumi much easier.
- For a seasonal twist, try adding simple embroidered lines on the pumpkin to mimic ribbing.
Common Mistakes to Avoid
- Not pulling the magic ring tightly enough, which causes a hole in the pumpkin bottom.
- Overstuffing, making it hard to close the top smoothly.
- Crocheting too loosely, which exposes fiberfill through gaps.
- Sewing the stem crooked or bulky – keep it flat and centered for best look.
- Forgetting to leave long tails for sewing and cinching the top.
Customization Ideas
- Use variegated or textured yarn for a unique pumpkin surface.
- Add a small leaf shape crocheted in green for extra decoration.
- Make the pumpkin larger by adding extra rounds of increase before stuffing.
- Attach a tiny bell or bead inside for a jingly keychain sound.
- Try this same technique with other autumn colors, like mustard yellow or deep brown.
How to Use or Display This Crochet Project
This pumpkin keychain charm is perfect for adding seasonal flair to your daily keys, backpacks, or purses. It makes a thoughtful handmade gift or stocking stuffer during fall and Halloween seasons. Display it on a decorative hook along with other cozy accessories, or use it as a small ornament tied to gift packages for a personal touch.
Care Instructions
Spot clean with a damp cloth or hand wash gently in cool water with mild soap. Reshape and air dry flat away from direct heat or sun. Store in a cool, dry place to prevent yarn discoloration or distortion. Avoid machine washing to maintain the pumpkin’s firm shape and neat stitches.
Frequently Asked Questions
Q: Can I use bulky yarn for this pattern?
A: Bulky yarn will make a much larger pumpkin and may alter stitch counts. It’s best to stick to light worsted (aran) yarn for the intended size.
Q: How do I fix a hole at the bottom after the magic ring?
A: Make sure to pull the magic ring tightly before the first round is completed. If a hole persists, you can stitch it closed with a tapestry needle.
Q: Can I make the stem longer?
A: Yes, simply chain more stitches before crocheting the sc across to extend the stem length.
Q: Is it okay to skip the stuffing?
A: Stuffing gives the pumpkin its plump shape and fullness. Without it, the pumpkin will be flat and lose its charm.
Q: How do I add a keyring if I don’t want to use the stem loop?
A: You can stitch an additional small loop with the brown yarn near the stem or sew the keyring directly to the top seam before closing.
Final Thoughts
This pumpkin keychain charm is a delightful and practical project that brings a little handmade warmth to everyday items. Whether you’re gifting it or keeping it for yourself, it’s a satisfying beginner project that creates instant seasonal charm. For those interested in expanding their beginner crochet repertoire with more sweet accessories, exploring a simple floral crochet hair comb can be a lovely next step that builds on basic stitches and neat finishing. Happy crocheting!



