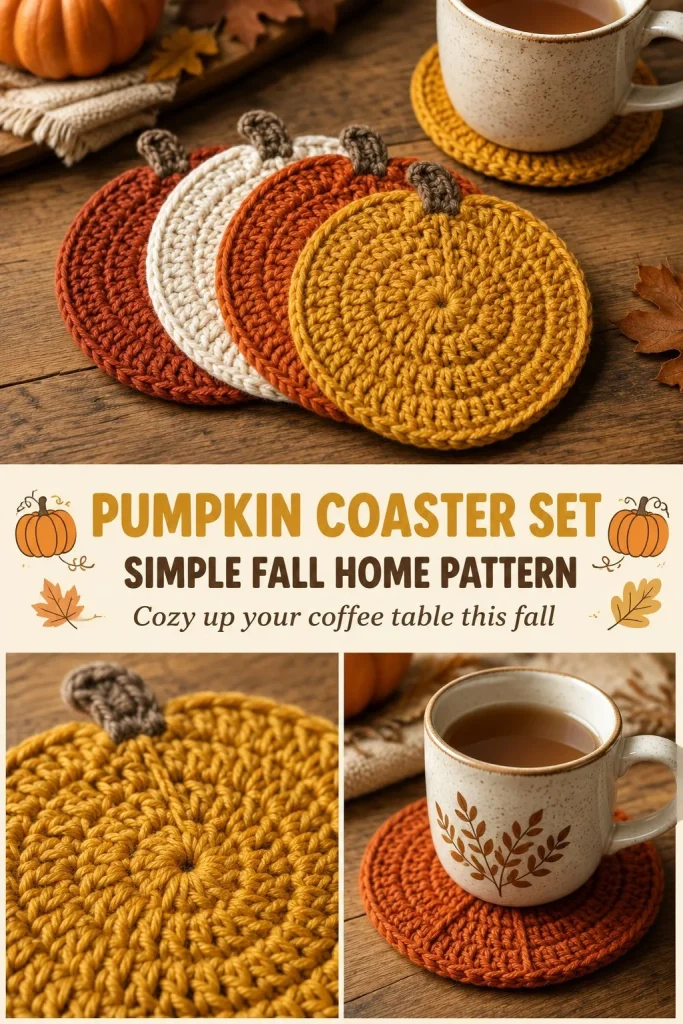
This charming Pumpkin Coaster Set is an easy, beginner-friendly crochet project that adds a cozy touch to your fall décor. Perfect for protecting your tables from cold or warm drinks, these crochet coasters blend practicality with seasonal style in four warm autumn shades: mustard, burnt-orange, cream, and rust. I love how simple rounds grow into perfectly round coasters that fit cups and mugs snugly. Beginners will appreciate the straightforward stitch pattern and gradual increases, making it a rewarding first project if you’re looking to practice working in the round. For a festive vibe, these coasters pair wonderfully alongside other seasonal crochet projects like a pumpkin bunting banner, which adds an extra layer of handmade charm to your home this fall.
Why You’ll Love This Crochet Pattern
- Simple step-by-step instructions perfect for beginners and intermediate crocheters.
- Uses only basic stitches, making it an excellent practice piece to master single crochet and working in the round.
- Multiple colors create a warm, autumnal palette that fits any fall-themed setup.
- Quick to crochet – each coaster works up in just a short knitting session.
- Ideal for gifting, especially as a set for housewarmings or seasonal visits.
- Made with cotton yarn, the coasters are durable, absorbent, and easy to care for.
Finished Size
Each finished coaster measures approximately 4 inches (10 cm) in diameter. Keep in mind that the exact size may vary slightly depending on your yarn choice, hook size, and crochet tension. Blocking the coasters gently after completion will help achieve a neat, consistent shape.
Skill Level
Easy beginner. This pattern is suitable for anyone who has basic knowledge of single crochet (sc) and can work with magic rings. The gradual stitch increases make it easy to follow, and the repetition helps you gain confidence working in continuous rounds.
Materials Needed
- Cotton yarn, DK or light worsted weight, in four colors: mustard, burnt-orange, cream, and rust
- 4mm (G) crochet hook
- Tapestry needle for weaving in ends
- Scissors
- Stitch markers (optional, but helpful for marking rounds)
Stitches and Abbreviations
- Ch = Chain
- Sc = Single crochet: insert hook, yarn over, pull through yarn, yarn over, pull through two loops
- Sl st = Slip stitch: insert hook into stitch, yarn over, pull through stitch and loop on hook
- Magic ring: an adjustable ring to start crocheting in rounds
- Repeat instructions in parentheses indicate stitch count for each round
Gauge and Tension Notes
Exact gauge is not crucial for this coaster set, but maintaining consistent tension will ensure even, flat coasters. A looser tension may create floppy shapes, while overly tight stitches can cause curling. Aim for a moderately firm but flexible texture so the coaster lies flat and absorbs moisture well.
Pattern Notes Before You Start
The coasters are crocheted in continuous rounds, starting with a magic ring. Each round increases evenly to form a perfect circle with a smooth edge. You will work in a single piece for each coaster without any seams or joins. Color changes occur only when switching to a new coaster – each coaster uses one color. This makes it easy to make a full set with four colors as shown. No stuffing or additional assembly is needed aside from weaving in ends neatly and blocking.
Step-by-Step Crochet Instructions
- Begin with a magic ring.
- Round 1: Ch 1, work 6 sc into the magic ring. (6 stitches)
- Round 2: Work 2 sc in each stitch around. (12 stitches)
- Round 3: Sc 1, 2 sc in the next stitch; repeat around. (18 stitches)
- Round 4: Sc 2, 2 sc in the next stitch; repeat around. (24 stitches)
- Round 5: Sc evenly around (24 stitches). Slip stitch to join the round.
- Fasten off and weave in ends smoothly.
- Repeat these steps with the other three colors to complete the full set of four coasters.
- Block each coaster gently by pinning flat on a towel and spritzing lightly with water if desired to shape and smooth.
Assembly and Finishing
Since these coasters are worked entirely in single pieces, assembly involves just weaving in tail ends securely to avoid unraveling. Use a tapestry needle for neat finishes. After weaving ends, lightly block the coasters to ensure they lie perfectly flat — this helps especially if your tension varies. Pin the coasters on a flat surface with some fabric under and spray lightly with water, allowing them to dry before use. This finishing step smooths out any unevenness in the crochet rounds.
Helpful Tips
- Stitch markers can help you keep track of rounds if you’re new to working in the round.
- Make your initial magic ring tight to prevent a hole in the center of the coaster.
- Keep an even, balanced tension to avoid puckering or curling edges.
- When weaving in ends, do this twice—once on the front and once on the back—for durability.
- Blocking really makes a difference for coasters to maintain their shapely, round design.
- If you’d like sturdier coasters, try holding two strands of yarn together while crocheting (test tension first).
Common Mistakes to Avoid
- Skipping stitch counts on increases, which can cause the coaster to cup or ruffle. Count stitches frequently.
- Leaving holes in the magic ring; be sure to pull tight when starting to avoid gaps.
- Forgetting to slip stitch at the end of the final round can cause an uneven edge.
- Not weaving in ends well, which can lead to unraveling with use or washing.
- Using yarn that’s too bulky or hook that’s too large, resulting in oversized coasters.
Customization Ideas
- Try different color combinations for your fall theme or use variegated yarn for a textured look.
- Adjust size by adding or skipping rounds (add a round 6 with increases for a larger coaster).
- Use a small white embroidery detail on each coaster to mimic pumpkin stems.
- Pair with coordinating seasonal crochet items like a pumpkin garland string to create a festive autumn display.
How to Use or Display This Crochet Project
These cozy coasters are perfect for everyday use on coffee tables, kitchen countertops, or dining areas. They also make thoughtful handmade gifts for housewarmings or seasonal holidays. Display them stacked or spread out with your favorite fall mugs to create a warm, inviting vibe. Store them flat when not in use to keep their shape intact.
Care Instructions
Wash coasters gently by hand or on a delicate machine cycle using cool water and a mild detergent to preserve the cotton fibers. Lay flat to dry to maintain shape and avoid stretching. Avoid using high heat in the dryer, which may distort the stitches or shrink the yarn.
Frequently Asked Questions
Q: Can I use acrylic yarn instead of cotton?
A: Yes, but cotton absorbs moisture better and prevents heat transfer, making it ideal for coasters. Acrylic may be less absorbent but works fine for decorative use.
Q: How do I fix curling edges?
A: Ensure you’re increasing stitches evenly each round. Blocking also helps flatten curled edges.
Q: Can I make these with a different hook size?
A: Yes, but adjust yarn weight accordingly. Use a hook that complements your chosen yarn to keep coaster size consistent.
Q: How many coasters can I make with one skein of cotton yarn?
A: This depends on the yarn weight and skein size, but typically one standard skein can make several coasters since each is small.
Q: Are these coasters machine washable?
A: If using cotton yarn, gentle machine washing on a delicate cycle is generally safe, but hand washing is recommended to prolong life.
Final Thoughts
This Pumpkin Coaster Set is a satisfying, quick project that blends cozy, seasonal charm with practical use. It’s a wonderful way to refine round crochet skills while adding a handmade touch to your autumn home. Whether for yourself or as a gift, these crochet coasters like pumpkin decorations offer warmth and care, stitch by stitch.



