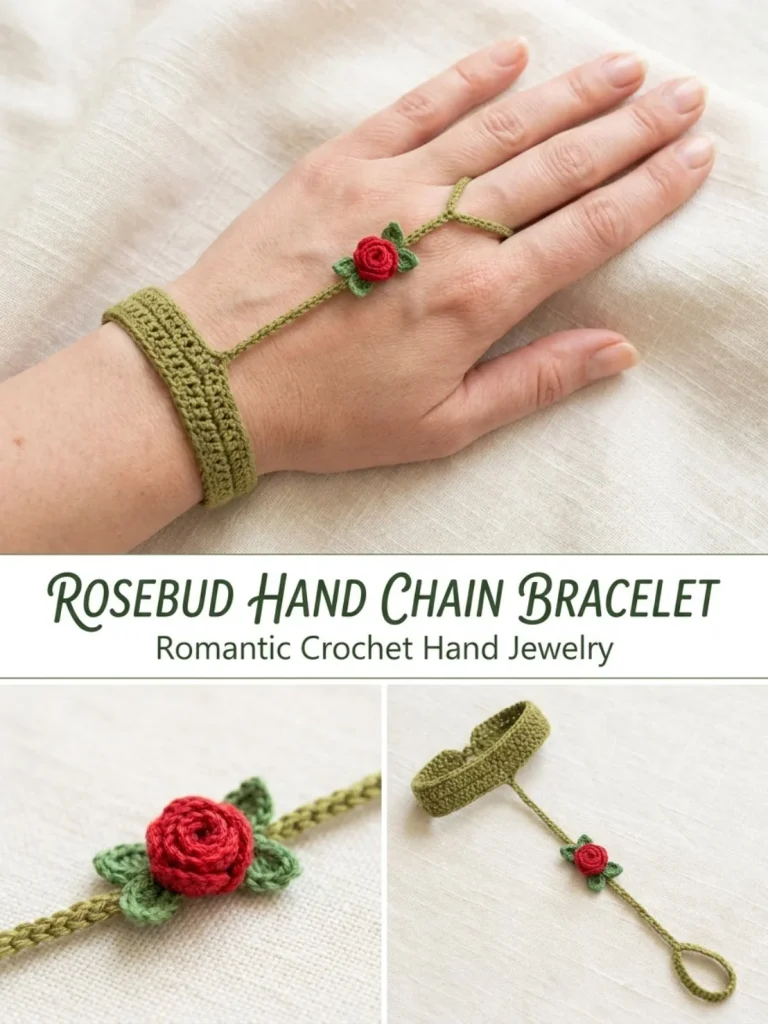
Crafting a crochet Rosebud Hand Chain Bracelet is a delightful project that combines both elegance and functionality. This charming accessory is not only a stylish statement piece but also a great way to express your creativity. Perfect for adding a touch of whimsy to your outfits, it’s also a thoughtful gift for friends or loved ones. I’ve found that this design not only enhances my crochet skills but also provides a satisfying experience when the rosebud comes together beautifully. You may also find Crochet Rosebud Hand Chain Bracelet Pattern useful.
Why You’ll Love This Crochet Pattern
- It’s an accessible project for crochet enthusiasts of all levels, especially beginners.
- The construction techniques are simple yet rewarding, allowing you to create a visually appealing piece.
- It is compact and quick to make, making it perfect for gifts or daily wear.
- You can experiment with colors and textures, making it uniquely yours.
- The bracelet serves as an excellent introduction to exploring 3D crochet elements.
Finished Size
The estimated finished size for the Rosebud Hand Chain Bracelet is around 7 to 8 inches in length, depending on the size of your fingers and wrist, as well as your choice of yarn and tension.
Skill Level
This pattern is suitable for beginners with some prior experience or easy crochet projects. The instructions are straightforward, and most stitches are basic.
Materials Needed
- Size 10 cotton thread in rose red and olive green
- 1.25–1.5 mm steel hook
- Tapestry needle
- Scissors
- Small clasp or tie closure (optional)
Stitches and Abbreviations
- sc: single crochet
- hdc: half double crochet
- dc: double crochet
- sl st: slip stitch
- ch: chain
Gauge and Tension Notes
Gauge is not crucial for this project; however, maintaining consistent tension will help in achieving a neat finish. I recommend practicing on a small swatch if you’re new to the stitches.
Pattern Notes Before You Start
This bracelet is worked in separate pieces—first a finger ring, then a rosebud, leaves, and a wristband. Each part will be joined at the end, so it’s important to keep the pieces organized as you work. The rosebud is formed by rolling a crocheted strip, which can be a fun technique for beginners to master.
Step-by-Step Crochet Instructions
- Finger Ring Base: With olive, chain 18–22 depending on your finger size. Join with a slip stitch into a ring, being careful not to twist. Round 1: sc evenly around. Join and fasten off.
- Rosebud: With red, chain 15. Starting in the 2nd chain from the hook: sc in the next 2 chains, hdc in the next 4 chains, 2 dc in each remaining chain. Fasten off, leaving a long tail. Roll the strip tightly from the narrow end to the wider end to form a bud. Sew through the base to secure.
- Leaves (make 2): With olive, chain 5. Starting in the 2nd chain from the hook: sl st, sc, hdc, sc. Fasten off.
- Connecting Chain: With olive, chain 18–24 from the finger ring to the wrist, depending on your hand size. Slip stitch back along the chain for strength. Sew one end to the finger ring.
- Wrist Band: Chain 45–55. Starting in the 2nd chain from the hook, sc across. Fasten off. Sew the free end of the connecting chain to the center of the wrist band. Sew the rosebud and leaves over that join.
- Finish the wrist band with a clasp or long ties. Weave in all ends.
Assembly and Finishing
To assemble, ensure that all pieces are securely sewn together, especially where the rosebud meets the wrist band. This provides a neat, professional finish. Weave in any ends to prevent fraying.
Helpful Tips
- When rolling the rosebud, take your time to ensure it’s tight for a better shape.
- Use a stitch marker if needed to keep track of your rounds.
- Consider blocking the finished bracelet lightly for a polished look.
- Experiment with color combinations to match your outfits.
Common Mistakes to Avoid
- Avoid twisting the ring base when joining, which can lead to a frustrating final result.
- Make sure the rosebud is securely sewn to the base to prevent it from coming loose.
- Keep your tension consistent to avoid uneven stitches.
Customization Ideas
- Use different colors for the leaves or rosebud to match seasonal themes.
- Try mixing yarn textures for a unique touch.
- Add beads or charms for extra sparkle.
- Adjust the size of the connecting chain for a customized fit.
How to Use or Display This Crochet Project
The Rosebud Hand Chain Bracelet can be a lovely accessory for daily outfits or special occasions. It also makes a thoughtful, handmade gift, beautifully presented in a small box or pouch.
Care Instructions
To clean your bracelet, hand wash gently in cool water and lay flat to dry. Store it in a cool, dry place to maintain its shape.
Frequently Asked Questions
1. Can I use different yarn for this project?
Absolutely! Just be mindful of the weight and texture as it may affect the final size.
2. How do I adjust the size if my wrist is larger or smaller?
You can simply modify the length of the connecting chain and wrist band to fit comfortably.
3. What if I’m struggling with the rolls of the rosebud?
Practice rolling on a small swatch before moving on to the actual piece to find what works best for you.
If you’d like to explore another delightful crochet design, check out this Forget Me Not Glasses Chain Crochet Pattern.
This project is a wonderful way to enhance your crochet skills while creating a stylish accessory you’ll cherish. Happy crocheting!



