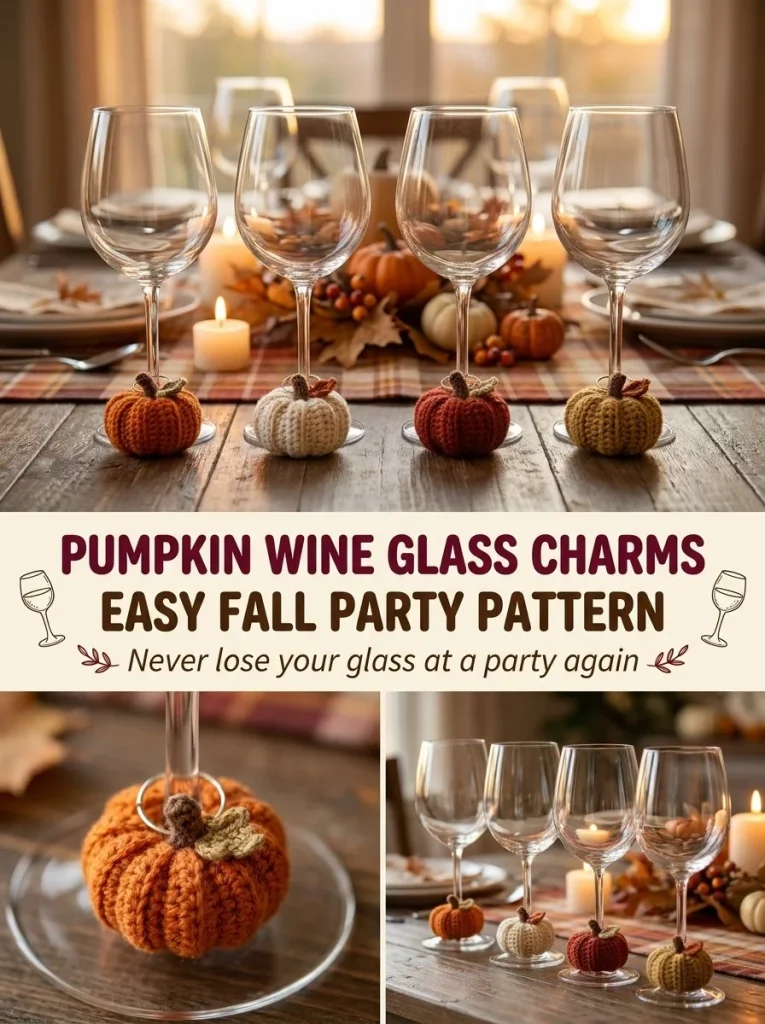
Crocheting cute accessories is a delightful way to bring festive charm to gatherings, and these pumpkin wine glass charms are no exception. Perfect for autumn celebrations, these tiny pumpkins not only add a touch of whimsy to your table setting but also serve a practical purpose by keeping track of whose glass belongs to whom. Each charm is quick and easy to make, requiring just some basic crochet skills and a few supplies. Plus, they can be made in a variety of fall colors, bringing a joyful palette to your parties. Beginners might find joy in the simplicity of the design, but even experienced crocheters will appreciate the quick finish and satisfaction of creating such adorable little charms. You may also find Pumpkin Garland String Easy Fall Decor Crochet Pattern useful.
Why You’ll Love This Crochet Pattern
- Ideal for fall-themed gatherings and celebrations.
- Uses minimal yarn and works up quickly, making it a great last-minute project.
- Exceptionally cute and functional—perfect for gifts or your own parties.
- The pattern is simple enough for beginners, strengthening your skills with single crochet.
- Customize with various colors to match your décor or personal style.
Finished Size
The estimated size for each pumpkin charm is about 1.5 inches in height, but this may vary slightly depending on your yarn, hook, and tension.
Skill Level
This pattern is classified as easy, primarily because it involves basic crochet techniques like the magic ring and single crochet—ideal for both beginners and those looking to enhance their crochet repertoire.
Materials Needed
- Small amounts of yarn in four different fall colors (orange, mustard, rust, cream)
- 2mm crochet hook
- 4 small jump rings or wire rings
- Tapestry needle
- Scissors
Stitches and Abbreviations
- sc: single crochet
- ch: chain
Gauge and Tension Notes
Gauge is not crucial for this project, but maintaining an even tension will ensure your pumpkins look neat and consistent. Aim for a tight stitch to keep the shape firm without stuffing.
Pattern Notes Before You Start
The pumpkins are worked in rounds, beginning with a magic ring. There’s no need for stuffing, so keep the pieces small and flat. The optional ridges can be added easily with sewing thread, enhancing their appearance.
Step-by-Step Crochet Instructions
- Start with a magic ring: Ch 1, then work 6 sc into the ring (6).
- Round 2: Sc evenly around for a total of 6 stitches (6).
- Finish off: Leave a tail long enough to secure to the jump ring.
- Create ridges: With orange or matching-tone thread, stitch short lines from the center to the edge of the pumpkin to mimic the natural grooves of a pumpkin.
- Attach the jump ring: Use the tail to secure a small jump ring or wire ring to the top of the pumpkin. Ensure it’s sized appropriately to fit over the stem of a wine glass.
- Repeat: Follow the same steps to make three more pumpkins in different colors.
Assembly and Finishing
Once all pumpkins are crocheted, ensure that each charm is securely attached to the jump ring. Weave in any loose ends carefully for a polished look. If desired, you can adjust the stitches to make the pumpkins slightly larger or smaller before completing the charm.
Helpful Tips
- If you find the magic ring challenging, consider starting with a chain of 4 and joining with a slip stitch to form a ring.
- Use a stitch marker to keep track of the first stitch in each round to avoid confusion.
- Experiment with thread colors for the ridges for an added touch of whimsy.
- For an even neater finish, block your finished pumpkins lightly to shape them naturally.
Common Mistakes to Avoid
- Skipping the slip stitch when joining rows can lead to uneven edges.
- Using too much stuffing (though you don’t need any here) will distort the pumpkin shape.
- Forgetting to weave in ends can result in unraveling during use.
Customization Ideas
- Try different yarn textures, such as using a fuzzy yarn for a softer look.
- Make a larger version as a decorative piece for your home.
- Decorate with small embellishments, such as leaves or beads, to enhance the fall aesthetic.
How to Use or Display This Crochet Project
These pumpkin wine charms make a delightful addition to any autumn table setting. Use them at parties to identify wine glasses, or give them as hostess gifts. You can also display them in a small basket as part of your fall décor.
Care Instructions
To clean your charms, gently hand wash them in cold water and lay them flat to dry. Store them in a cool, dry place away from direct sunlight, especially if you used vibrant yarn colors that may fade.
Frequently Asked Questions
1. Can I use larger yarn and a bigger hook?
Yes, you can adjust your hook size and yarn for larger pumpkins, but the design and charm size will change accordingly.
2. How do I adjust the colors?
Feel free to swap any color for others that suit your theme. There’s no limit to creativity here!
3. Can these be made for other holidays?
Absolutely! Change the colors and shapes to create winter or spring-themed charms.
4. Do I need to know advanced techniques?
No, this pattern is designed for beginners and uses only basic crochet skills.
Make sure to explore other crochet projects like the pumpkin coaster set to complement your wine charms. Happy crocheting!



