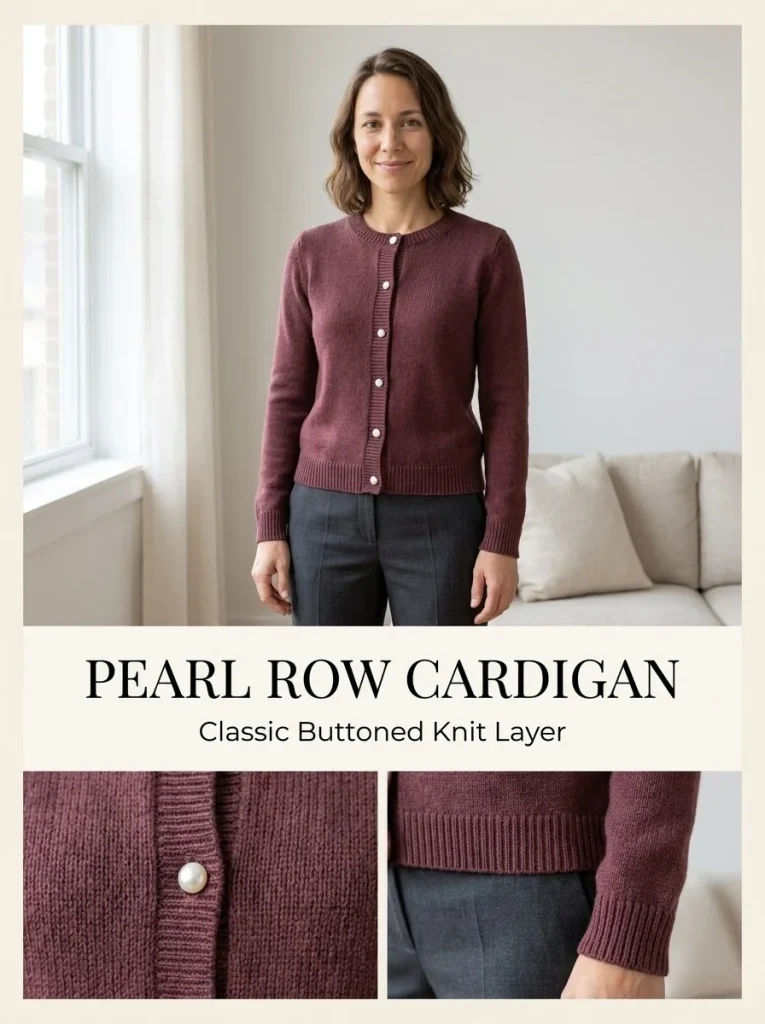
Crafting a Pearl Row Cardigan is a delightful project that combines comfort with style, making it suitable for various occasions. This sophisticated garment features a classic design adorned with pearl-look buttons, elevating the everyday cardigan into a chic piece. Whether you’re a confident beginner or an intermediate crocheter looking to expand your skills, this cardigan will be an enjoyable challenge. If you’ve enjoyed working on other projects, such as the Acorn Brown Keyhole Scarf, you’ll find that creating this cardigan is a similarly rewarding experience.
Skill Level
Intermediate: This project requires basic knitting skills, including casting on, knitting, purling, and shaping techniques. Familiarity with working with different needle sizes, as well as basic seaming techniques, will be beneficial.
Materials
- Yarn: 1,050–1,250 yd / 960–1,143 m DK-weight merino or soft wool blend in muted burgundy
- Needles:
- US 6 / 4.0 mm for main fabric
- US 4 / 3.5 mm for ribbing and bands
- Notions:
- Exactly 6 pearl-look buttons, 0.5–0.6 in / 12–15 mm diameter
- Stitch markers
- Tapestry needle
- Sewing needle and matching thread
Abbreviations — US Terms
- st(s) – stitch(es)
- K – knit
- P – purl
- BO – bind off
- YO – yarn over
- K2tog – knit two together
Special stitches
Buttonhole
To create a buttonhole, work up to the button position, then YO, K2tog, and continue with your ribbing.
Gauge
While gauge is not necessarily critical for this cardigan, a consistent tension helps ensure the best fit.
Finished Size
The completed cardigan will fit a variety of sizes. It’s important to note that individual fit may vary, so check your measurements as you go.
Pattern Notes
- The cardigan is worked in rows.
- The pattern includes ribbing for the cuffs and neckline.
- Remember to place stitch markers at each shoulder seam to help with assembly later.
Crochet Instructions
BACK
- Cast On: With smaller needles, cast on 118 sts. This will serve as the foundation.
- Ribbing: Work K1, P1 ribbing for 2 in / 5 cm to create a snug edge.
- Body: Switch to larger needles. Continue in stockinette stitch until the piece measures 20 in / 51 cm.
- Shoulder Shaping:
- Bind off 34 sts for each shoulder.
- Place the center 50 sts on hold for the back neck.
LEFT FRONT
- Cast On: With smaller needles, cast on 59 sts.
- Ribbing: Work K1, P1 ribbing for 2 in / 5 cm.
- Body: Change to larger needles. Keep 7 sts at the center-front edge in K1, P1 rib for the button band; work the remaining sts in stockinette.
- Measurement: Continue until the piece measures 17.5 in / 44.5 cm.
- Neck Shaping:
- At the center-front edge, bind off:
- 8 sts once
- 4 sts once
- 3 sts once
- 2 sts twice
- 1 st three times
- At the center-front edge, bind off:
- Shoulder: Continue until 34 shoulder sts remain. At 20 in / 51 cm, bind off shoulder.
RIGHT FRONT
Work to match the instructions for the Left Front, reversing the shaping steps as necessary.
- Buttonholes: Make six buttonholes evenly along the front band with the lowest buttonhole approximately 2 in / 5 cm above the hem and the highest approximately 1.5 in / 4 cm below the neckline. To create each buttonhole, work to the band position, YO, K2tog, and continue in rib.
SLEEVES — MAKE 2
- Cast On: With smaller needles, cast on 46 sts.
- Ribbing: Work K1, P1 ribbing for 2 in / 5 cm.
- Body: Switch to larger needles and work in stockinette stitch.
- Increasing:
- Increase 1 st at each edge every 8th row until you have a total of 70 sts.
- Length: Continue working evenly until each sleeve measures 18.5 in / 47 cm. Bind off loosely.
ASSEMBLY
- Block Pieces: Lightly steam or wet block all pieces for shape.
- Seam Shoulders: Use the tapestry needle to seam the shoulder stitches together.
- Attach Sleeves: Set sleeves into their arm openings and sew the side/sleeve seams.
NECKBAND
- Picking Up Stitches: Using smaller needles, pick up approximately 110 sts evenly around the neckline.
- Ribbing: Work K1, P1 rib for 1 in / 2.5 cm.
- Bind Off: Bind off in pattern.
BUTTONS
Sew exactly six pearl-look buttons opposite the six buttonholes.
Weave in any loose ends and lightly block the finished cardigan for an elegant touch.
If you enjoyed this cardigan project, you might also like exploring other patterns, such as the Easy 4-Row Lace Shoulder Scarf for a beautiful accessory to complement your new cardigan. The techniques you’ll learn in both projects will enhance your knitting skills and add to your wardrobe.
Care
Depending on your yarn choice, care instructions may vary. Always check the yarn label for specific washing and drying instructions to maintain the integrity of your garment. Blocking may help the cardigan maintain its shape, so consider doing so after completing the project.
In conclusion, the Pearl Row Cardigan is not only a stylish addition to your wardrobe but also a testament to your growing knitting skills. Enjoy the process, and wear your cardigan with pride!



