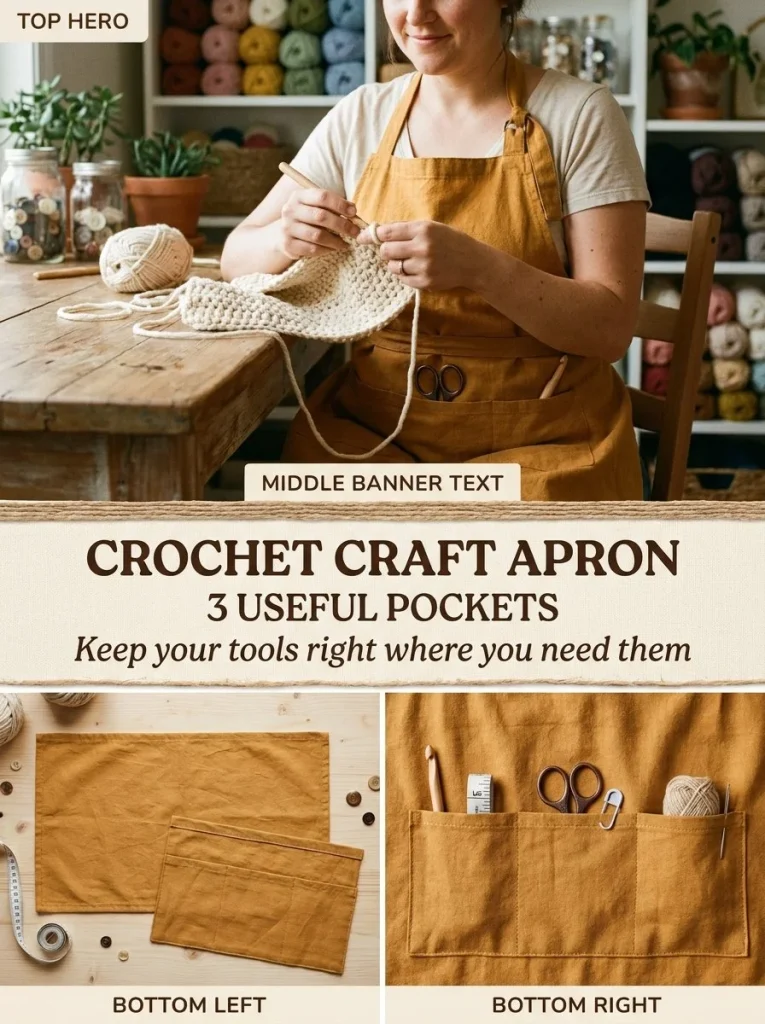
The Ochre Three-Pocket Crochet Craft Apron is a delightful and practical project perfect for crafters of all skill levels. This utility apron is not only a functional piece for those who enjoy crafts, cooking, or gardening, but it also boasts a charming design that can brighten up any crafting space. The construction is straightforward, utilizing half double crochet stitches to create a roomy apron with three pockets, making it easy to keep your essentials handy while you work.
The combination of ochre or mustard yarn with cream accents adds a lovely visual appeal to this apron, making it a stylish choice for any endeavor. This project implements simple crochet techniques that yield beautiful results, providing an excellent opportunity for both beginners and seasoned crocheters to hone their skills while creating something useful.
Pattern at a Glance
Skill level: Intermediate
Terminology: U.S. terms
Construction: Worked in rows, assembled with sewing and crochet edging
Finished size: Approximately 18-20 inches wide, 11-13 inches tall
Yarn weight: Worsted-weight #4 cotton yarn
Hook: 5mm (H-8)
Main stitch: Half double crochet
Gauge: Approximately 4 inches = 12 hdc stitches and 8 rows
Motifs: None
Layout: One-piece body with a separate pocket panel
Joining: Sewn vertical seams for pockets
Border: Optional cream single crochet edging
Materials
- Worsted-weight #4 cotton yarn in ochre or mustard (for the main body)
- Small amount of cream cotton (for optional edging)
- 5mm hook (H-8)
- Tapestry needle (for weaving in ends and sewing)
- Measuring tape (to track size and gauge)
Ensure to have enough yarn to complete the project; typically, around 200-250 yards of the main color will be sufficient.
Yarn and Color Notes
When working with a worsted-weight cotton yarn, it’s crucial to focus on the fiber’s characteristics. Cotton yarn is not only durable but also offers a nice weight and drape that makes it ideal for crafting items like aprons. The ochre or mustard colors reflect warmth and can pair well with various styles, making your apron versatile and fun.
If you’re interested in using different colors, consider a contrasting color for the pockets or the ties, or even a variegated yarn for a unique look. Just remember, when switching colors, it’s essential to maintain the stitch count and pattern integrity.
Finished Measurements
The apron is designed to be approximately 18-20 inches wide and 11-13 inches tall when completed. These dimensions make for a comfortably fitting craft apron that allows you to move freely while keeping your tools and supplies within reach.
Gauge
Achieving the proper gauge is critical to ensure your apron fits well. The recommended gauge is approximately 4 inches = 12 hdc stitches and 8 rows. To measure your gauge accurately, crochet a small swatch of at least 12 stitches and 12 rows, then measure a 4×4 inch square to see if you meet the gauge.
If your gauge is larger than stated, you may want to switch to a smaller hook. Conversely, if your stitches are smaller, try using a larger hook. This will help maintain the intended proportions of your apron.
Abbreviations
- ch: chain
- hdc: half double crochet
- sc: single crochet
Important Pattern Notes
- The turning chain does not count as a stitch unless indicated.
- Maintain consistent tension throughout the project to prevent uneven areas.
- If sewing your pockets or waistband, ensure alignment for a neat finish.
- Optional edging can enhance the overall look but is entirely up to personal preference.
Special Stitches and Techniques
The primary stitch utilized in this apron design is the half double crochet (hdc). Here’s a brief breakdown of the stitch:
- Yarn Over: Yarn over, insert your hook into the stitch.
- Pull Up a Loop: Yarn over again and pull through, giving you three loops on the hook.
- Yarn Over Again: Yarn over once more and pull through all three loops on the hook.
This stitch creates a dense fabric suitable for an apron, providing durability while remaining flexible.
Understanding the Construction
This apron is constructed in several straightforward steps:
- Apron Body: Start by crocheting the body, working back and forth to create the main fabric where you will attach the pockets.
- Pocket Panel: Crochet an additional piece for the pocket, which is similar in width to the apron body but shorter in height.
- Assembly: Finally, you’ll sew the pocket onto the apron body and add the waistband and ties, ensuring proper dimension and ease of wear.
These steps come together seamlessly, creating a functional and attractive apron.
Full Pattern Instructions
Foundation
- Starting Chain: Chain enough to measure approximately 18-20 inches in width.
Body
- Work in half double crochet (hdc) for about 11-13 inches tall. Continue to check your measurements as you go.
- After reaching the desired height, you will switch to the pocket panel.
Pocket Panel
- Use the same stitch count as the apron body, chaining enough for approximately 18-20 inches in width.
- Work in hdc until the panel measures about 6-7 inches tall.
- Place the pocket panel over the lower portion of the apron body, aligning the side and bottom edges.
Assembly
- Sew around the bottom and both side edges of the pocket panel to secure it to the apron body.
- To create exactly three pockets, divide the width into three equal sections and sew two vertical seams through the pocket panel and apron body.
Waistband and Ties
- Chain approximately 140-170 stitches, depending on your waist measurement and desired tie length.
- Starting from the second chain from the hook, single crochet (sc) across.
- Work an additional 1-2 rows of sc to create a band.
- Center the apron body along the waistband and sew the upper edge securely to the band, ensuring equal tie lengths on both sides.
Finishing
- If desired, finish off with a cream single crochet edging around the apron for a polished look.
Checkpoints
- After completing the body, verify it measures 11-13 inches in height.
- You should have three pockets formed by your vertical seams.
- Ensure the waistband is centered and securely attached without any pulling.
Assembly
To assemble the apron:
- Align the pocket panel precisely on the lower body, and ensure the side and bottom edges are straight.
- When sewing seams, use matching thread for a seamless finish.
- The waistband should fit comfortably; adjust the ties to your preferred length before securing them.
Resizing
To resize the apron, simply adjust the number of chains in the foundation to suit your dimensions. Remember to maintain the same stitch pattern for consistency. If you wish to widen or narrow the apron, keep the increments in mind.
Variations
Here are some variations you can try with this pattern:
- Create a one-color version by using the same yarn for the body and pockets.
- Use a scrap yarn version by combining various leftover yarns to create a unique look.
- Alter the apron size for children by reducing the starting chain length accordingly.
Troubleshooting
Why Is My Project Getting Wider?
If your apron seems to be widening excessively, check your stitch tension and ensure you are not adding extra stitches on the edges.
Why Is My Edge Wavy?
A wavy edge might indicate that your stitches are too tight. Try loosening your grip or using a larger hook size.
Why Is My Fabric Curling?
Curling can happen if the tension is inconsistent; ensure you maintain similar tension across all rows.
Frequently Asked Questions
Can I use a different yarn weight?
You can use lighter yarn, but be mindful of adjusting the hook size and gauge to maintain the apron’s integrity.
Can I make it larger?
Yes! Simply adjust your starting chain for the body and the waistband as needed.
Is the pattern reversible?
While the apron is practical on both sides, the pockets are designed to be on the interior.
Final Thoughts
The Ochre Three-Pocket Crochet Craft Apron combines functionality and style perfectly. By following the outlined steps and utilizing the appropriate materials, you’ll create a lovely apron that can accompany you in all your crafting adventures. Enjoy the process and have fun experimenting with colors and sizes as you make it uniquely yours! If you’re keen on enhancing your crochet skills further, consider exploring other patterns, such as a lovely blue bow bag charm or a nifty crochet bun cover. Happy crocheting!



