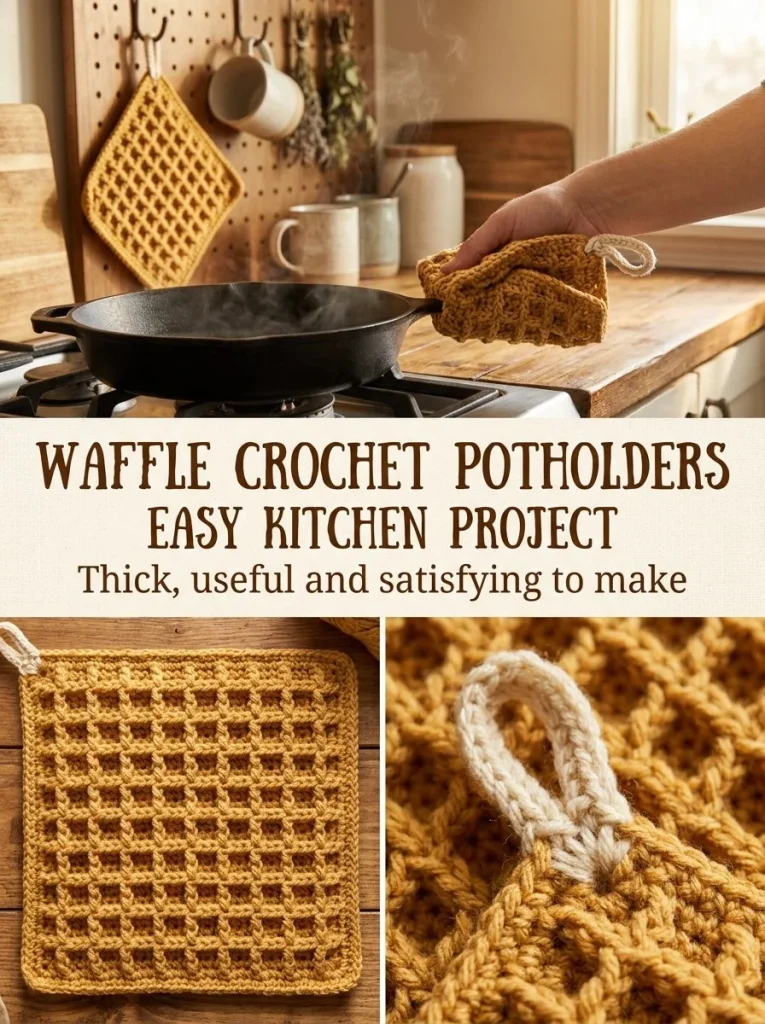
This crochet project brings warmth and functionality to your kitchen with its unique texture and practical design. The Honey Waffle Crochet Potholders are not only aesthetically pleasing with their rich honey gold hue but also highly functional for handling hot pots and pans. Their construction technique involves alternating rows of double crochet and front-post double crochet, creating a delightful waffle texture that enhances both grip and insulation. With this pattern, you’ll be able to create two sturdy potholders that will serve you well in the kitchen. You may also find Blue Pearl Crochet Wrist Cuff Easy Mini Jewelry Pattern useful.
This project is particularly appealing due to its use of 100% cotton yarn, making it heat-resistant and durable, essential qualities for kitchenware. Moreover, the skill set required for this pattern is beginner-friendly, while still providing a rewarding challenge. So grab your yarn and hook, and let’s dive into the world of crochet with this lovely potholder project. If you are also interested in other easy crochet projects, consider trying out this blue bow bag charm crochet pattern.
Pattern at a Glance
Skill level: Beginner
Terminology: US Crochet Terms
Construction: Worked in rows
Finished size: Approximately 7-8 inches square
Yarn weight: Worsted-weight #4
Hook: 4.5mm
Main stitch: Double crochet, front-post double crochet
Gauge: Not essential for this project
Motifs: 2 identical squares
Layout: Potholder made from two joined squares
Joining: Slip stitch
Border: Single crochet for strength (optional)
Materials
To create the Honey Waffle Crochet Potholders, you will need the following materials:
- Worsted-weight #4 100% cotton yarn in honey gold: This will be your main color for the potholder. Cotton is crucial for heat resistance.
- Small amount of cream cotton yarn: Used for finishing touches, such as the hanging loop.
- 4.5mm crochet hook: This is the recommended size for this pattern.
- Tapestry needle: For weaving in ends and any finishing work.
It’s essential to use cotton yarn only for this project, as it withstands heat and ensures safety while using the potholder.
Yarn and Color Notes
When selecting your yarn, it’s important to choose fibers that can handle heat without melting or transferring odors. Cotton, with its natural fibers, is the best choice for kitchen accessories due to its absorbent nature and durability. The warm honey gold color not only adds vibrancy to your kitchen space but also works beautifully with the textured pattern. This potholder would look stunning with coordinating kitchen wares or even as a standalone decorative piece.
Finished Measurements
Each potholder will measure approximately 7-8 inches square upon completion. This ideal size offers ample coverage for handling pots and pans while being compact enough to store away without taking up too much space.
Gauge
While gauge is not critical for this project, if you wish to ensure a tighter or looser fabric, remember that a standard gauge for worsted-weight yarn is approximately 16-20 stitches for 4 inches. If your gauge is larger, your potholder may turn out larger, and if smaller, it may not provide enough coverage. It’s always good practice to create a small swatch if you’re concerned about your tension.
Abbreviations
- ch – chain
- dc – double crochet
- fpdc – front-post double crochet
- sl st – slip stitch
- sc – single crochet
- st(s) – stitch(es)
Important Pattern Notes
Before you start crocheting, keep these important considerations in mind:
- Always begin each row with the appropriate turning chain.
- The turning chain does not count as a stitch unless specified.
- It’s helpful to place a stitch marker to keep track of the beginning of your rounds or rows.
- Following the stitch patterns precisely will ensure that you’re creating the correct waffle texture.
Special Stitches and Techniques
This pattern features the following special stitch:
- Front Post Double Crochet (fpdc): This technique works around the post of the stitch below rather than through the top of the stitch, creating a raised effect that contributes to the waffle texture.
Understanding the Construction
The potholder consists of two identical squares worked individually and then joined together. This layering not only reinforces the thickness but also provides additional insulation for safety when handling hot cookware. The squares are crafted using alternating rows of double crochet and front-post double crochet, which create the distinctive waffle design.
Full Pattern Instructions
Foundation
To begin, make a slip knot and chain 27.
Row 1
In the 3rd chain from the hook, work 1 double crochet (dc). Continue doing so across the chain. You should end up with 25 dc in total.
Row 2
Ch 2 and turn your work. Front-post double crochet (fpdc) around the next 2 stitches, then dc in the next stitch. Repeat this pattern across until you reach the end, ensuring the stitch count remains consistent.
Row 3
Ch 2 and turn. Here, you’ll switch it up: dc in the next 2 stitches, fpdc around the next stitch. Continue this pattern across to the end of the row.
Continue Alternating Rows
Repeat Rows 2 and 3 until your square measures approximately 7-8 inches. Each square should have the same waffle texture that contributes to the thickness and durability of the potholder.
Assembly
For extra thickness, make two identical squares for each potholder. You can hold them together and join them around all edges with sc, or alternatively, fold a longer piece double if you prefer this method.
Finishing Touches
To create a hanging loop, join the cream yarn in one corner, chain 12, and slip stitch into the same corner to form a loop. Then, sc around the loop for added strength.
Use only heat-safe natural fiber yarn, such as cotton, and ensure the finished potholder remains dry when handling hot cookware.
Checkpoints
- After finishing your squares, measure them to confirm they are approximately 7-8 inches.
- Ensure you have created consistent rows so that the texture appears even.
Assembly
When assembling, align both squares with the right sides facing out. Join using slip stitches or single crochet, going around all four sides. Make sure to leave an opening for the hanging loop if you wish to incorporate one.
Finishing
For a polished finish, weave in any ends with the tapestry needle after completing your potholders. This step creates a clean look without loose threads.
Resizing
To resize the potholders, consider adjusting the number of chains at the beginning. For example, you can chain more or fewer than 27 chains to create smaller or larger potholders, keeping in mind that changes will affect the overall size.
Variations
- Create a two-color version by alternating colors every few rows for a unique look.
- Experiment with different yarn weights, but ensure they are heat-safe.
- A scrap yarn version using leftover cotton yarn can make for a colorful and eco-friendly alternative.
Troubleshooting
Why Is My Project Getting Wider?
This often occurs if you are adding extra stitches. Maintain the stitch count as specified to avoid this issue.
Why Is My Edge Wavy?
Wavy edges can indicate that the tension is too loose or that you’re adding stitches. Ensure you count and follow the pattern accurately.
Why Is My Fabric Curling?
Curling might happen if your starting chains are too tight. Try to keep your tension even throughout the project.
Frequently Asked Questions
Can I use a different yarn weight?
While you can use a different yarn weight, it is crucial to ensure it remains heat-safe, so stick to cotton yarn.
Can I use acrylic yarn?
Acrylic is not recommended for this project due to its heat sensitivity, especially in kitchen applications.
How should I block it?
Blocking is not necessary for this project as the crochet should maintain its texture and shape naturally.
Final Thoughts
Creating the Honey Waffle Crochet Potholders involves mastering simple crochet stitches while producing a practical kitchen accessory. The project encompasses three main steps: creating the square pieces, assembling them, and finishing with a sturdy hanging loop. Enjoy your crochet journey and stay safe while handling those hot pots!



