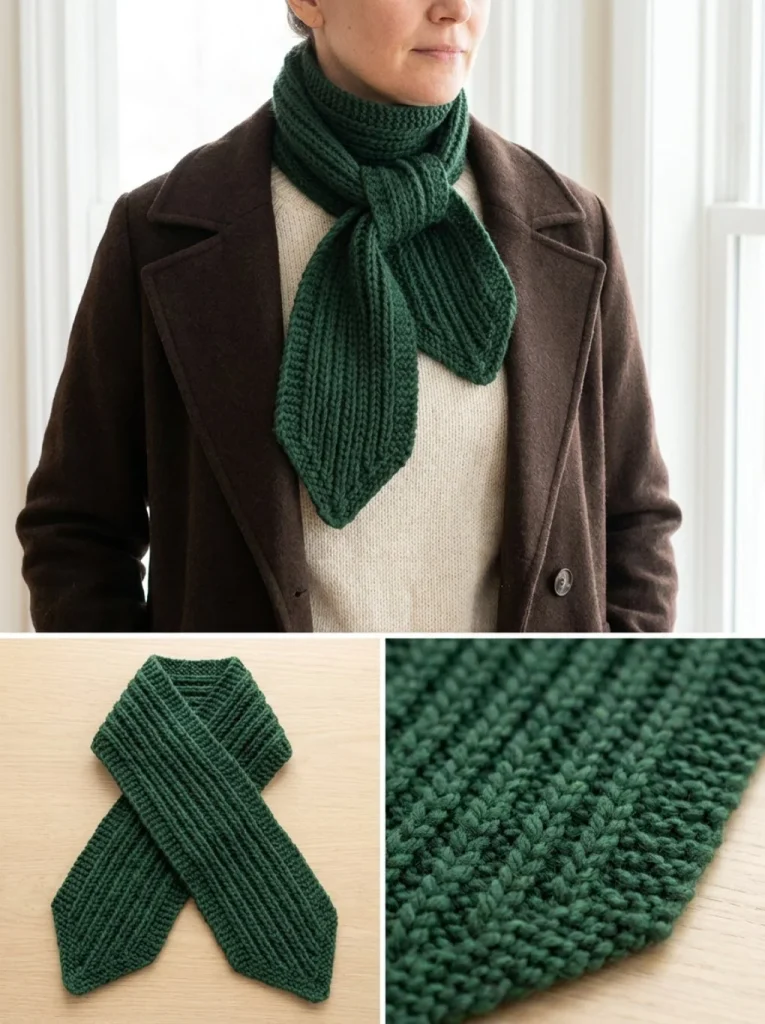
The Forest Chunky Texture Scarf is a delightful knitting project perfect for adding a warm touch to your wardrobe. Its soft, chunky design not only provides warmth but also showcases beautiful texture that is visually appealing and cozy. This scarf is a practical accessory to have during chilly seasons, as it is versatile enough for everyday wear or special occasions, making it an excellent gift option for friends and family. Beginners will find the pattern straightforward, cultivating confidence while working with the chunky yarn. Plus, the pointed design at both ends adds a unique charm without being overly complicated. You may also find Forest Green Pointed Mini Scarf Knitting Pattern useful.
Why You’ll Love This Crochet Pattern
- Quick to knit with chunky wool, resulting in a finished scarf in no time.
- The ribbed texture is both stylish and functional, keeping the scarf snug and warm.
- Points at the ends provide a polished look that elevates any outfit.
- Easily customizable in terms of color; consider pairing it with other textures or fabrics.
- Great as a beginner-friendly project to practice basic knitting techniques like increases and decreases.
Finished Size
This scarf is approximately 42–46 inches (107–117 cm) long, but exact size may vary based on your gauge and tension, as well as the yarn and needles used.
Skill Level
This pattern is suitable for beginners, as it involves simple stitches and clear instructions that will guide new knitters through the process comfortably.
Materials Needed
- Bulky (#5) wool or wool-blend yarn, 170–200 yards / 155–183 meters, in forest green
- US 10.5 (6.5 mm) straight or circular knitting needles
- Tapestry needle for weaving in ends
- Scissors
- Measuring tape
Stitches and Abbreviations
- K = knit
- P = purl
- M1L = make one left
- M1R = make one right
- SSK = slip, slip, knit
- K2tog = knit two together
Gauge and Tension Notes
While gauge is not critical for this project, maintaining even tension will help achieve a neater finish. If you’re unsure, consider making a small swatch to gauge your rows and stitches.
Pattern Notes Before You Start
This scarf is worked in rows, starting with a pointed tip and finishing with another pointed end. Be sure to focus on keeping your tension consistent, especially in the ribbed texture to avoid stretching. Color changes are not included, but you could have fun experimenting with different shades.
Step-by-Step Crochet Instructions
- Pointed Start: Cast on 3 stitches.
- Row 1: Knit all stitches.
- Row 2: K1, M1L, knit until the last stitch, M1R, K1.
- Repeat Rows 1 and 2 until there are 19 stitches on the needle.
- Body Texture:
Row 1 (RS): K2, *K1, P1; repeat from * 7 times, K1, K2.
Row 2 (WS): K2, P15, K2. - Continue to repeat these two rows until the scarf measures approximately 42–46 inches from the cast-on point, ensuring you end after a WS row.
- Pointed End:
Row 1 (RS): K1, SSK, knit to the last 3 stitches, K2tog, K1.
Row 2: Knit all stitches. - Repeat Rows 1 and 2 until 3 stitches remain.
- Bind off these remaining stitches.
Assembly and Finishing
Weave in all ends carefully to ensure a neat finish. It’s recommended to wet-block the scarf lightly to shape both tips into matching soft points without overstretching the ribbed center texture.
Helpful Tips
- Always double-check stitch counts at the end of every few rows to avoid confusion later on.
- If you find the yarn slipping, consider using a sharper needle for better grip.
- To enhance the ribbed texture, keep your purl stitches loose for ease of movement.
- Blocking can really help open up the texture, giving it a more polished appearance.
Common Mistakes to Avoid
- Ensure you’re not losing stitches during the increase process; always check your stitch count.
- Pay attention to the direction of your decreases to maintain the pointed shape.
- Don’t be afraid to unravel and redo sections if you notice mistakes; practice makes perfect!
Customization Ideas
- Experiment with different bulky yarns, such as a variegated wool blend, for a unique look.
- Adjust the width of the scarf by adding or reducing the number of stitches cast on.
- Add decorative elements like tassels at the ends for a fun flair.
How to Use or Display This Crochet Project
This scarf can be worn casually, dressed up for outings, or given as a heartfelt gift in any season. Pair it with a matching beanie for a cozy winter outfit or drape it stylishly over a coat.
Care Instructions
To clean the finished scarf, hand wash it gently in lukewarm water using a mild detergent. Lay it flat to dry, reshaping it as needed to maintain its form.
Frequently Asked Questions
1. Can I use a different yarn weight?
Yes, but be mindful that it will change the size and texture of the finished product.
2. What’s the best method to block the scarf?
Wet-blocking is ideal; lay it flat on a clean surface and pin as desired until dry.
3. How long does the project take?
Most knitters find they can complete this scarf in a few evenings, depending on their knitting speed.
4. Is this stitch combination suitable for other projects?
Absolutely! This textured pattern can be adapted to blankets, hats, or even smaller accessories.
5. Where can I find similar patterns?
If you enjoy this project, check out this lovely burgundy leaf texture scarf pattern for more options.
The Forest Chunky Texture Scarf is not only a practical addition to your wardrobe; it’s a project that fosters creativity and growth in your knitting skills. Happy knitting!



