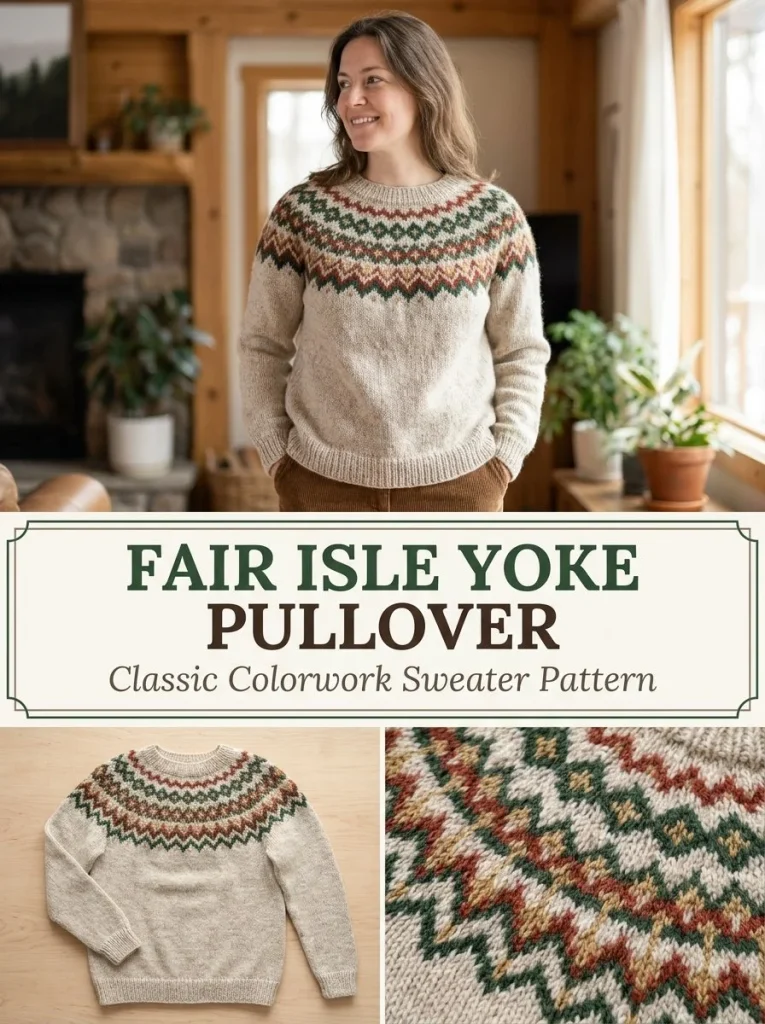
This Fair Isle yoke pullover knitting pattern is perfect for those looking to blend classic style with a modern touch. With a combination of a cozy worsted weight yarn and a well-constructed yoke design, this project not only showcases your knitting skills, but also results in a beautiful, wearable piece. Whether you’re a seasoned knitter or just getting started, the techniques involved in this pullover can enhance your repertoire. If you’re interested in other cozy scarf patterns to complement your knitted outfit, you might enjoy checking out the Acorn Brown Keyhole Scarf for a stylish accessory.
Skill Level
Intermediate – This pattern requires familiarity with knitting in the round, colorwork techniques, and consistent tension. Those with some experience in knitting and working with multiple colors will find this project rewarding.
Materials
- Worsted #4 wool or wool-blend yarn
- Main color: oatmeal
- Contrast 1: forest green
- Contrast 2: brick red
- Contrast 3: muted gold
- US 7 / 4.5 mm circular needles
- US 6 / 4 mm circular needles
- DPNs or magic loop for sleeves
- Stitch markers
- Waste yarn
- Tapestry needle
Abbreviations — US Terms
- CO – cast on
- K – knit
- P – purl
- M1L – make 1 left (increase)
- M1R – make 1 right (increase)
Special Stitches
M1L (Make 1 Left)
To work a make 1 left increase, lift the strand between the last stitch and the next stitch onto the left needle, knit through the back loop.
M1R (Make 1 Right)
To work a make 1 right increase, lift the strand between the last stitch and the next stitch onto the left needle, knit through the front loop.
Gauge
While gauge is not critical for this pattern, maintaining consistent tension will ensure the best fit. Expect to achieve approximately 18 stitches and 24 rows per 4 inches in stockinette stitch using the larger needles.
Finished Size
The completed pullover will have a bust circumference of approximately 38 inches, making it a versatile piece that can fit various body types comfortably.
Pattern Notes
- The pullover is worked in the round, which requires joining at the beginning of each round.
- Color changes will occur throughout the yoke pattern, so ensure you have the contrast colors ready to use.
- Stitch markers are essential for tracking the beginning of each round and the join points of the sleeves to the body.
Crochet Instructions
Part 1 – Body
Round 1
Using the smaller needle and the main color (MC), cast on 192 stitches. Join in the round being careful not to twist.
Round 2
Work in K2, P2 ribbing for 2 inches (5 cm).
Round 3
Switch to the larger needle and begin knitting in stockinette stitch (knit every round) until the body measures 15 inches (38 cm) from the cast-on edge.
Round 4
Place 8 stitches on waste yarn for the underarms (total of 16 body stitches reserved). You should have 176 stitches remaining. Set the body aside.
Part 2 – Sleeves (Make 2)
Round 1
Using the smaller needle and MC, cast on 40 stitches and join in the round.
Round 2
Work K2, P2 ribbing for 2 inches (5 cm).
Round 3
Change to the larger needle and knit 4 rounds.
Round 4 (Increase Round)
Knit 1, M1L (make 1 left), knit to last stitch, M1R (make 1 right), knit 1.
Round 5
Repeat the increase round every 8th round until you have 64 stitches.
Rounds 6-9
Continue working until the sleeve measures approximately 18 inches (46 cm). Place 8 underarm stitches on waste yarn. You will have 56 stitches remaining. Repeat these instructions for the second sleeve.
Part 3 – Join Yoke
Round 1
Using the larger circular needle and MC, knit across the front body, the first sleeve, the back body, and the second sleeve. Place markers at the joins for easy reference. This should total 288 stitches.
Round 2
Knit 3 rounds in MC.
Part 4 – Simple Fair Isle Yoke
You will now work color bands while decreasing evenly.
Band A
Work 4 rounds in the following sequence:
3 MC, 1 forest green; repeat around.
This should cover your round with 288 stitches.
Decrease Round 1
Knit in MC while evenly decreasing 32 stitches. This will leave you with 256 stitches.
Band B
Work 4 rounds in the following sequence:
2 MC, 2 brick red; repeat around.
Decrease Round 2
Decrease 32 stitches evenly, bringing your total down to 224 stitches.
Band C
Work 4 rounds in the following sequence:
3 MC, 1 muted gold; repeat around.
Decrease Round 3
Decrease 32 stitches evenly, leaving you with 192 stitches.
Band D
Work 4 rounds alternating with small forest green and brick-red checks.
Decrease Round 4
Continue decreasing 32 stitches evenly, bringing it to 160 stitches.
Rounds 5-6
Work 2 rounds in MC, followed by a decrease round decreasing another 32 stitches evenly.
Part 5 – Neck
Round 1
Switch back to the smaller needle, and work K2, P2 ribbing for 2 inches (5 cm).
Finish
After the neck ribbing, bind off stretchily to maintain elasticity.
Finishing
Graft or sew the underarm stitches together securely to prevent gaps. Weave in all yarn ends with the tapestry needle to ensure a neat finish. Finally, wet block your pullover carefully to shape it properly and bring out your stitches.
If you’re looking for more patterns to complement your knitting repertoire, consider the Autumn Color Block Chunky Scarf for a fresh and stylish look to wear with your new pullover.
Care
For the best results, follow the care instructions specific to your yarn. Hand wash cold and lay flat to dry to maintain the shape and softness of your pullover. Always refer to the label on your yarn for the best care instructions.



