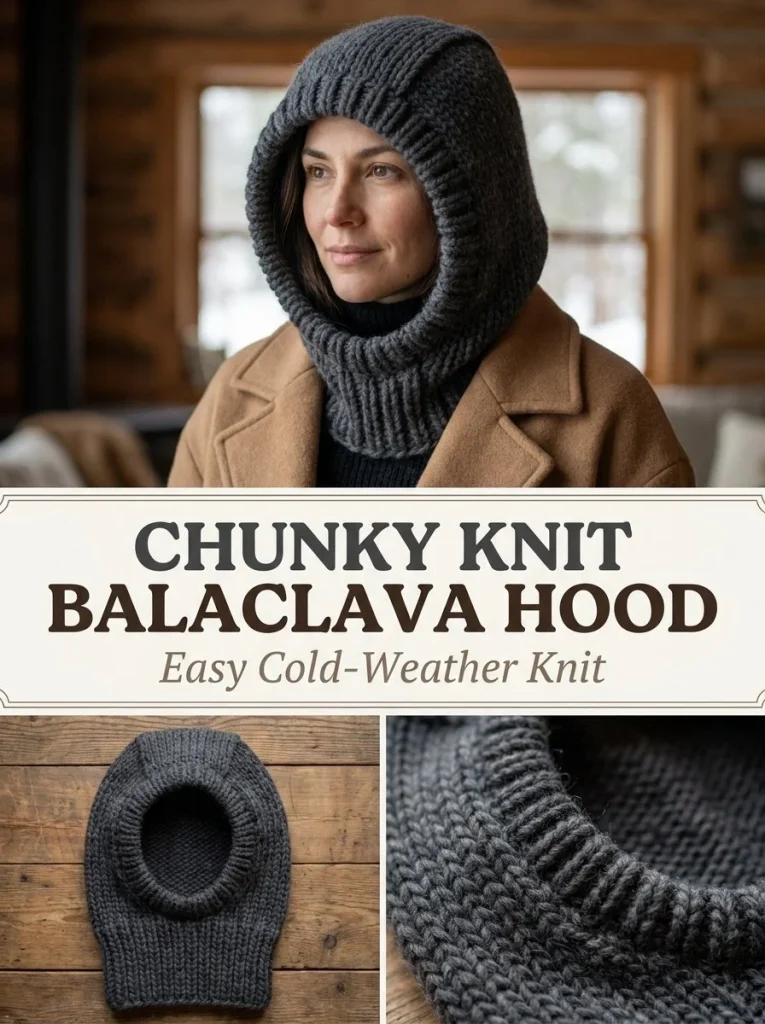
The Chunky Knit Balaclava Hood is a cozy and versatile accessory, perfect for keeping warm during chilly autumn and winter days. This pattern is designed for crocheters who enjoy working with bulky yarns, making it a relatively quick project. Whether you’re new to knitting or looking for something satisfying to create, this hood can provide that snug feeling without the hassle of numerous techniques. If you’re interested in more projects featuring bulky yarn, such as a stylish scarf, check out the autumn color block chunky scarf knitting pattern.
Skill Level
This pattern is suitable for a Confident Beginner or Intermediate crocheter. Basic knowledge of knitting techniques such as ribbing and stockinette is necessary, along with the ability to follow pattern instructions involving increases and decreases.
Materials
- Bulky #5 wool or wool-blend yarn: 260–320 yards / 238–293 meters
- US 10 / 6 mm 16-inch circular needle (plus a second needle of the same size for working flat)
- US 9 / 5.5 mm circular needle (for ribbing)
- Stitch marker
- Tapestry needle
- Scissors
Abbreviations — US Terms
- K – knit
- P – purl
- st(s) – stitch(es)
Special Stitches
This pattern primarily utilizes basic knitting stitches, including knit and purl. No special stitches beyond these are required.
Gauge
While gauge is not critical for this project, maintaining consistent tension is important for ensuring the finished hood fits well.
Finished Size
The finished balaclava should cover the neck fully and sit closely around the face, with a comfortable fit.
Pattern Notes
- The project is worked in the round for the neck and then switched to rows for the hood.
- The ribbing is created using a smaller needle, while the main hood is knitted with a larger needle.
- The top seam is joined using a three-needle bind-off or mattress stitch, depending on your preference.
Crochet Instructions
Part 1 – Neck
Round 1
Using the smaller circular needle, cast on 72 stitches. Join to work in the round, making sure not to twist the stitches.
Round 2–10
Work in K2, P2 ribbing for 6 inches / 15 cm. This will create a stretchy and comfortable neck opening.
Part 2 – Main Hood
Round 11
Switch to the larger needle. Knit 4 rounds in stockinette stitch (knit every stitch in the round).
Round 12
On the next round, bind off 20 stitches centered at the front to create the face opening.
Row 1 (WS)
Purl the next 52 stitches.
Row 2 (RS)
Knit the next 52 stitches.
Repeat Rows 1–2
Continue repeating these rows until the hood section above the bound-off edge measures 10 inches / 25 cm. You should see a lovely fabric beginning to form that will shape around your head nicely.
Part 3 – Top Seam
Fold the hood so the two top halves meet. Use either a three-needle bind-off or a mattress stitch to close the top seam. For those who desire a slightly pointed silhouette, keep the top seam straight instead of rounding the crown.
Part 4 – Face Ribbing
Round 1
With the smaller circular needle and right side facing, pick up approximately 64 stitches evenly around the entire face opening, ensuring to include the 20 bound-off stitches across the lower front.
Round 2
Join in the round. Work in K1, P1 rib for 1.25 inches / 3 cm. This creates a snug fit around the face.
Finishing
After you complete the ribs, bind off very stretchily to ensure that the ribbing has some give. Weave in any loose ends with a tapestry needle, and block lightly to shape the fabric as needed. Ensure the finished hood covers the neck fully and fits snugly around the face without any additional embellishments like drawcords or buttons.
Tips for the Best Result
To achieve the best fit and appearance for your balaclava, always check your tension, especially during the ribbing phase as it can affect how the hood sits. Additionally, consider lightly blocking after finishing to help the stitches settle into a uniform appearance.
Common Mistakes
Uneven Ribbing
This can happen if the tension fluctuates. Make sure to keep an even tension as you work through the ribbing to maintain consistency.
Hood Not Fitting Properly
If the hood feels too loose or too tight, revisit the row measurements to ensure it aligns with the desired fit. Larger needles will yield a more relaxed fabric, while tighter stitches can create a snugger look.
For those looking to expand on their crochet skills or tackle similar projects, consider making additional items such as tote bags or market bags. A great next project could be our cream chunky market tote knitting pattern, complementing your new balaclava beautifully.
In conclusion, crafting the Chunky Knit Balaclava Hood is a rewarding experience, combining warmth and style. With the right materials and attention to detail, you’ll have a cozy accessory that showcases your knitting skills beautifully. Enjoy your crafting journey!



