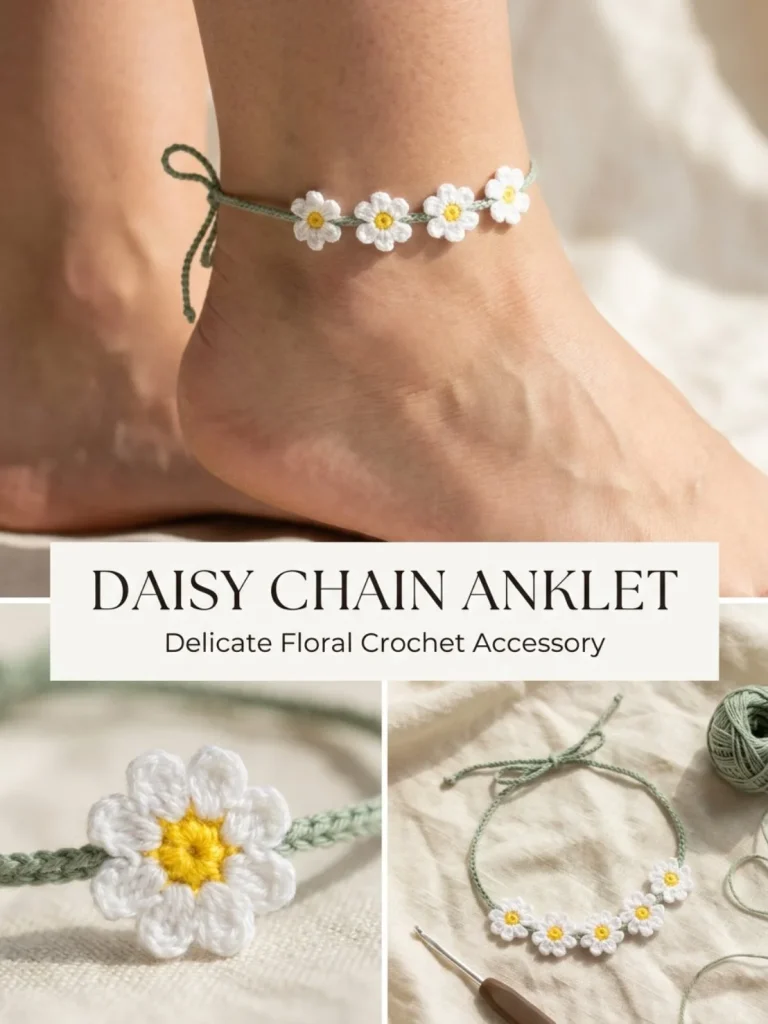
The Daisy Chain Anklet is a charming crochet project that adds a touch of whimsy to any outfit. Perfect for beginners, this anklet features cheerful daisies blooming along a delicate green cord, making it not only a stylish accessory but also a lovely gift option for friends and family. Crocheting the small daisies can be a great way to practice your skills, and the lightweight design means it’s comfortable for all-day wear. Plus, adding pearl beads for extra flair elevates this design beautifully. If you’re looking for a project that combines creativity and functionality, this anklet is just the ticket—especially when it comes to learning new techniques in a fun way.
Why You’ll Love This Crochet Pattern
- A delightful accessory that can brighten up your summer outfits.
- Quick to make, allowing you to create multiple anklets in one sitting.
- A great way to use up leftover yarn from other projects.
- Customize with different colors or embellishments for a personal touch.
- Perfect for beginner crocheters to practice basic stitches and assembly.
Finished Size
The finished anklet size will vary based on your ankle measurement and the tension you use while crocheting. Generally, it will fit around the ankle comfortably with a length of approximately 10 to 12 inches.
Skill Level
This pattern is classified as beginner level. The techniques used are simple and clearly explained, making it easy to follow even for those new to crochet.
Materials Needed
- Size 10 cotton crochet thread in white, yellow, and sage green
- 1.5 mm steel crochet hook
- Tapestry needle
- Scissors
- Optional: 6–8 small pearl beads and a small amount of fabric glue
Stitches and Abbreviations
- sc: single crochet
- dc: double crochet
- ch: chain
- sl st: slip stitch
- mr: magic ring
Gauge and Tension Notes
For this project, gauge isn’t critical due to its flexibility in wear. However, maintaining consistent tension will ensure a neat finish and proper fit. Aim for an even stiffness in your work for the daisies to retain their shape.
Pattern Notes Before You Start
Work the daisies in separate motifs, then attach them to a cord. The daisies will be sewn onto the green cord, with ties left at both ends for comfort. Adjust the starting chain length based on your ankle size to allow for a snug fit.
Step-by-Step Crochet Instructions
-
Make the Daisies:
- Center: With yellow, work 6 sc in a magic ring. Pull the ring closed and join with a sl st to the first sc, then fasten off.
- Petals: Join white to any center stitch. (ch 3, 2 dc, ch 3, sl st) in the same stitch to form a petal. Repeat in each of the 6 center stitches for 6 petals total. Fasten off, leaving a short tail.
-
Create the Anklet Cord:
- With sage green, chain 70–85 depending on your ankle size.
- Row 1: Starting in the 2nd ch from the hook, sc in each ch across. Fasten off.
-
Assembly:
- Steam or gently shape the flowers with your fingers. Position the 5 daisies evenly across the center of the green cord, and ensure there are plain ties at both ends. Use the yellow center of the daisies to sew them securely to the cord, and if desired, sew one pearl bead between each daisy.
-
To Wear:
- Wrap the anklet around your ankle and tie in a bow for a comfortable fit. To adjust the size, lengthen or shorten the initial chain while maintaining a 3-4 inch tie on each side.
Assembly and Finishing
After sewing the daisies onto the cord, make sure to weave in any loose ends nicely for a clean finish. If you opted for beads, ensure they are securely attached so they remain in place when being worn.
Helpful Tips
- Use a stitch marker to keep track of your rounds when making the daisies to avoid any confusion.
- If you’re using beads, consider using fabric glue to secure them in place after sewing.
- Take your time shaping the daisies; a little steam can help the petals hold their curves better.
- To keep your work neat, ensure your tension remains consistent throughout the project.
Common Mistakes to Avoid
- Skipping the magic ring can make the center of your daisies too loose; use this technique for a tight start.
- Not checking your gauge might lead to a mis-sized anklet; always ensure you’re comfortable with your tension.
- Forgetting to leave a tail on the daisies can make sewing them to the cord difficult—be sure to leave some length.
Customization Ideas
- Experiment with different colors of yarn for the daisies, such as pink or blue, to match your style.
- Use varying lengths for the cord to create a multi-layered anklet look.
- Add charms or additional beads between the daisies for more visual interest.
- Create a matching bracelet using the same daisy pattern for a cohesive accessory set.
How to Use or Display This Crochet Project
The finished anklet is perfect for summer outings, beach days, or casual gatherings. It can also make a lovely handcrafted gift for birthdays or special occasions.
Care Instructions
To clean your anklet, hand wash gently in cool water with mild soap, and lay flat to dry. Store it in a cool, dry place away from direct sunlight to maintain the vibrant colors.
Frequently Asked Questions
-
Can I use a different weight of yarn?
Yes, but remember to adjust your hook size accordingly; this can affect the fit and look. -
How do I resize the anklet?
You can lengthen or shorten the starting chain while ensuring the ends remain long enough for tying a bow. -
What if my daisies aren’t shaping well?
Don’t be afraid to re-shape them with gentle heat or steam—this can enhance the petals’ curves. -
Is it needed to add pearl beads?
No, pearls are optional but can add a touch of elegance if included.
As you progress through this crochet anklet pattern, you’ll find that it’s not only a lovely accessory but also a fulfilling project to undertake. Whether you wear it yourself or gift it to someone special, this anklet embodies a unique blend of creativity and craft. For more stylish options, consider checking out the Daisy Pearl Anklet for inspiration, or dive into the intricacies of crocheting with the Crochet Rosebud Hand Chain Bracelet Pattern. Happy crocheting!



