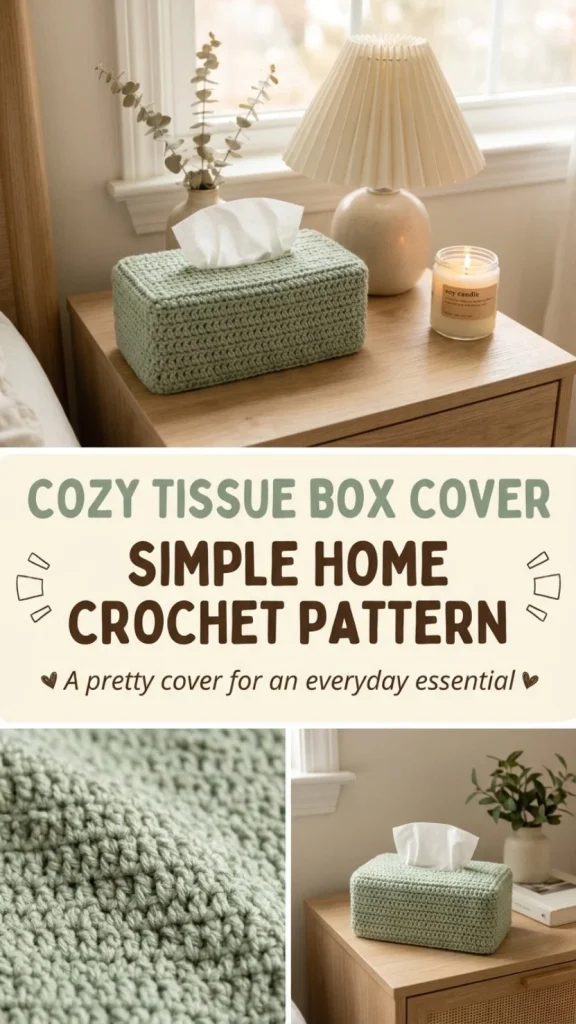
Crocheting a Cozy Tissue Box Cover is a delightful project that combines functionality with a touch of charm. It’s a practical addition to any home, ensuring that your tissue box is not only accessible but also stylishly dressed. This pattern is perfect for both beginner and intermediate crocheters; its straightforward design allows you to focus on your technique while crafting something useful. As you crochet, consider using a worsted-weight cotton yarn in a soothing sage green which adds a calming effect to your decor. Plus, working with cotton is great for texture and durability, helping your project maintain its shape beautifully. If you are looking for more crochet ideas, check out this Cozy Owl Bookmark pattern for a quick and charming addition to your crafting repertoire.
Why You’ll Love This Crochet Pattern
- Simple and clear instructions, perfect for beginners.
- A stylish way to add coziness to your home.
- Functional design that helps keep tissues at hand.
- Customizable to match your decor with various colors.
- A great gift idea for friends or family who love handmade items.
Finished Size
The finished tissue box cover measures approximately the dimensions of your tissue box. It’s important to note that size may vary slightly depending on your yarn choice, hook size, and tension during the crochet process.
Skill Level
This pattern is classified as beginner to easy. The instructions are straightforward, with minimal complex stitches required, making it an excellent choice for newer crocheters.
Materials Needed
- Worsted-weight cotton yarn (suggested: sage green)
- 5mm crochet hook
- Tapestry needle
- Scissors
- Stitch markers for organizing your work
Stitches and Abbreviations
- sc: single crochet
- ch: chain
Gauge and Tension Notes
Gauge is not critical for this project; however, keeping a consistent tension will help ensure a neat finish. For best results, make sure your stitches are not too tight or too loose, as this will affect the overall fit of the cover.
Pattern Notes Before You Start
The cover is constructed in separate rectangular panels that are later joined. Begin by measuring your tissue box to get accurate dimensions, then crochet the top panel followed by the side panels. It’s recommended to leave a slit for easy access to the tissues, either by creating two shorter sections or cutting a small opening after you finish the top.
Step-by-Step Crochet Instructions
- Top Panel: Chain until you reach the width of the tissue box. Work a single crochet in the second chain from your hook and across the chain. Continue crocheting back and forth in rows (ch1, turn, sc across) until the length matches your box.
- Create Opening (optional): For a slit, work two sections separately mid-way through the top panel, then reconnect. Alternatively, you can complete the top panel and cut a small opening later.
- Side Panels: Measure each side of the box, creating separate rectangular panels in the same manner as the top panel.
- Assemble: Use whip stitches to join all panels together along their edges, ensuring that the bottom remains open for the box to slide in.
Assembly and Finishing
After completing each panel, align them with the tissue box to ensure a good fit. Whip stitch the edges together securely, leaving the bottom open for easy access. Weave in any loose ends, and if you’ve cut an opening for tissues, whip-stitch around the edges to prevent fraying.
Helpful Tips
- Use stitch markers to keep track of stitch counts, particularly on longer rows.
- To keep the opening neat, consider reinforcing it with a small slipstitch border.
- If you find the fabric too loose, consider using a smaller hook size for a tighter texture.
- Keep your tension even to avoid misshapes; practice on a small swatch if necessary.
Common Mistakes to Avoid
- Skipping the measurement of the tissue box can lead to a poor fit.
- Not leaving enough room for the tissues can result in a cover that’s too tight.
- Forgetting to whip-stitch edges can cause the panels to come apart.
Customization Ideas
- Play with different colors to match your home decor.
- Experiment with various yarn textures for a unique look.
- Add embellishments like buttons or decorative stitches for personalization.
How to Use or Display This Crochet Project
The finished tissue box cover is not just a functional item; it adds a cozy touch to any room. It can easily fit in with your living room decor, or be a thoughtful handmade gift for friends and family.
Care Instructions
To clean your cozy tissue box cover, hand wash in cold water and lay flat to dry. If necessary, gently reshape the cover while damp to maintain its structure.
Frequently Asked Questions
- How can I alter the size of my cover?
You can adjust the chain length and row counts according to your box dimensions. - What should I do if my stitches look uneven?
Make sure to maintain an even tension and practice on a swatch if needed. - Is this pattern suitable for gifts?
Absolutely, it’s a thoughtful handmade gift that is both functional and decorative. - Can I use different yarn weights?
Yes, but this may change the finished size, so be sure to adjust your measurements accordingly.
Finding joy in crocheting like this can open up a world of creativity. If you’re inspired by this project, you might also enjoy crafting a charming pumpkin coaster set for fall decor; discover it here: pumpkin coaster set for fall home. Happy crocheting!



