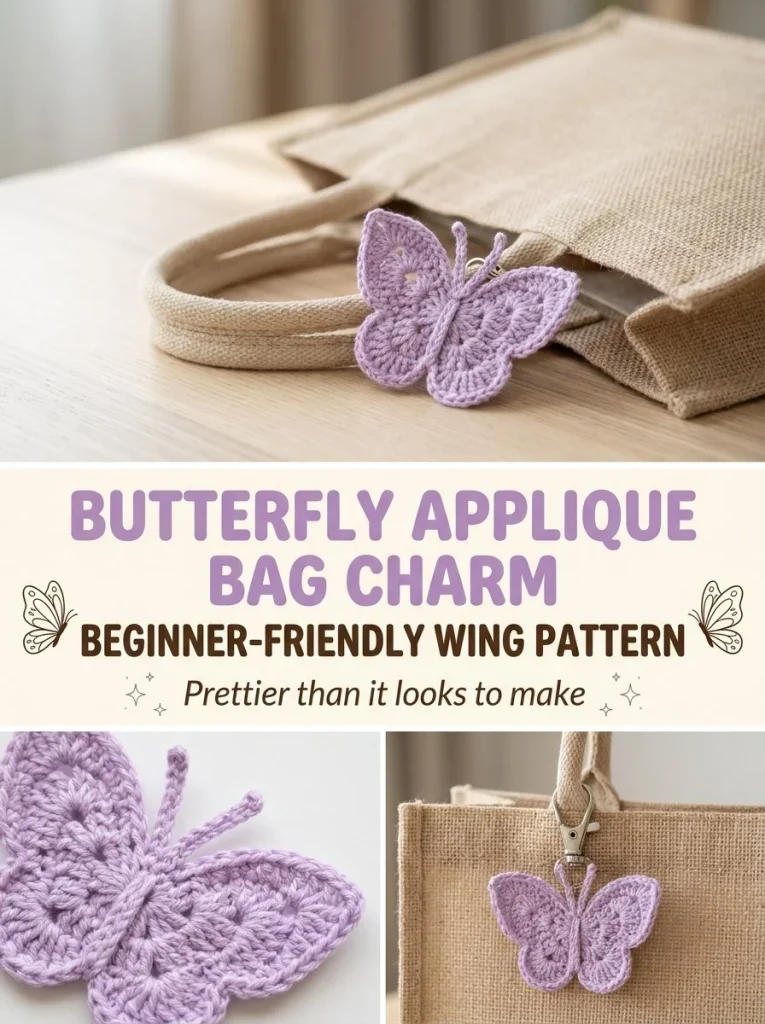
This charming Butterfly Applique Bag Charm is perfect for adding a whimsical touch to any accessory! This beginner-friendly pattern guides you through creating a delightful little butterfly that can be attached to bags, keychains, or even used as a decoration around the house. The design involves easy stitches and makes an ideal project for budding crocheters. Not only do these bag charms brighten up your items, but they also make thoughtful, handmade gifts to share with friends and family. One handy tip is to choose vibrant colors that complement the materials you already have on hand to make the butterfly truly stand out.
Why You’ll Love This Crochet Pattern
- Quick to make, perfect for last-minute gifts.
- A lovely introduction to crochet appliqué techniques.
- Easy to customize with different colors and yarn types.
- Great way to use up small amounts of yarn from previous projects.
- A fun practical item that adds a touch of charm to bags and accessories.
Finished Size
The estimated finished size of your butterfly should be roughly 4 inches across, though the size may vary depending on the yarn, hook, and your tension.
Skill Level
This pattern is rated as beginner. The stitches and techniques required are straightforward, making it accessible for anyone just starting out in crochet.
Materials Needed
- Small amount of lavender cotton thread (or your choice of colors)
- 2.5mm crochet hook
- Small keyring or jump ring for attaching the charm
- Tapestry needle
- Scissors
Stitches and Abbreviations
- ch: chain
- dc: double crochet
- sc: single crochet
- sl st: slip stitch
- st(s): stitch(es)
Gauge and Tension Notes
While gauge is not critical for this project, maintaining an even tension will ensure your butterfly looks neat and well-crafted. A relaxed stitch will help keep the edges smooth.
Pattern Notes Before You Start
The butterfly is worked in rounds to create both the upper and lower wings, each formed symmetrically from the center point. You will join certain pieces and tack them down, so keep your work flat as you assemble.
Step-by-Step Crochet Instructions
- Create a magic ring and ch3 (counts as dc). Then, 2dc into the ring, ch2, and 3dc into the ring to form one upper wing half.
- Continue by ch1 and 3dc into the ring, followed by ch2, 2dc, ch1, and sl st to close the ring.
- Repeat the shaping symmetrically to form the second upper wing lobe.
- Next, from the center, chain 2, work 2dc, ch2, and 3dc into a new small ring below the upper wings to form the lower wing lobes. Mirror this on both sides.
- Fasten off and weave in ends.
- For the body, chain 5, sc into the 2nd ch from the hook and across, then fasten off.
- Lay the small strip down the center of the wings and tack it in place with a few stitches.
- For the antennae, with a short length of thread, make 2 small loop stitches at the top of the body.
- Attach a keyring to the top of the body using a small loop of thread.
Assembly and Finishing
Assemble your butterfly by ensuring both wings are evenly attached to the body. Weave in any loose ends using the tapestry needle for a clean finish, and be sure that all stitches are secure.
Helpful Tips
- When making your wings, take care to keep your tension even, which will help create a more polished look.
- To keep the small pieces from curling or becoming uneven, blocking is a great technique to consider.
- If your butterfly looks a bit lopsided, gently steam the edges to reshape them.
- Use different color threads for the wings and body for added character.
- Pay close attention to the slip stitches when finishing to avoid any gaps.
Common Mistakes to Avoid
- Failing to secure the magic ring properly can lead to gaps, so be sure to pull the yarn tight.
- Over-tightening your stitches may make it difficult to work into the project, so keep tension relaxed.
- Skipping stitches or miscounting during increases can affect the shape of your butterfly.
Customization Ideas
- Experiment with different yarn weights to change the size of your butterfly.
- Feel free to use variegated yarn for more visual interest on the wings.
- Add embellishments like beads or buttons to personalize your charm.
- Consider creating a series of butterflies in various colors for a cohesive set.
How to Use or Display This Crochet Project
This butterfly charm makes a great accessory for bags, wallets, or keychains. It can also be used as a fun way to decorate items around the home, such as hanging on hooks or as part of a mobile.
Care Instructions
To clean your finished butterfly, gently hand wash in cool water using mild soap, then pat dry with a towel. Avoid wringing out the charm to maintain its shape.
Frequently Asked Questions
-
Can I use a different yarn type?
Yes, any lightweight cotton yarn can be used for this project. -
How do I make the wings stiffer?
You might try starching your finished piece lightly after washing for added support. -
Is blocking necessary?
Blocking isn’t mandatory, but it can enhance the finished look, especially for the wings. -
Can I make this pattern larger?
Absolutely! Use a thicker yarn and larger hook, but adjust your stitch counts accordingly. -
How should I store the charm?
Keep it in a cool, dry place away from direct sunlight to maintain its shape and color.
The Butterfly Applique Bag Charm is a delightful pattern that combines ease and functionality—enjoy creating your little butterfly! For further projects that might inspire you, check out the dimensional flower bag charm for another fun accessory or the mini granny square bag charm crochet accessory pattern for a twist on classic crochet aesthetics. Happy crocheting!



