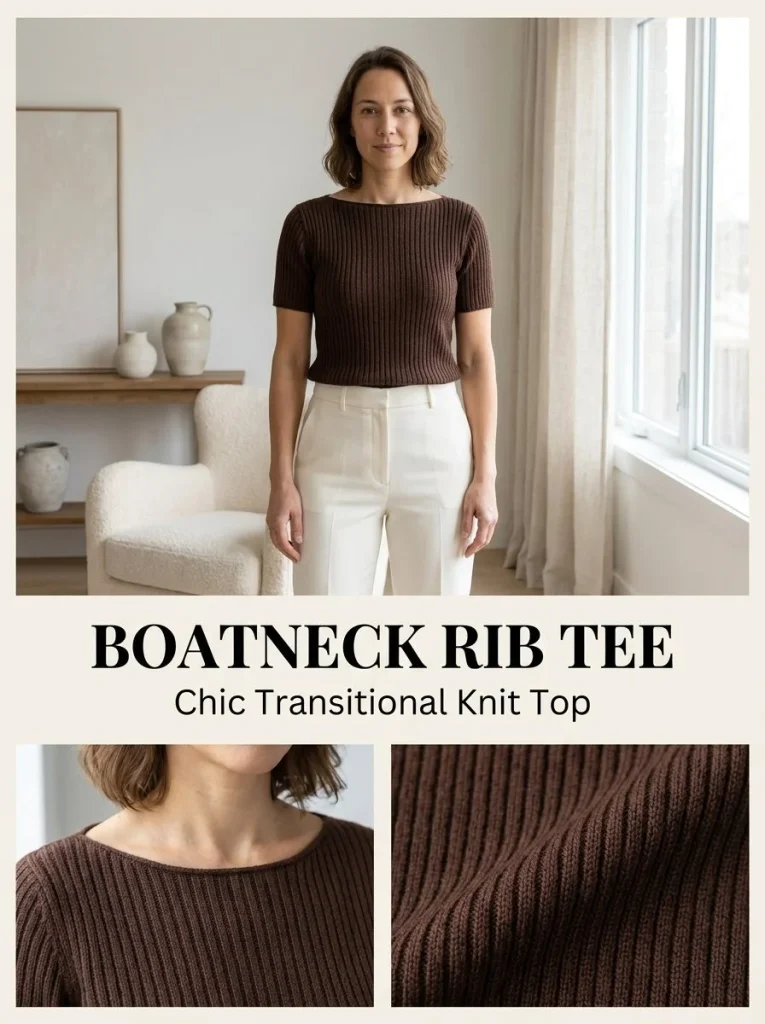
The Boatneck Rib Tee is an elegant design that combines comfort with style. This pattern yields a relaxed fit and is perfect for casual wear or dress-up occasions. Knitting this project will not only improve your knitting skills but also allow you to create a versatile piece for your wardrobe. If you’re looking for inspiration, consider checking out other rib patterns that showcase this lovely stitch technique.
Skill Level
Intermediate knitters should find this project engaging as it includes ribbing and shaping techniques. Some experience is recommended, particularly with working necklines and seaming.
Materials
To create your Boatneck Rib Tee, gather the following materials:
- 950–1,100 yds / 870–1,006 m of sport or light DK cotton-merino blend yarn in deep chocolate brown
- US 5 / 3.75 mm needles for the body
- US 4 / 3.5 mm needles for the edges
- Stitch markers
- Tapestry needle
- Scissors
Abbreviations — US Terms
- CO – cast on
- BO – bind off
- K – knit
- P – purl
- RS – right side
- WS – wrong side
- st(s) – stitch(es)
Special Stitches
No special stitches are required for this pattern, making it a straightforward project that emphasizes basic techniques.
Gauge
While gauge is not provided, achieving consistent tension is crucial for ensuring your finished garment fits well.
Finished Size
The Boatneck Rib Tee is designed to have a relaxed fit, and its dimensions will vary based on the size you knit.
Pattern Notes
- The body of the tee is worked in rows, utilizing a ribbing technique throughout.
- The boat neck design means that the center portion is bound off to create a wider neckline.
- Keep in mind that the stitches might seem tighter when worked in the ribbing, so it’s important to maintain an even tension throughout.
Crochet Instructions
Part 1 – Back
Row 1
With the smaller needles, cast on 108 stitches using your preferred method.
Total: 108 sts.
Rows 2–3
Begin working in K2, P2 ribbing:
- Row 2: (RS) *K2, P2; repeat from * to end.
- Row 3: (WS) *P2, K2; repeat from * to end.
Total: 108 sts.
Rows 4 and Beyond
Continue in K2, P2 ribbing until the piece measures 21 inches (53 cm) from the cast-on edge, adjusting the number of rows as needed to match this measurement.
Boat Neck / Shoulders
Next RS Row
- Work the first 28 stitches in ribbing, then bind off these 28 stitches for the first shoulder.
- Work the center 52 stitches and place them on waste yarn.
- Bind off the final 28 stitches for the second shoulder.
Total: 52 center sts on waste yarn.
Part 2 – Front
Rows 1–3
Work exactly as you did for the back until the piece measures 20.25 inches (51.5 cm).
Reducing for the Neckline
To create a deeper front boat neck:
- Bind off the center 44 stitches.
- Decrease 1 stitch at each neck edge every RS row for a total of 4 times.
Continue with Remaining Shoulders
- Overview the remaining shoulder stitches in ribbing until the front matches the back length. Then, bind off the 28 stitches per shoulder as previously done.
Part 3 – Assembly
- Block the front and back pieces to measurements before seaming.
- Seam the shoulders for 5.5 to 6 inches (14 to 15 cm) on either side, ensuring to leave a wide boat neckline.
- Seam the side edges from the hem upward, leaving the top 8 inches (20 cm) open for each armhole.
Part 4 – Sleeves
With the larger circular needle and right side facing:
- Pick up approximately 80 stitches evenly around one armhole.
- Join in the round and work K2, P2 rib for 8 inches (20 cm).
- Switch to the smaller needle and continue in rib for 1 inch (2.5 cm).
- Bind off stretchily.
- Repeat for the second sleeve.
Part 5 – Neck Edge
With the smaller circular needle:
- Pick up approximately 120 stitches evenly around the boat neckline.
- Work K1, P1 rib for 3 rounds only.
- Bind off loosely to maintain a wide and elegant neckline.
Total: 120 sts.
Part 6 – Finishing
- Weave in all ends and wet-block your project to measurements, allowing the vertical rib to relax without flattening.
Tips for the Best Result
To ensure your Boatneck Rib Tee turns out beautifully, keep these tips in mind:
- Use stitch markers to mark shoulder seam lines and where to bind off stitches to ensure precision.
- Remember that your knitting tension can affect the fit, so test your gauge if this is your first time working with a cotton-merino blend.
Common Mistakes
Uneven Ribbing
Ensure you are maintaining consistent tension when switching between knit and purl stitches.
Missed Stitches
It’s easy to skip stitches in ribbing; double-check your counts after each row to avoid discrepancies.
If you’re interested in exploring additional patterns that utilize ribbing techniques, check out this ribbed glove pattern that could complement your Boatneck Rib Tee perfectly.
Care
Check the care label of your yarn, but generally, cotton-merino blend garments can be washed gently in cold water and laid flat to dry. This ensures the longevity and beauty of your finished piece.
By following these detailed instructions, you can create a stylish and comfortable Boatneck Rib Tee that will be a delightful addition to any wardrobe. Happy knitting!



