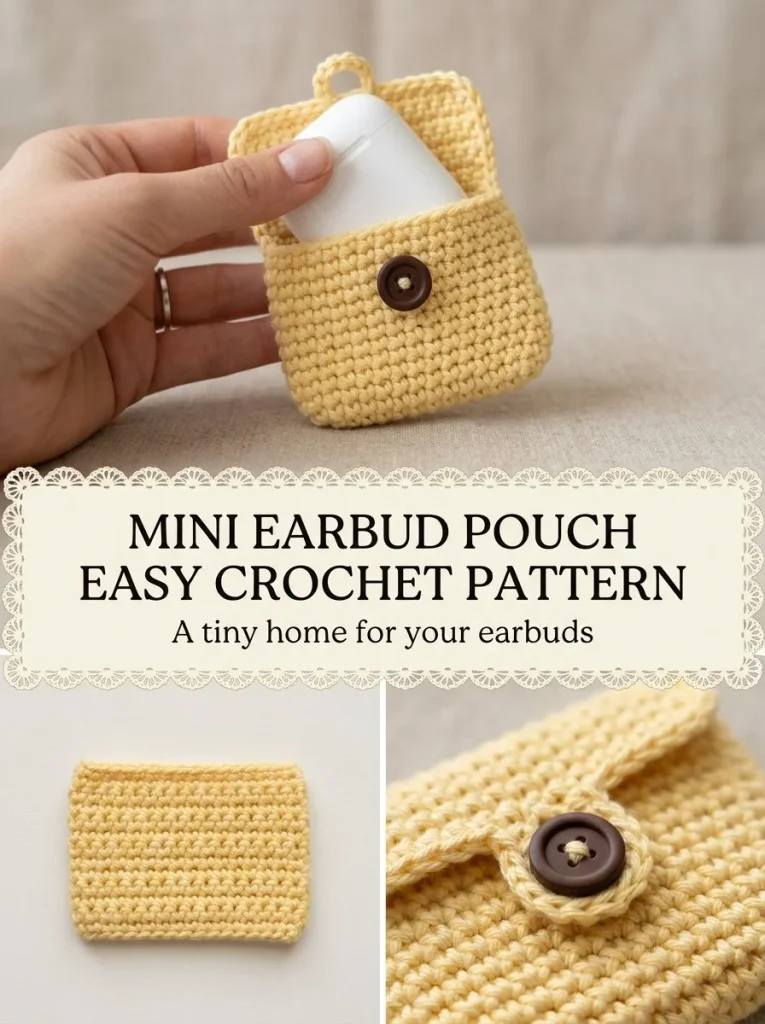
This Mini Earbud Snap Pouch is a delightful and practical project that allows you to keep your earbuds organized and tangle-free while showcasing your crochet skills. This pouch is perfect for beginners, featuring a straightforward construction that employs basic stitches. In shades of butter yellow and chocolate brown, this cozy pouch not only protects your earbuds but also adds a cheerful touch to your accessory collection.
The construction is simple yet effective, making it a great choice for anyone looking to enhance their crocheting capabilities. It features a snap closure that is both functional and stylish, ensuring that your earbuds remain secure. To get started on this adorable project, here is a detailed guide to all the aspects you’ll need to consider.
Pattern at a Glance
Skill level: Beginner
Terminology: US Crochet Terms
Construction: Crocheted in rows and sewn into a pouch
Finished size: Approximately 3.5 x 3 inches, adjustable
Yarn weight: Worsted-weight #4 cotton yarn
Hook: 4mm crochet hook
Main stitch: Single crochet (sc) and half double crochet (hdc)
Gauge: Not critical for this project, but keep your stitches uniform
Joining: Simple seam for side edges
Finishing: Button loop and button closure
Materials
To create your Mini Earbud Snap Pouch, you’ll need the following supplies:
- Worsted-weight #4 cotton yarn in butter yellow (for the main body)
- Small amount of chocolate-brown yarn (for the flap edge)
- 4mm hook (for the crocheting)
- 1 small button (for securing the flap)
- Tapestry needle (for weaving in ends and sewing on the button)
Using a cotton yarn is essential for durability and a neat finish, ensuring that your pouch retains its shape.
Yarn and Color Notes
When choosing your yarn, utilizing a worsted-weight cotton yarn will give your pouch structure while allowing for flexibility. The butter yellow color not only brings warmth but also pairs wonderfully with chocolate brown for a charming contrast. Feel free to explore various color combinations or even a variegated yarn for a unique look! However, ensure that the chosen yarn maintains a similar thickness to achieve the same finished measurements.
Finished Measurements
The final dimensions of the pouch will be approximately 3.5 x 3 inches. This size is ideal for earbuds and small accessories, making it easy to fit into a pocket or bag.
Gauge
While gauge is not critical for this project, consistent tension is essential for a well-formed pouch. A good way to check your gauge is to crochet a small square swatch and ensure the stitches are evenly spaced without gaps or bunching.
Abbreviations
- ch – chain
- sc – single crochet
- hdc – half double crochet
- sl st – slip stitch
- st(s) – stitch(es)
Important Pattern Notes
- Always ensure that your turning chains do not count as stitches unless specified.
- When working on the pouch, keep an even tension for the best results.
- Check that the right side of your work is facing outward before sewing the button.
Special Stitches and Techniques
This project employs basic crochet stitches:
- Single Crochet (sc): A foundational stitch that creates a tight fabric.
- Half Double Crochet (hdc): A taller stitch that adds slight volume to your work.
- Slip Stitch (sl st): Used for finishing and joining pieces together without adding bulk.
These stitches are easy to master and are fundamental in many crocheting projects, making this pouch an excellent practice piece.
Understanding the Construction
This pouch is made by crocheting a flat piece that is then folded and seamed at the edges to form a pocket. After creating the base, the flap is shaped for closure, making it a straightforward yet rewarding project. You’ll work in rows, gradually creating the depth of the pouch, and then transition to forming the flap.
Complete Pattern Instructions
Foundation
- Ch 15.
This chain will form the foundation of your pouch.
Row 1
- Row 1: Sc in the 2nd ch from the hook and across (14 stitches).
This establishes the first row of your pouch.
Rows 2-22
- Rows 2-22: Ch 1, turn, sc across.
By repeating this process, you’ll create a rectangular piece measuring approximately 9 rows high for the pouch body.
Row 23
- Row 23: Sl st in the first st, sc in the next, hdc across to the last 2 sts, sc, sl st.
This shaping creates a slightly rounded flap for added style and functionality.
Finishing Up
-
Fasten off your yarn.
This will secure your work and ensure it doesn’t unravel. -
Fold the lower 9 rows upward to form the pouch body, leaving the remaining rows as the flap.
-
Seam both side edges securely to create the sides of the pouch.
-
Join chocolate yarn around the flap edge and work 1 row of sc (optional) for a decorative finish.
-
Sew the button to the center front of the flap.
-
At the center flap edge, join the yellow yarn, ch 6-9 (depending on the button size) and sl st back into the flap to form a button loop.
-
Weave in ends. This step is vital for a polished look.
Checkpoints
- After completing Row 22, your piece should measure approximately 22 rows in height.
- Confirm that you have 14 stitches across the work after Row 1.
- The pouch should fold neatly, maintaining its shape and retaining the length of the flap.
Assembly
Once the crochet body is complete, carefully assemble the pouch:
- Fold the bottom 9 rows upward to create a pouch.
- Secure the edges with a plain seam, ensuring the inside of the pouch is neat.
- The rounded flap should sit naturally on top and should be aligned with the button beneath.
Finishing
To finish the project, ensure that all ends are well woven in. You might also choose to block the finished piece if desired, which can help it hold its shape better.
Resizing
If you want to resize your pouch, consider adjusting the starting chain while maintaining the same stitch counts for rows. For example, adding or subtracting from the number of chains can increase or decrease the overall size while keeping the proportions similar.
Variations
Here are a few variations you might explore once you’ve mastered the basic pouch:
- Create a two-color version using different yarn for the body and flap.
- Design a larger version to accommodate more significant items, such as a portable charger.
- Experiment with decorative stitches for added texture.
- Make a matching keychain using the same pattern scaled down.
Troubleshooting
Why Is My Pouch Crooked?
Ensure you are maintaining an even tension throughout your work. If only certain rows seem to be skewed, check for missed stitches on the previous rows.
Why Is It Not Closing Properly?
The button may be too small or not aligned correctly with the loop. Adjust the loop size according to the button.
How Can I Secure the Edges Better?
When seaming, use a single crochet seam to maintain strength and prevent unraveling, or consider a slip stitch for less bulk.
Frequently Asked Questions
Can I use a different yarn weight?
Yes, you can experiment with different yarn weights, but adjust your hook size accordingly to maintain the same finished dimensions.
Can I use acrylic yarn instead of cotton?
Acrylic yarn can work, but it may produce a different texture and drape. It is not as breathable as cotton.
Is this pattern suitable for complete beginners?
Absolutely! It’s designed specifically for those new to crochet.
Can I customize the button placement?
Certainly! Adjust the button placement to suit your needs; just ensure it’s functional for closing the flap securely.
Do I need a special hook for this yarn?
A standard 4mm hook is sufficient, but ensure it’s compatible with the thickness of your yarn.
How should I block it?
A light steam block should suffice; be careful not to apply too much heat to avoid damaging cotton yarn.
This project is a practical and charming way to practice your crochet skills. By following the pattern closely, you’re sure to succeed. For more creative crochet ideas, you might enjoy exploring this blue crochet belt pouch beginner pattern or consider making a mini amigurumi pumpkin with this easy beginner crochet pattern. Happy crocheting!



