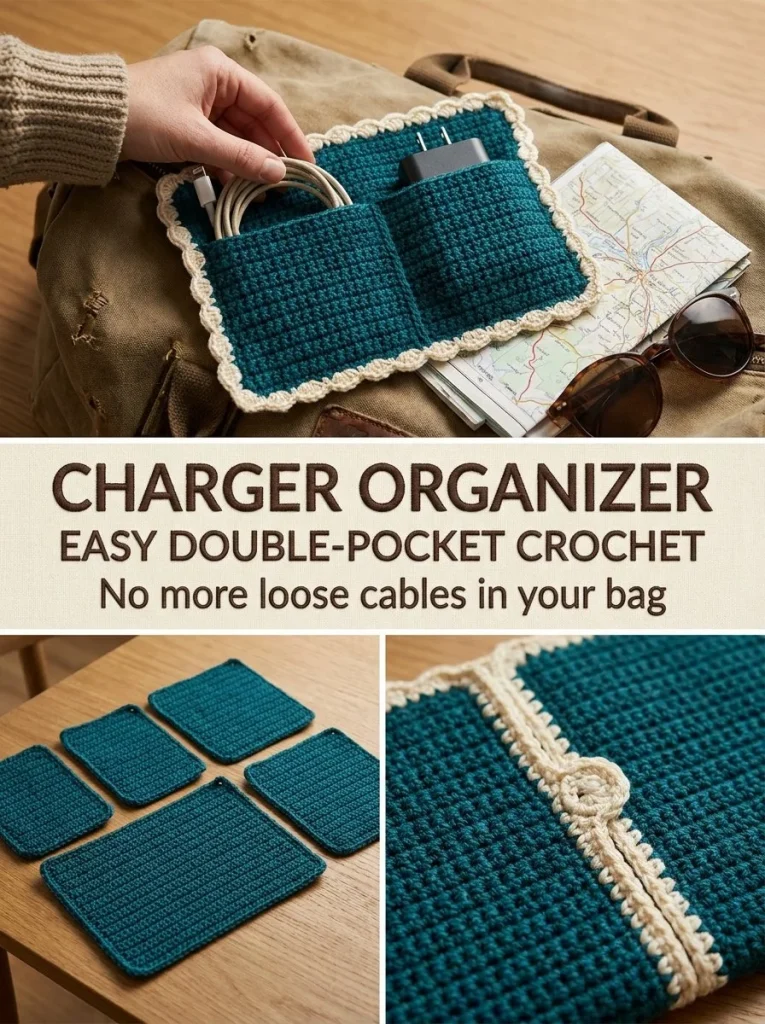
Creating a functional and stylish crochet project can be both rewarding and practical, especially when that project helps organize our daily essentials. The Double-Pocket Charger Organizer is an easy-to-make pouch designed specifically for holding your charging block and neatly coiled cables. With its simple construction and charming aesthetic, this organizer is perfect for anyone looking to keep their electrical cords tidy while adding a splash of color to their space. Made with worsted-weight cotton yarn, it offers both durability and visual appeal, making it a delightful addition to your home or workspace.
This project is particularly appealing because it combines effective storage solutions with delightful crochet techniques. As you create this organizer, you will become familiar with basic stitch techniques, alongside practical construction methods that further enhance your crochet skills. The finished piece not only serves its function but also reflects your personal taste, elevating any décor.
Pattern at a Glance
Skill level: Beginner
Terminology: US Crochet Terminology
Construction: Worked in rows and assembled for pocketing
Finished size: Approximately 11 inches tall x 9 inches wide
Yarn weight: Worsted-weight #4
Hook: 4.5mm
Main stitch: Single crochet (sc)
Gauge: Approximately 14 sc = 4 inches in width
Motifs: None
Layout: Flat rectangle with sewn pockets
Joining: Sewing
Border: Clean edge with a cream yarn
Materials
To create the Double-Pocket Charger Organizer, gather the following materials:
- Worsted-weight #4 cotton yarn in deep teal (approx. 150 yards for the main body)
- Small amount of cream yarn for the border
- 4.5mm crochet hook
- Tapestry needle for sewing ends and assembling the pockets
- 1 button (optional) for added closure
The worsted-weight yarn provides a sturdy structure, while the contrasting cream color creates a lovely border that enhances the overall design.
Yarn and Color Notes
For this project, selecting high-quality cotton yarn is crucial as it adds softness and durability to your work. Cotton is known for its ability to hold shape well, which makes it ideal for a user-friendly organizer that can withstand the wear and tear of daily use. Moreover, the rich hue of deep teal not only adds elegance but integrates easily with various decors.
Feel free to experiment with color combinations! Look into mixing and matching your deep teal with orange or warm yellows, especially if you aim to give your pouch a fall theme. This project could easily take on a cozy atmosphere with seasonal tones, making it a delightful gift, especially with fall approaching.
Finished Measurements
The finished organizer will measure approximately 11 inches tall and 9 inches wide. This size is perfect for accommodating standard chargers and coiling cords comfortably. Measuring your piece as you progress is essential, especially if you want to ensure a snug fit for your items.
Gauge
To achieve the desired measurements and maintain consistency throughout your project, it’s important to check your gauge. For this pattern, the target gauge is:
- 14 single crochets = 4 inches in width
If your gauge is larger than this, consider using a smaller hook size; if it’s smaller, switch to a larger hook. An incorrect gauge can affect the overall size of your project, impacting its functionality.
Abbreviations
- ch: chain
- sc: single crochet
Important Pattern Notes
- Be mindful of your turning chains; they do not count as a stitch.
- Always start your work into the first stitch of the row to maintain your stitch count.
- After assembling the pouch, ensure that the pockets are evenly sized by measuring and marking before sewing.
- The use of a tapestry needle is critical for weaving in any ends for a neat finish.
Special Stitches and Techniques
This project primarily consists of the single crochet stitch. Here’s a quick refresher:
- Single Crochet (sc): Insert the hook into the stitch, yarn over, pull up a loop (2 loops on hook), yarn over again, and pull through both loops.
Understanding the Construction
The construction begins with creating a flat rectangle for the back piece, followed by a smaller rectangle to serve as the pocket panel. The pocket is then sewn onto the backing, and a flap is folded down to close the organizer. This straightforward assembly process helps maintain the functionality of the piece while introducing easy sewing techniques.
Full Pattern Instructions
Foundation
Begin by chaining 27.
Row 1
Start from the second chain from the hook: work 1 single crochet (sc) in each chain across (you will have a total of 26 stitches).
Continuing Rows
Continue working sc in each stitch until the back piece measures approximately 11 inches tall.
Pocket Panel
Now, create the pocket panel by chaining 27 and working sc rows until the pocket measures 5 inches tall.
Assembly
- Position the pocket panel across the lower half of the backing.
- Sew along the bottom and both sides, securing the pocket in place.
- Mark the center of the pocket width with a stitch marker or a light pencil mark.
- Sew a straight vertical seam from the bottom of the pocket to the top, creating exactly 2 pockets.
Flap and Edging
- Fold the upper backing section down to create a flap.
- Join the cream yarn and work sc around the exposed edges to finish off the top.
- Optional: Sew a button to the front of the pouch and create a chain loop at the flap edge for closure.
At this point, you should have one pocket for your charging block and another for neatly coiled cables.
Checkpoints
- Your backing piece should now measure 11 inches tall and 9 inches wide.
- The pocket should be securely sewn on all sides.
Assembly and Joining
Ensuring that your pieces are properly aligned is crucial. Once you have sewn the pocket on, double-check that the center seam divides the pocket properly to accommodate two charging cables or items. The final edge work with cream yarn should create a polished look, preventing any rough edges from showing.
Finishing
- Weave in all loose ends using a tapestry needle.
- If desired, block your piece lightly to even out stitches.
- Ensure that the button closure functions smoothly with the created loop.
How to Resize
If you want a larger organizer, simply increase the foundation chain by multiples of 2. For example, to create a wider version, use 29 or 31 chains to begin with, adjusting your stitch counts accordingly in the same manner throughout.
Useful Variations
- Create a smaller version for headphones or smaller electronic gadgets.
- Use a single color for a minimalist look.
Troubleshooting
Why is my project getting wider?
This often happens if you accidentally add extra stitches in your rows. Keep an eye on your stitch count at the end of each row.
Why is my edge wavy?
Wavy edges can be a result of tension issues. Make sure you are keeping your tension consistent and not pulling stitches too tight.
Frequently Asked Questions
Can I use a different yarn weight?
Yes, but remember that this will affect the finished size. If using a different yarn weight, test your gauge.
Can I use cotton?
Absolutely! Cotton yarn is ideal for this project, providing durability and structure.
Can I make it larger?
Yes, you can increase the number of chains for a larger organizer. Just make sure to maintain the initial pattern structure with even increases.
Is the pattern reversible?
No, since there is a clear front and back due to the flap and pocket construction.
Final Thoughts
The Double-Pocket Charger Organizer combines practicality with a touch of creativity, making it a fantastic project for both beginner and seasoned crocheters. This easy-to-follow pattern allows for tailoring to individual needs, creating not just an item but an essential tool for organizing your space. Enjoy the process and embrace the satisfaction of making something useful with your own hands!
For more design ideas and crochet tips, check out this fall-inspired crochet pattern or explore this easy remote phone storage solution. Happy crocheting!



