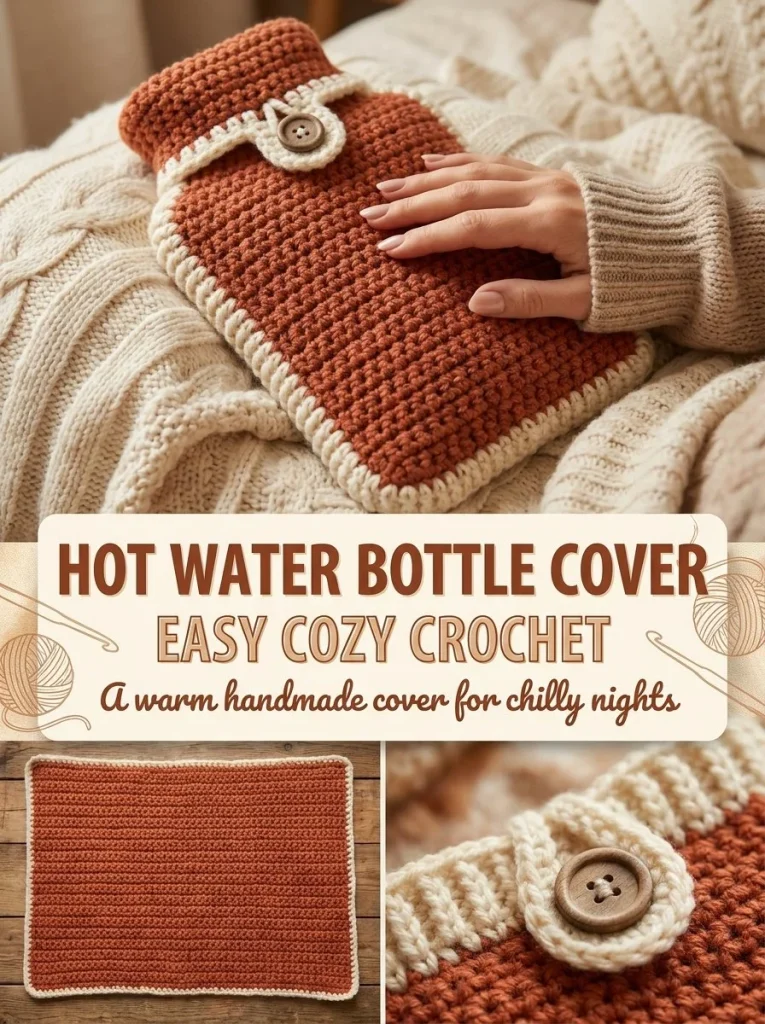
This terracotta hot water bottle cover is a charming and functional project that adds warmth and decorative flair to your home. Made using an easy one-piece crochet construction, it combines both aesthetic appeal and practicality, making it a perfect gift or personal accessory for those chilly nights.
The project is primarily created using worsted weight yarn, allowing for flexibility in its style and warmth. The cover is not just visually appealing; it is also crafted as a cozy safe haven for your hot water bottle, which can be especially comforting during winter months or for soothing sore muscles. By using different shades and textures, you can customize the look of the cover to match your home décor or personal taste. If you’re interested, you can also explore other cozy crochet patterns like this cable hot water bottle cover for even more design ideas.
Pattern at a Glance
Skill level: Intermediate
Terminology: US crochet terms
Construction: One-piece crochet
Finished size: Fits standard hot water bottle dimensions
Yarn weight: Worsted-weight #4 or bulky #5 yarn
Hook: 5-6mm
Main stitch: Half double crochet (hdc)
Gauge: Unspecified, but gauge isn’t critical for this project
Motifs: None
Layout: Rectangle-shaped pouch and flap
Joining: Seam sides to create the pouch
Border: Simple edge finishing with single crochet (sc)
Materials
To create the terracotta hot water bottle cover, you will need:
-
Yarn:
- Worsted-weight #4 or bulky #5 yarn in terracotta for the body
- Small amount of cream yarn for the finishing touches
-
Tools:
- 5-6mm crochet hook for the main assembly
- 1 medium button for the closure
- Tapestry needle for weaving in ends
- Measuring tape to ensure proper sizing
Each material serves a specific purpose, with the yarn providing the warm aesthetic and the button offering functional closure.
Yarn and Color Notes
Selecting the right yarn is crucial for achieving the desired texture and warmth. Worsted-weight yarn is a common choice for projects like this one since it is durable yet comfortable—ideal for a hot water bottle cover. The terracotta color provides a warm, earthy tone, though feel free to choose any color that suits your personality or décor.
Consider natural fibers like cotton or wool for their breathability, especially for a project that may come into direct contact with skin. If you choose to use a fuzzy or thicker yarn, be sure to adjust your stitch count accordingly to maintain the correct fit.
Finished Measurements
Before you start your project, it’s important to measure your hot water bottle for the perfect fit. Here’s a guideline for the ideal dimensions:
- Measure the width, height, and thickness of your hot water bottle. Your cover will be designed slightly larger than these measurements to ensure easy access and a snug fit.
Gauge
While a specific gauge isn’t critical for this project, it’s always good practice to check your stitches.
- To maintain a consistent fabric, it’s suggested to measure a small swatch to see if your tension aligns with the expected feel of the finished piece. If your gauge is larger, you may need to adjust your stitch count to ensure the final cover fits the bottle snugly.
Abbreviations
- Ch: Chain
- Hdc: Half double crochet
- Sc: Single crochet
- Sl st: Slip stitch
Important Pattern Notes
When crocheting this hot water bottle cover, keep the following tips in mind:
- Turning chains: Remember that your turning chain may not count as a stitch; for hdc, typically a chain of two is used.
- Even tension: Maintaining even tension throughout your work will ensure that the stitches look uniform.
- Right side vs. wrong side: Ensure you are consistent about which side is facing outwards as you work through your rows.
Special Stitches and Techniques
This project utilizes basic crochet techniques:
- Half double crochet (hdc) is worked by yarn-over before inserting the hook into the stitch, making it a versatile and effective choice for many projects.
- Single crochet (sc) is simplified for finishing the flap and provides a clean edge.
Understanding the Construction
The construction of the hot water bottle cover is straightforward, primarily involving the creation of a rectangle-shaped piece that is folded and seamed to form a pouch.
- Begin by crocheting a long rectangle that comfortably fits the dimensions of the bottle.
- Fold the rectangle to create a pouch, securing the sides while leaving the top open for access.
Next, a flap is formed at the top for closure, which will also require careful finishing and button placement to ensure the cover can secure the bottle effectively.
Full Pattern Instructions
Foundation
- Measure the width, height, and thickness of your hot water bottle.
- Create a chain that is approximately the bottle width plus 1-1.5 inches.
- Work half double crochet (hdc) rows until the piece is roughly twice the bottle height, plus 4-5 inches for the flap.
Construction
- Row Instructions: Continue working in hdc until you reach the desired length, ensuring to keep your stitches consistent.
Assembly
- Lay your rectangle flat on the table.
- Fold the lower portion upward to create a pouch that is slightly taller than the body of the bottle.
- Seam both side edges securely, leaving the top open.
Finishing the Flap
- Attach the cream yarn and work 1-2 rows of single crochet (sc) across the exposed edge of the flap.
- Sew a medium button to the front center of the pouch.
- At the center of the flap edge, join yarn and chain enough stitches to comfortably loop around the button, then slip stitch back into the flap.
Final Step
Insert a filled and securely closed hot water bottle only after checking for leaks in the bottle cap.
Checkpoints
- After creating your rectangle, your piece should measure approximately the dimensions taken from your bottle.
- The pouch should be tall enough to cover the bottle adequately when completed.
Resizing
If you wish to resize your hot water bottle cover, consider adjusting the foundation chain based on the dimensions of a different bottle. For larger bottles, increase the initial chain length accordingly; for smaller bottles, reduce it.
Useful Variations
- Color Combinations: Try using a gradient or ombre yarn for unique color variations.
- Embellishments: Add decorative stitches or motifs to personalize your cover further.
- Different Sizes: Create a matching cover for smaller bottles or even a set of cozies in varying sizes.
Troubleshooting
Why Is My Project Getting Wider?
If your piece is expanding, it may be due to adding extra stitches or failing to maintain consistent tension. Always keep an eye on stitch counts as you work.
Why Is My Edge Wavy?
A wavy edge may indicate uneven tension or incorrectly counting stitches at the beginning of rows. Ensure consistent tension and double-check your stitch counts.
Frequently Asked Questions
Can I use a different yarn weight?
Yes, but note that exact dimensions may vary if you choose a different weight. Adjust your stitch counts accordingly.
Can a beginner make this project?
While some basic crochet experience is recommended, the project is designed to be accessible for those looking to improve their skills.
Do I need a special hook?
A standard 5-6mm hook will work fine for this pattern. However, you should choose a hook that matches the yarn you’re using for the best results.
Final Thoughts
Creating the terracotta hot water bottle cover involves straightforward crochet techniques and a relaxing process. With just a few simple steps—measuring, crocheting, and assembling—you’ll have a cozy, personalized accessory that not only serves a function but brightens up your space. You might even find it inspires you to explore additional crochet projects, such as a lovely succulent holder with patterns like this removable plant pot cover. Enjoy crocheting your snug little creation!



