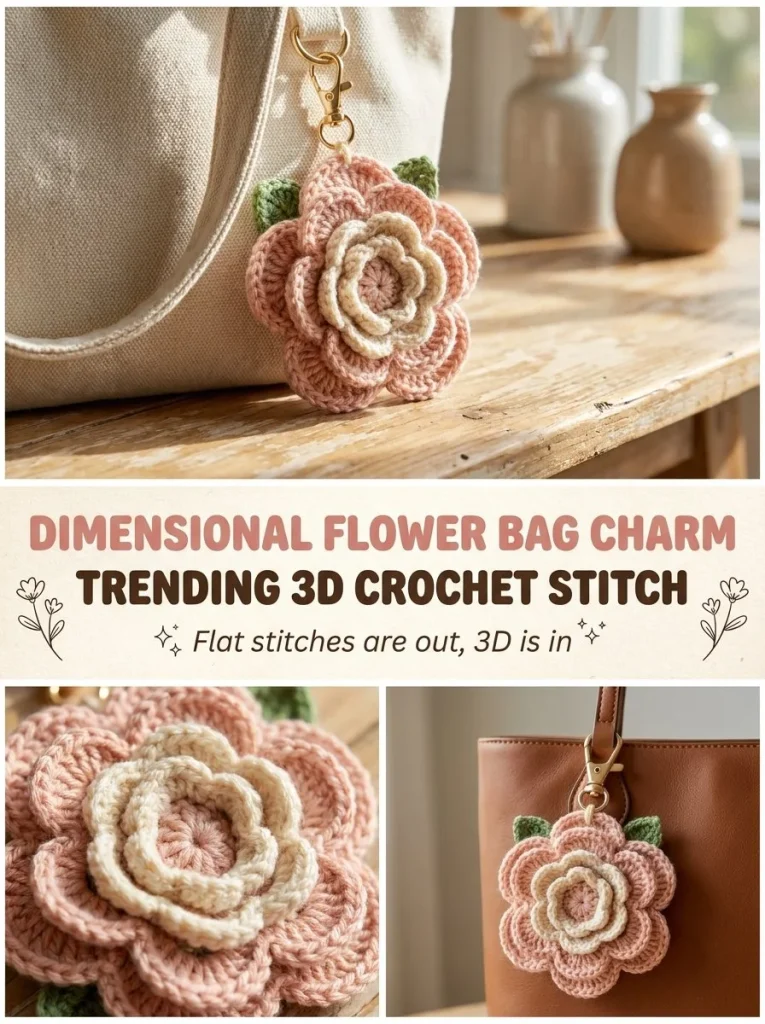
Creating a dimensional flower bag charm with crochet techniques is not only a fun project but also a fantastic way to spruce up any accessory with a touch of handmade charm. This small yet eye-catching piece can be attached to keyrings, backpacks, or as a decorative element on bags. You’ll find that working this pattern provides a satisfying result while developing your crochet skills. As you manipulate the yarn into layered petals, you’ll gain valuable experience with magic rings and slip stitches.
Why You’ll Love This Crochet Pattern
- The dimensional layers add a beautiful depth and texture to the flower.
- Quick to make, this project is perfect for a thoughtful, last-minute gift.
- It’s an excellent way to use up small amounts of yarn.
- You can customize colors to match the recipient’s style.
- It’s a fun addition to other crochet accessories, such as the mini granny square bag charm.
Finished Size
The finished flower charm will approximately measure 3 to 4 inches in diameter, although it may vary depending on your choice of yarn, hook size, and personal tension.
Skill Level
This pattern is suitable for beginners to intermediate crocheters. The skills required include magic rings and basic slip stitches, which are easy to grasp even for those just starting in crochet.
Materials Needed
- Small amount of blush cotton yarn
- 3mm hook
- Small keyring
- Tapestry needle
- Stitch markers
- Scissors
Stitches and Abbreviations
- Ch: Chain
- Sc: Single crochet
- Sl st: Slip stitch
- Rnd: Round
Gauge and Tension Notes
Gauge is not crucial for this project; however, maintaining a consistent tension will help ensure that your flower maintains its shape. Aim for a firm but not too tight tension when working with the cotton yarn.
Pattern Notes Before You Start
This project is worked in rounds, with the petals layered for a 3D effect. You’ll be assembling the flower by sewing the center piece onto the petals. Ensure you offset the front petals relative to the back ones when assembling for the best visual appeal.
Step-by-Step Crochet Instructions
-
Back Petals (Layer 1): Create a magic ring, chain 1, and work chain 3, slip stitch into the ring five times to form 5 petal loops. Fasten off, leaving the ring open in the center.
-
Front Petals (Layer 2): Using a new strand, work into the same center ring: chain 2, slip stitch into the ring five times to form 5 smaller petals directly on top of the first layer, offsetting their placement between the layer-1 petals to create a dimensional look. Fasten off.
-
Center: Work a small tight round by creating a magic ring, chain 1, and work 5 single crochets into the ring. Fasten off and sew it into the very center on top of both petal layers.
-
Finishing Touch: Attach a keyring to the back of the flower using a small loop of yarn.
Assembly and Finishing
To create a polished look, weave in all ends carefully. Ensure the petals maintain their shape by gently tugging at them if necessary. You may decide to lightly steam the flower to help it settle into a lovely shape.
Helpful Tips
- To enhance the neatness of your flower, try using a stitch marker to mark the beginning of each round.
- Keep your tension even when working the back and front petals to avoid any unintended distortion.
- For extra sturdiness, consider using a slightly thicker yarn for the keyring loop.
Common Mistakes to Avoid
- Avoid pulling the magic ring too tight before finishing the petals; it can make subsequent rounds difficult.
- Be sure to check that you are working in the same direction for both layers of petals to maintain a consistent look.
- Don’t forget to offset the placement of the front petals; this is key for achieving that dimensional effect.
Customization Ideas
- Choose a different yarn color to match seasonal decor or personal preferences.
- Add a bead or button in the center of the flower for an extra decorative touch.
- Experiment with different yarn textures or weights for a unique look.
How to Use or Display This Crochet Project
The finished flower bag charm is perfect for brightening up a set of keys or adding flair to a bag or purse. Its cheerful presence makes it an ideal gift for any crochet enthusiast or as a fun accessory for yourself.
Care Instructions
To clean your crochet charm, hand wash it in cold water with mild soap. Lay it flat to dry to maintain its shape.
Frequently Asked Questions
-
Can I use a different yarn weight?
Yes, but be aware that the size and appearance may differ. -
How do I secure the petals better?
Consider sewing the layers together more securely if you find they don’t hold their shape. -
What if my magic ring is too big or small?
Practice making smaller rings if necessary; adjust tightness by how firmly you pull the yarn. -
Can I turn this flower into a brooch?
Absolutely! Just sew a pin back onto it for easy wear. -
Is it easy to remove yarn tails?
Yes, just ensure to leave a sufficient tail when fastening off for ease of weaving in.
With this guide, you’re all set to create a beautiful crocheted flower bag charm. Enjoy the process and let your creativity blossom! For more crochet ideas, you might also be interested in exploring the chartreuse mosaic coin charm.



