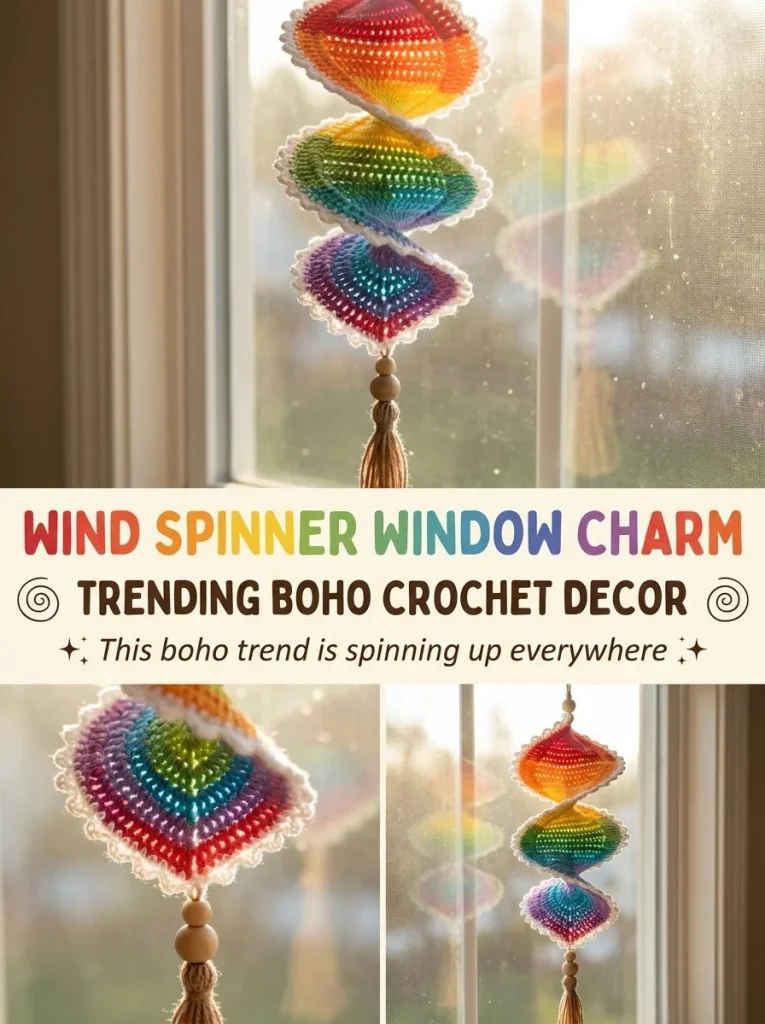
Creating a charming wind spinner for your window is an enjoyable crochet project that combines creativity with practicality. This delightful decor piece not only adds a whimsical touch to any room, but it’s also a fantastic gift idea for friends and family. The beauty of this pattern lies in the spiral gradient that emerges from alternating colors, which captures light beautifully and brings movement to your space. As you work through the rows, you may find that maintaining your tension helps the panels maintain a clean shape, preventing them from curling or warping.
Why You’ll Love This Crochet Pattern
- Easy to follow for both beginners and more experienced crocheters.
- Vibrant colors create an eye-catching decoration perfect for any window.
- Quick project that makes for a lovely gift any time of year.
- The spiral design allows for creative expression with color combinations.
- Each panel is small and manageable, making this a great stash-buster.
Finished Size
The estimated finished size of each panel is about 6 inches in diameter, but this may vary depending on your yarn, hook size, and tension.
Skill Level
This pattern is classified as beginner due to its straightforward stitches and simple construction. Even those new to crochet will find success with the step-by-step instructions.
Materials Needed
- Cotton yarn in 4-5 rainbow colors
- 4mm crochet hook
- Small wooden beads (optional for tassels)
- Fishing line or string for hanging
- Tapestry needle
- Scissors
Stitches and Abbreviations
- ch: chain
- sc: single crochet
- sl st: slip stitch
- Picot: ch3, sl st into the first ch
Gauge and Tension Notes
For this project, the gauge is not critical, but maintaining even tension will help your panels look neat and consistent. Aim for a uniform stitch size as you work through the color changes.
Pattern Notes Before You Start
The wind spinner consists of four spiral panels worked in rows. Each panel features a gradient color change, allowing you to switch colors every 3-4 stitches. Finally, the panels are assembled by stitching them together at the center, radiating outward like the blades of a wind spinner.
Step-by-Step Crochet Instructions
- Panel Creation: Start by chaining 20. In the 2nd chain from the hook, make 1 single crochet (sc) and continue with sc across for a total of 19 sc.
- Row 2: Chain 1 and turn your work. Working in the back loop only, sc across, changing to a new color every 3-4 stitches.
- Continue: Repeat step 2 for about 6 rows total, then fasten off. Make three more panels, repeating the process in your chosen color transitions.
- Picot Edge: Once all panels are completed, create a picot edge by working a round of sc1, ch3, sl st into the first ch (picot), sc1 around each panel’s outer edge.
- Assembly: Stitch all four completed panels together at their centers, ensuring they radiate outward.
- Tassel: Thread a wooden bead onto a length of string and tie it to the bottom center of the assembled panels as a decorative tassel.
- Hanging Loop: Finally, attach a loop of string to the top for hanging.
Assembly and Finishing
To finish your wind spinner, take care to weave in any loose ends neatly. Hang the spinner in a location where it can catch sunlight and breeze, enhancing its charming movement and color.
Helpful Tips
- Keep a steady tension to maintain uniformity in your panels.
- Experiment with color schemes to find what works best for you.
- If new to picots, practice on a swatch to ensure neatness.
- Use a stitch marker to help keep track of your color changes.
Common Mistakes to Avoid
- Uneven Color Changes: Switching colors too often or not often enough can disrupt the gradient effect. Stick to 3-4 stitches per color.
- Curling Panels: If panels are curling, check your tension and ensure you’re working in the back loops correctly.
- Joining Panels Incorrectly: Make sure to stitch together accurately at the center for a balanced finish.
Customization Ideas
- Incorporate more colors to create a larger variety of panels.
- Use different bead sizes or textures for the tassel.
- Adjust the size by changing the chain length at the beginning.
- Try different stitches along the edges for added texture.
How to Use or Display This Crochet Project
The finished wind spinner can be displayed in a sunny window, bringing a cheerful flair to your home decor. It’s also a charming gift for house warmings or special celebrations.
Care Instructions
To clean your wind spinner, gently hand wash with mild soap and air dry. Store in a cool, dry place away from direct sunlight to maintain the colors and shape.
Frequently Asked Questions
-
Can this pattern be adjusted for different sizes?
- Yes, simply adjust the initial chain length accordingly.
-
What types of yarn work best for this project?
- Cotton yarn is ideal for its durability and ease of use.
-
Is this project suitable for children?
- With adult supervision, this pattern can be a fun project for older children learning to crochet.
-
How do I secure the ends of my yarn when changing colors?
- Weave in the ends with a tapestry needle to keep your work tidy.
To explore more fun crochet designs, be sure to check out this geometric crochet pattern or this cute bag charm pattern. Both offer unique projects to expand your crochet repertoire.



