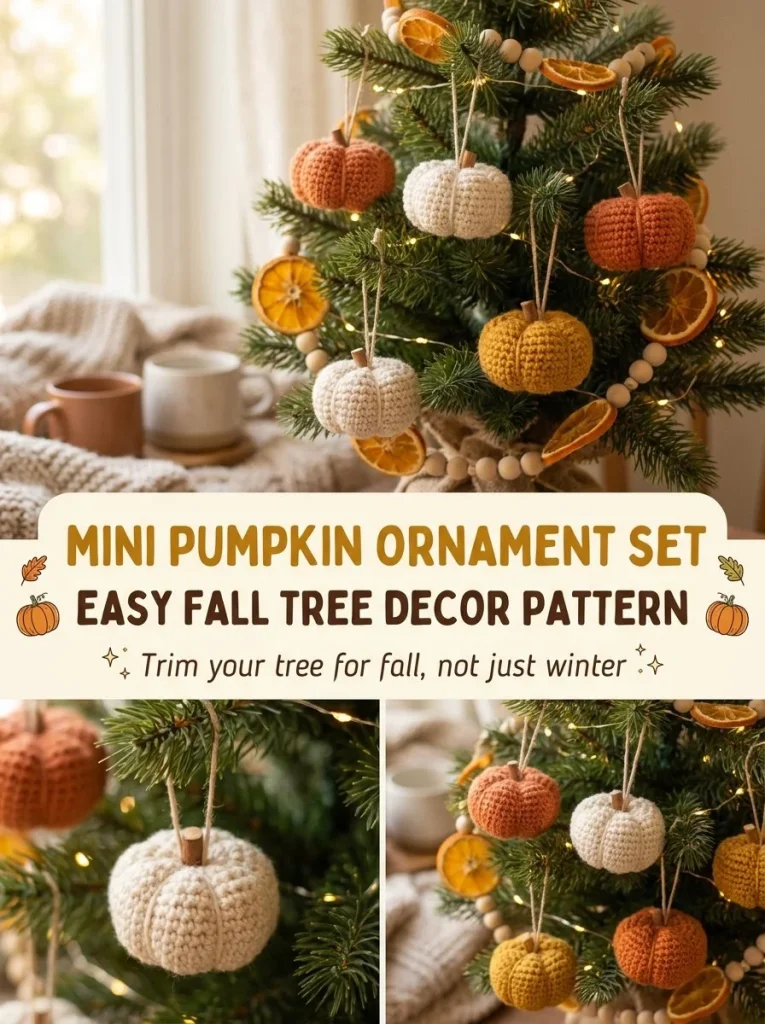
The Mini Pumpkin Ornament Set is a delightful crochet project perfect for sprucing up your fall decor. These tiny pumpkins, made in shades of orange, cream, and mustard, make lovely additions to any autumn-themed display. They are also fantastic gifts or little treats for friends, especially during the harvest season. Using a simple magic ring and basic stitches, even beginners will find the pattern easy to follow. A maker tip to enhance the shape of your pumpkins is to ensure they are lightly stuffed for a plump look, which really brings them to life.
Why You’ll Love This Crochet Pattern
- Perfect for beginners and experienced crocheters alike.
- Quick to make: you can complete a whole set in an afternoon.
- Versatile decor that fits in with any style, from rustic to modern.
- A fun project that uses up leftover yarn scraps.
- Easy to customize with different colors or sizes.
- The pattern includes clear instructions with stitch counts and shaping tips.
Finished Size
Each pumpkin measures approximately 3 inches in height and width, although size may vary depending on your yarn choice, hook size, and tension.
Skill Level
This pattern is suitable for beginners due to its straightforward techniques. It introduces basic crochet skills without overwhelming new crocheters.
Materials Needed
- Small amounts of orange, cream, and mustard yarn
- Small amount of brown yarn for stems
- 3.5mm crochet hook
- Small amount of stuffing
- Thin ribbon or string for hanging loops
- Tapestry needle
- Scissors
Stitches and Abbreviations
- sc: single crochet
- ch: chain
- sc2tog: single crochet two together
Gauge and Tension Notes
While gauge isn’t crucial for this project, aim for even tension to keep your stitches consistent. If you find your stitches are too tight or loose, adjust your hook size accordingly.
Pattern Notes Before You Start
The pumpkins are worked in rounds, starting from a magic ring and gradually increasing the stitch count. You will need to stuff them lightly before closing them off. The stems are created using simple chains and are sewn onto the top of each pumpkin.
Step-by-Step Crochet Instructions
- Magic Ring: Create a magic ring, ch1, and work 6 sc into the ring (6).
- Increase Round: Round 2: 2 sc in each st around (12).
- Even Round: Round 3: sc even around (12). Lightly stuff the pumpkin before proceeding.
- Decrease Round: Round 4: sc2tog around (6), fasten off, and cinch closed.
- Make the Stem: For the stem, chain 3, sc into the 2nd ch from hook and across, fasten off, and sew it to the top of each pumpkin.
- Hanging Loop: Attach a small loop of ribbon or string through the stem of each ornament for hanging.
- Repeat for all 5 pumpkins.
Assembly and Finishing
To finish your pumpkins neatly, weave in all loose ends with a tapestry needle. Ensure the stems are securely attached and adjust the stuffing if necessary for a uniform look.
Helpful Tips
- For a tidy finish, stuff each pumpkin lightly before closing. Overstuffing can distort their shape.
- Use a tapestry needle to sew the stems securely to the pumpkins to prevent them from falling off.
- Experiment with different yarn textures for unique looks—fluffy yarns can add a whimsical touch.
- When stitching the hanging loop, make sure it’s long enough to allow for easy hanging.
Common Mistakes to Avoid
- Overstuffing: This can make the shape awkward; aim for a light stuffing.
- Inconsistent Tension: Keep an eye on your tension to prevent uneven sizes.
- Skipping the Magic Ring: Start with a magic ring for a neat closure; avoid chains that leave a hole.
Customization Ideas
- Change the colors of yarn to suit your decor, like pastel shades for spring.
- Resize the pattern by using thicker yarn for bigger pumpkins or thinner yarn for miniatures.
- Add embellishments such as glitter or beads for a festive touch.
- Consider using fabric paint to create unique patterns or faces on your pumpkins.
How to Use or Display This Crochet Project
These finished mini pumpkins can be used as table centerpieces, hung on a fall-themed tree, or displayed on a mantel. They make perfect gifts for holiday parties or can be added to gift baskets for a personal touch.
Care Instructions
To clean your mini pumpkins, gently spot clean with a damp cloth. Store them in a cool, dry place, protected from direct sunlight to keep the colors vibrant.
Frequently Asked Questions
Q: Can I use different yarn types?
A: Yes! Just keep in mind that different yarn weights will affect the size of your pumpkins.
Q: Do I need to block my project?
A: Blocking isn’t necessary for this project, but if you prefer a neater finish, you can lightly steam your pumpkins.
Q: How do I make the stems stand out more?
A: You can use contrasting yarn for the stems or add some embellishments like beads.
Q: What if I want to make more than five pumpkins?
A: Simply repeat the pattern as many times as you like to create your desired number of pumpkins.
For even more crochet fun, consider exploring an easy fall decor option with this pumpkin garland string pattern that complements your mini pumpkins beautifully.
These charming crochet creations are sure to bring a touch of warmth to any autumn celebration, making them a delightful addition to your seasonal crafting repertoire. For those wanting to dive deeper into the world of crochet, check out this mini amigurumi pumpkin pattern for another easy and engaging project to try!



