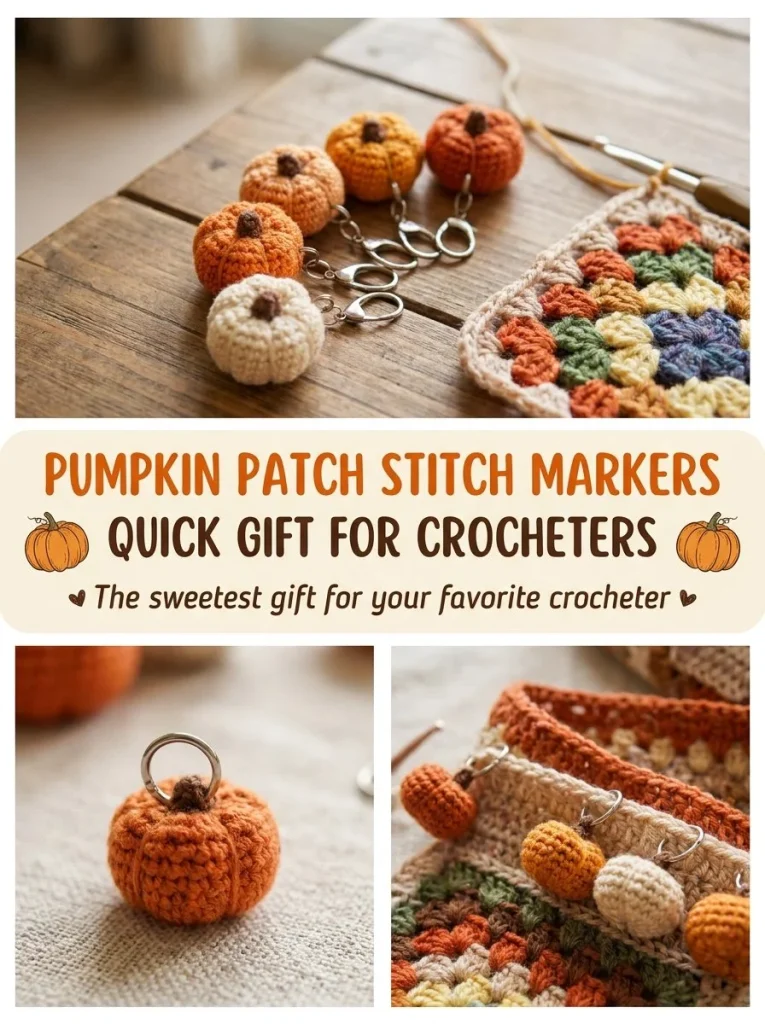
The Pumpkin Patch Stitch Marker Set is a delightful project that brings a touch of autumn to your crochet toolkit. Perfect for beginners and experienced makers alike, these tiny pumpkin stitch markers add a festive charm to your crochet projects while also keeping your place organized. The cute orange and cream pumpkins are not only quick to make, but they also serve as thoughtful gifts for your fellow crocheters. When using this pattern, you’ll find that the size of your finished pumpkins can vary slightly based on your yarn choice and hook tension, but they will all maintain that adorable, plump pumpkin shape. To achieve a lovely finish, remember to keep your stitches tight for a neater look. You may also find Heart Texture Dishcloth Knitting Pattern Gift Set useful.
Why You’ll Love This Crochet Pattern
- Quick and easy to whip up, making them great last-minute gifts.
- Adds a seasonal flair to your crochet projects.
- Ideal for using up small amounts of yarn.
- The pattern is straightforward, ensuring a satisfying and enjoyable crafting experience.
Finished Size
Each tiny pumpkin will measure approximately 1.5 inches in diameter, but this may vary depending on your yarn, hook, and tension.
Skill Level
Beginner: This pattern is beginner-friendly, with simple stitches and clear instructions, making it accessible for new crocheters.
Materials Needed
- Small amounts of orange and cream cotton thread
- 2mm hook
- 5 locking stitch marker rings
- Tapestry needle
- Scissors
Stitches and Abbreviations
- sc: single crochet
- ch: chain
- ea: each
- st: stitch
Gauge and Tension Notes
While gauge is not crucial for this pattern, maintaining consistent tension will help keep your pumpkins evenly shaped and neat.
Pattern Notes Before You Start
The pumpkins are worked in the round and attached directly to the locking stitch markers. Each one is formed using a magic ring, then worked in simple single crochet to create a flat body, making them quick to finish.
Step-by-Step Crochet Instructions
- Begin with a magic ring. Chain 1 and work 6 single crochets into the ring: (6).
- For Round 2, crochet evenly around all stitches: (6).
- Fasten off, leaving a tail for stitching.
- To create ridges, use orange yarn on a tapestry needle and stitch 3-4 short lines from the center to the edge of the pumpkin.
- Finally, stitch the completed pumpkin securely onto a locking stitch marker ring. Repeat for all 5 markers.
Assembly and Finishing
Once you have crocheted all five pumpkins, ensure they are evenly shaped and securely attached to the stitch markers. Weaving in your ends neatly will help maintain a finished look.
Helpful Tips
- Keep your tension consistent to ensure an even shape for the pumpkins.
- If the magic ring feels tricky, consider using a slip knot as an alternative to start your project.
- Use a tapestry needle to hide any loose ends for a polished finish.
- Experiment with varying the number of ridges for extra personality in your pumpkins.
Common Mistakes to Avoid
- Not pulling your magic ring tight enough can cause gaps; make sure it’s snug.
- Over-tightening your stitches may lead to a stiff pumpkin; find a comfortable tension.
- Ensure that all stitches are completed evenly to maintain a round shape.
Customization Ideas
- Change the pumpkin colors to a variety of fall hues, such as deep red or yellow.
- Consider using different textures of yarn for a unique look.
- Experiment by adding small embellishments like beads or even glitter thread for a festive touch.
How to Use or Display This Crochet Project
These adorable pumpkin stitch markers can be used to keep track of your stitches in any crochet project or can be gifted to friends as a charming seasonal surprise. They also make excellent decorations for your yarn storage area or workspace.
Care Instructions
To clean your finished markers, gently hand wash with mild soap and let them air dry. Cotton yarn is durable yet gentle, so your pumpkins will look good as new with proper care.
Frequently Asked Questions
Q: Can I use a different type of yarn for this project?
A: Absolutely! Just ensure the yarn is lightweight enough to maintain the tiny pumpkin shape.
Q: How do I attach the stitch markers securely?
A: Make sure to stitch them tightly onto the locking rings, pulling the yarn firmly to keep them in place.
Q: Are these stitch markers suitable for all types of crochet projects?
A: Yes, these markers work well for any crochet project where you need to keep track of your stitches.
Q: What other crochet projects could I pair with these markers?
A: For a cohesive autumn theme, you might explore the pumpkin coaster set as well!
With these practical tips and instructions, you’ll find joy in making your own Pumpkin Patch Stitch Marker Set. Enjoy your crafting journey, and happy crocheting!



