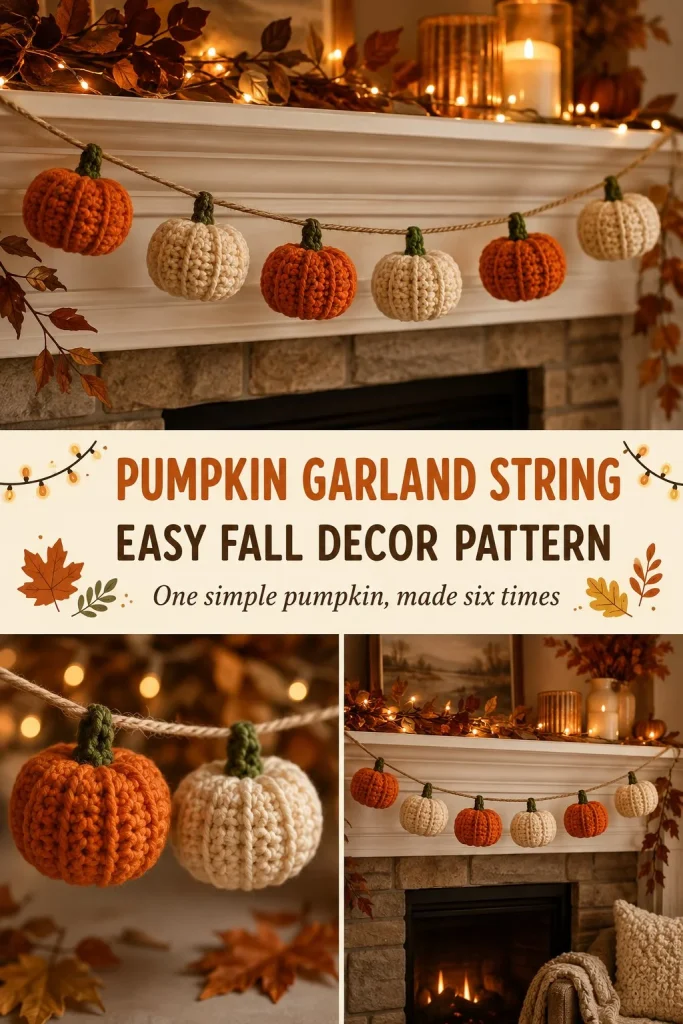
Cozy up your home this fall with a delightful crochet pumpkin garland string that’s both charming and easy to make. This pattern features six mini pumpkins crocheted alternately in orange and cream, threaded together on a twine or cotton string to create a festive decoration perfect for mantels, doorways, or windows. Using worsted-weight yarn and a modest 4mm hook, the pumpkins work up quickly, making this a practical project for beginners ready to explore shaping small amigurumi pieces. Light stuffing and a little brown stem give each pumpkin a rounded, realistic look — a detail that really adds to the charm. If you’re familiar with beginner-friendly designs like the cherry blossom crochet hair comb pattern, you’ll find this garland similarly enjoyable and approachable, with simple assembly that brings everything together beautifully.
Why You’ll Love This Crochet Pattern
- Creates a cozy, festive decoration perfect for fall or Halloween
- Uses basic stitches and a single small motif repeated for easy repetition
- Mini pumpkins are lightweight and quick to crochet with stuffing to hold shape
- Assembly with yarn threading is simple and customizable for different lengths
- Great opportunity to practice amigurumi stuffing and shaping skills
- The finished garland is a charming handmade gift for friends or family
Finished Size
Each mini pumpkin measures approximately 3 inches (7.5 cm) in diameter. The full garland string, with six pumpkins spaced 4 to 5 inches apart, will be around 28–30 inches long, excluding hanging loops. Size may vary slightly depending on your yarn choice, hook, and crochet tension.
Skill Level
Easy to Intermediate beginner. This pattern involves working in continuous rounds with magic rings and basic stitches, making it accessible for new crocheters who want to try amigurumi shapes. The assembly requires basic sewing skills but is straightforward.
Materials Needed
- Worsted-weight yarn in orange (approx. 50 yards)
- Worsted-weight yarn in cream (approx. 50 yards)
- Small amount of brown worsted-weight yarn for pumpkin stems
- 4 mm (G) crochet hook
- Polyester stuffing or fiberfill (small amount)
- Length of cotton twine or yarn for stringing (approx. 3 feet)
- Tapestry needle for sewing and threading
- Scissors
Stitches and Abbreviations
- MR = Magic Ring: A loop made by wrapping yarn around fingers to start crochet rounds.
- sc = Single Crochet: Insert hook, yarn over, pull through 2 loops.
- inc = Increase: Two single crochets in one stitch.
- dec = Decrease: Single crochet two stitches together to reduce stitch count.
- sl st = Slip Stitch: Insert hook, yarn over, pull through both loops on hook to join rounds or finish.
Gauge and Tension Notes
Gauge is not critical for this project but maintaining consistent tension ensures pumpkins are uniformly sized and nicely shaped. Avoid overly tight stitches when stuffing, as it may be harder to work into the pumpkin closing rounds. Conversely, too loose tension can make the stuffing show through.
Pattern Notes Before You Start
Each mini pumpkin is worked in continuous rounds from a magic ring through round 11 before stuffing and closing. The pumpkins are crocheted separately, alternating colors between orange and cream. The small brown stem is sewn on top after stuffing. Once all pumpkins are complete, you will thread them onto the string and knot the ends with loops for hanging. No color changes happen during the pumpkin body, simplifying the process for beginners.
Step-by-Step Crochet Instructions
-
Mini Pumpkin Body (Make 6 total: 3 orange, 3 cream, alternating colors)
- Round 1: Make MR, 6 sc in ring (6 sts)
- Round 2: inc around (12 sts)
- Round 3: sc 1, inc repeat around (18 sts)
- Round 4: sc 2, inc repeat around (24 sts)
- Round 5: sc 3, inc repeat around (30 sts)
- Rounds 6–8: sc around (30 sts each)
- Round 9: sc 3, dec repeat around (24 sts)
- Round 10: sc 2, dec repeat around (18 sts)
- Round 11: sc 1, dec repeat around (12 sts)
- Lightly stuff with fiberfill to desired firmness.
- Round 12: dec around (6 sts)
- Finish off, leaving a long tail for sewing.
-
Pumpkin Stem (Make 6, in brown yarn)
- Chain 4
- Row 1: sc in 2nd chain from hook and each chain across (3 sts)
- Row 2: sc across (3 sts)
- Finish off and leave tail for sewing.
Assembly and Finishing
Use the tapestry needle and a length of yarn or twine to thread through the center of each pumpkin, from side to side, spacing them evenly around 4–5 inches apart. This spacing creates a balanced look without crowding. Tie knots at both ends of the string to keep pumpkins from sliding and finish each end with a small loop for hanging. Sew the small brown stem securely onto the top of each pumpkin using yarn tails left from the stem piece. Weave in all loose ends to prevent unraveling and maintain a neat appearance.
Helpful Tips
- When stuffing pumpkins, add fiberfill sparingly in small amounts to keep the shape firm but slightly squishy.
- Use stitch markers if needed to keep track of rounds, especially when working decreases.
- To get a tidier pumpkin shape, gently shape the body with your fingers as you stuff to avoid lumps.
- Knot the twine securely and test the tension before hanging to avoid pumpkins sliding or bunching up.
- For a perfectly spaced garland, lightly mark twine spacing with a washable marker or thread a thinner yarn temporarily.
Common Mistakes to Avoid
- Overstuffing the pumpkins can stretch out stitches and make finishing difficult—stuff lightly and gradually.
- Skipping decreases or losing count can result in uneven pumpkin sizes; count stitches carefully in rounds 9–12.
- Not securing the stems well can cause them to come loose; sew them firmly with leftover tails.
- Using string that’s too slippery without knots may cause pumpkins to slide around—knots keep them in place.
Customization Ideas
- Try different color combinations such as cream and pale yellow or add a green accent for tiny leaves on stems.
- Use a light sport weight instead of worsted yarn for smaller pumpkins for a delicate garland.
- Add embroidered pumpkin "ribs" with surface slip stitches for realistic texture.
- Create a longer garland with more pumpkins or mix the pumpkins with crocheted leaves for richer fall decor.
How to Use or Display This Crochet Project
This pumpkin garland adds a warm, handmade touch to your seasonal decorating. Perfect hung above a fireplace, across windows, or on stair railings, it brightens any space with cozy charm. It also makes a lovely gift for friends or family who enjoy unique fall decorations. You can pair it with other crochet projects, such as table runners or pumpkin coasters, for a coordinated look.
Care Instructions
Hand wash your garland gently in cool water with mild detergent to keep yarn colors vibrant. Avoid wringing; instead, press out water gently and reshape pumpkins before drying flat. Store it properly by hanging or keeping it in a breathable container to prevent crushing the stuffed shapes.
Frequently Asked Questions
Q: Can I make the pumpkins without stuffing?
A: You can, but stuffing helps the pumpkins hold their shape well and look plump. Without stuffing, they might appear flat and less defined.
Q: What yarn types work best for this pattern?
A: Worsted-weight acrylic or cotton blends work well for shape and durability, but natural fibers can also add softness.
Q: How do I keep the pumpkins from sliding on the twine?
A: Tie knots tightly on either side of each pumpkin along the string to hold their positions firmly.
Q: Can I make larger pumpkins for the garland?
A: Yes, using bulkier yarn or increasing rounds will create larger pumpkins, just adjust spacing accordingly.
Q: Is the brown stem necessary?
A: It adds a nice finishing touch, but you can skip it or substitute with a small button or felt decoration if preferred.
Final Thoughts
This pumpkin garland string pattern is a simple way to bring cozy autumn vibes into your home or craft space. Its manageable size and easy construction make it a satisfying project for beginners, while the soft colors and thoughtful finishing details give it a polished look. If you want to complement this project with another statement crochet accessory, exploring the bold stripe chunky statement ring pattern offers a fun, monochrome option to challenge your skills in a new way. Enjoy crafting your fall decor!




Why doesnt photo and instructions match? Another AI post flooding the intertnet by you