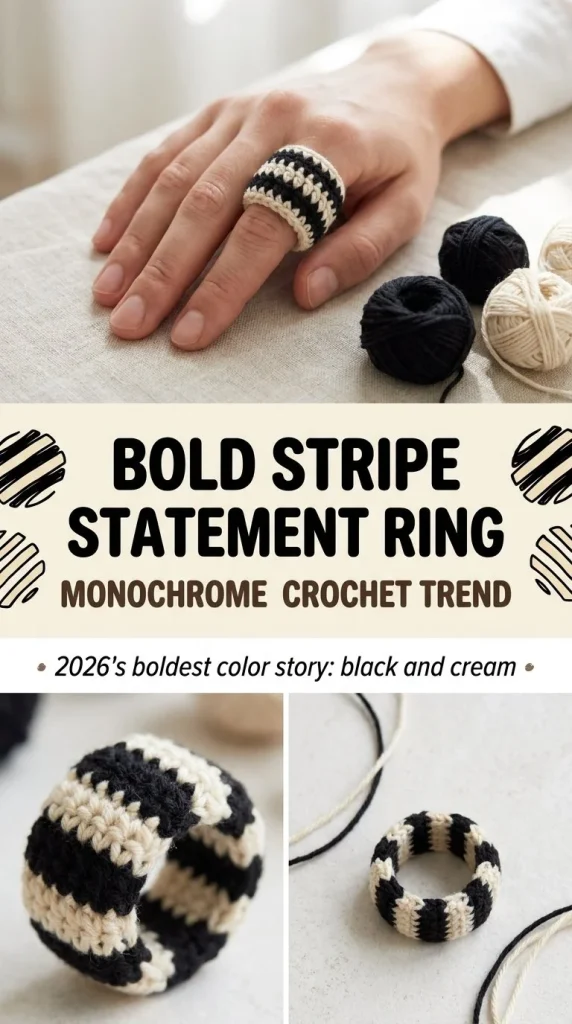
This bold stripe chunky statement ring is a fun and easy crochet project especially perfect for anyone looking to add a minimalist yet eye-catching accessory to their handmade collection. Crafted with black and cream worsted-weight yarn, this ring works up quickly using simple stitches and alternating colors for a striking stripe effect. Because it’s made in rounds with basic single crochet stitches, it’s a great project for beginners who want a wearable piece that’s both stylish and customizable. I found that working in continuous rounds helped keep the edges neat and the stripe pattern crisp, and threading elastic through the base ring ensures a comfortable fit that stretches to your finger size without losing shape. If you enjoy creating small crochet accessories like this, you might also be interested in the detailed and beginner-friendly instructions from the cherry blossom crochet hair comb pattern, which pairs well as a gift set or personal accessory collection.
Why You’ll Love This Crochet Pattern
- Quick to crochet with just a few rounds and minimal materials.
- Uses simple stitches and straightforward color changes, making it beginner-friendly.
- The stretchy elastic base ensures a comfortable and adjustable fit.
- Eye-catching bold stripes add a modern, statement-making vibe.
- No sewing required except for weaving in ends and adding elastic, which makes finishing fast.
- Can be customized easily by swapping colors or yarn textures for a unique ring look.
Finished Size
The finished ring has an approximate diameter of about 1.25 inches (3 cm), suitable for most adult fingers once the elastic is adjusted. Remember that size can vary slightly depending on your chosen yarn, hook size, and personal tension while stitching.
Skill Level
Advanced beginner — this pattern is perfect if you know how to crochet in rounds and understand basic color changes, but it doesn’t have complicated shaping or stitch variations. The elastic cord step adds a slight assembly element but is very simple to do.
Materials Needed
- Black and cream worsted-weight yarn (acrylic, cotton, or blend)
- 4 mm (G) crochet hook
- Short length of stretch elastic cord (for adjustable sizing)
- Tapestry needle (for weaving in ends and threading elastic)
- Scissors
Stitches and Abbreviations
- ch: chain
- sl st: slip stitch — used to join rounds seamlessly
- sc: single crochet — a tight, dense stitch perfect for sturdy fabric
- st(s): stitch(es)
Gauge and Tension Notes
Exact gauge is not critical for this accessory, but consistent tension matters. Keeping your single crochet stitches even and not too tight will help the ring lay flat and avoid warping. The elastic at the base accommodates minor size variations, but overly loose or tight stitches could affect comfort.
Pattern Notes Before You Start
This ring is worked entirely in joined rounds, changing colors each round to create a bold stripe effect. You will start with a small crochet ring and increase stitches in round two to shape the ring band. The black rounds frame the cream middle round to emphasize the stripes. Ends are fastened off each round, then woven in cleanly. Finally, a short elastic cord is threaded through the initial ring base and tied to size — this holds the ring securely on your finger while allowing stretch.
Step-by-Step Crochet Instructions
- Chain 6, then slip stitch to the first chain to form a small ring.
- Round 1 (black yarn): Chain 1, work 12 single crochets evenly into the ring (total 12 sts). Join with a slip stitch to the first sc.
- Round 2 (cream yarn): Join in any stitch, chain 1, 2 single crochets in each stitch around (increasing to 24 sts). Join with slip stitch, fasten off cream yarn.
- Round 3 (black yarn): Join in any stitch, single crochet evenly around (24 sts). Join with slip stitch, fasten off.
- Weave in all ends with a tapestry needle.
- Thread a short length of stretch elastic cord through the base ring (the initial chain ring from step 1). Tie the elastic securely to fit your finger size and trim the excess cord.
Assembly and Finishing
Take extra care when weaving in ends to ensure the color changes stay crisp and the edge remains smooth. Threading elastic through the base ring is easier with a plastic needle or a safety pin attached to the elastic tip. Make the knot neat and tight so it won’t slip while wearing. Tucking the knot inside or under a stitch adds to the durability and appearance.
Helpful Tips
- When switching colors, finish the last yarn over of the previous stitch with the new color to avoid gaps.
- Use stitch markers to help identify round joins so your stripe lines remain consistent.
- Work your stitches evenly, neither too tight nor too loose, for a neat finish and comfortable fit.
- Thread elastic carefully to avoid stretching the yarn or pulling stitches too tight.
- If your working yarn tends to split, try a smoother worsted-weight for cleaner stitches.
- Explore pairing your ring with other small crochet accessories, such as those in the bluebell drop earrings pattern, to create coordinating handmade jewelry sets.
Common Mistakes to Avoid
- Missing the slip stitch join at the end of rounds, which can cause uneven edges.
- Forgetting to increase stitches on round 2, which will make the ring too small or misshapen.
- Making stitches too tight, resulting in a stiff ring that does not stretch well with the elastic.
- Failing to securely knot the elastic, leading to the ring slipping off during wear.
- Weaving in ends too loosely or too close to the edge, which may cause unraveling or visible threads.
Customization Ideas
- Use other monochrome color combinations like gray and white or navy and cream for different looks.
- Try variegated or slightly fuzzy yarns for texture contrast with the stripe pattern.
- Add a small sewn-on bead or button on the outer round as a decorative accent.
- Adjust the size by changing the initial chain ring or hook size for smaller or larger fingers.
How to Use or Display This Crochet Project
This chunky statement ring makes a unique gift for friends who appreciate handmade accessories or a personal stylish addition to your own jewelry collection. It can be worn alone for a subtle pop of black and cream or stacked with metal rings for a bold mix of textures. When not wearing, display it alongside other favorite small crochet pieces such as hair accessories or earrings as a thoughtful creative set.
Care Instructions
To keep the ring looking fresh, hand wash gently in lukewarm water with mild soap and lay flat to dry away from direct heat. Avoid stretching the elastic cord aggressively to maintain fit. Store in a jewelry dish or small fabric pouch to protect the yarn from dust or snagging.
Frequently Asked Questions
Q: Can I use a different yarn weight or hook size?
A: You can, but the finished size and stretch will vary. Adjust the elastic length accordingly and try a yarn with similar thickness for best results.
Q: How long should the elastic cord be?
A: Measure your finger circumference and cut slightly longer elastic to allow tying securely without too much excess.
Q: Can I make this ring without elastic?
A: The elastic helps fit and flexibility. Without it, the ring may be too tight or loose. You could crochet a closed band instead, but fit won’t be adjustable.
Q: How do I keep my color transitions neat?
A: Always finish the last yarn over of the previous stitch with the new color, and carry the unused yarn loosely inside or fasten off and weave ends carefully.
Q: Is this ring suitable for sensitive skin?
A: Choosing a soft, skin-friendly yarn like cotton or a hypoallergenic acrylic reduces irritation risk. Avoid yarns with rough textures for jewelry.
Final Thoughts
This bold stripe chunky statement ring is a delightful project for beginners eager to create quick, wearable crochet jewelry. With a simple stitch pattern, clear color changes, and a stretchy finish, it combines style and practicality in one handy accessory. Enjoy customizing your version and pairing it with other handmade pieces as you build your cozy collection.



