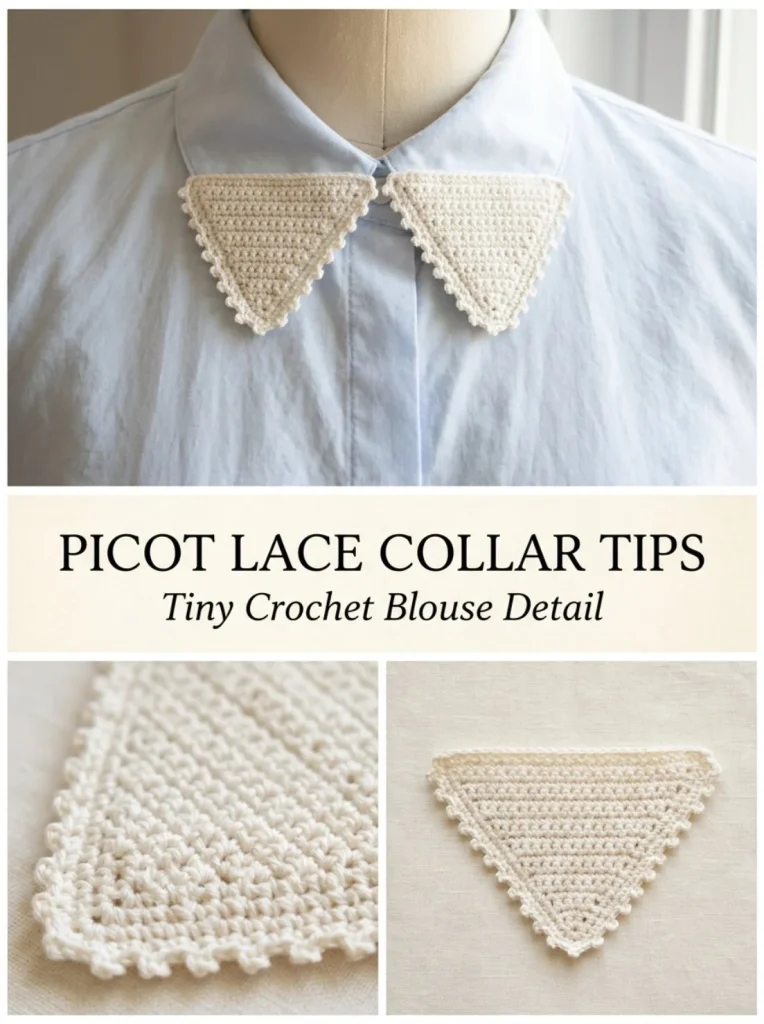
Creating picot lace collar tip covers is a lovely crochet project that adds an elegant touch to any shirt or blouse. These charming triangular sleeves fit snugly over collar tips, giving your outfit a delightful finishing touch. This quick and simple pattern is perfect for crochet enthusiasts of all levels, especially beginners who appreciate clear instructions. One insight from my crafting experience: ensuring that your picot stitches are evenly spaced can significantly enhance the piece’s overall appearance. With just a few basic stitches and a touch of creativity, you can create two matching covers that brighten up your wardrobe.
Why You’ll Love This Crochet Pattern
- Quick to make, ideal for beginners and those short on time.
- Creates a functional yet stylish accessory that can transform your everyday outfits.
- The pattern allows for easy customization with different thread colors or textures.
- Incorporates a fun picot stitch detail that adds a sophisticated look.
- Perfect for gifting to friends or family who love to accessorize.
Finished Size
Each finished collar-tip cover will measure approximately 1.5 to 1.75 inches (3.8 to 4.5 cm) deep. Please remember that size may vary depending on the yarn, hook size, and your tension.
Skill Level
This project is suitable for a beginner or intermediate crocheter. The pattern mainly uses basic stitches, but the addition of picot stitches provides a fun challenge.
Materials Needed
- Size 10 cotton thread in ivory or soft cream
- 1.25-1.5 mm steel hook
- Yarn needle
- Scissors
- Optional tiny snap stitches inside for extra grip
Stitches and Abbreviations
- sc – single crochet
- ch – chain
- sc2tog – single crochet two together (decrease)
Gauge and Tension Notes
Gauge is not critical for this pattern; however, maintaining a consistent tension will ensure even and neat collar tip covers. Aim for a firm crochet fabric to hold its shape well.
Pattern Notes Before You Start
This project is worked in rows, creating two separate triangles for each collar tip cover. It’s important to ensure that your joining is neat and that the wide top edge remains open for easy fitting over the collar.
Step-by-Step Crochet Instructions
-
Front Triangle (Make 2):
a. Ch 13.
b. Row 1: sc in the 2nd ch from the hook and across (12 sts).
c. Row 2: ch 1, turn, sc2tog, sc in next 8 sts, sc2tog (10 sts).
d. Row 3: ch 1, turn, sc2tog, sc in next 6, sc2tog (8 sts).
e. Row 4: ch 1, turn, sc2tog, sc in next 4, sc2tog (6 sts).
f. Row 5: ch 1, turn, sc2tog, sc in next 2, sc2tog (4 sts).
g. Row 6: ch 1, turn, sc2tog twice (2 sts).
h. Row 7: ch 1, sc2tog (1 st). Fasten off. -
Back Triangle (Make 2):
Repeat the same instructions as for the front triangle. -
Assembly:
Place one front triangle and one back triangle together. Join the thread at one lower corner and sc through both layers up one side to the tip and down the second side, leaving the top edge open for the collar. Work a small picot every 3-4 stitches along the joined outer edge: ch 3, sl st in the first ch. Fasten off. Repeat for the second cover. -
Fit:
Slide each sleeve over a shirt or blouse collar tip. If needed, add a tiny hidden tack stitch or small snap inside the open edge for extra security while ensuring the collar fabric remains flat and unpierced.
Assembly and Finishing
After completing the crochet parts, join the triangles carefully to ensure they are symmetrical. Weave in the ends neatly for a polished finish. Remember to check the positioning for comfort and style while assembling.
Helpful Tips
- For even picot stitches, use a stitch marker to gauge your spacing.
- Block your finished covers to help them maintain their shape.
- Take your time with joining seams to avoid puckering.
- Adjust your tension if the finished piece feels too loose or tight.
Common Mistakes to Avoid
- Ensure you don’t pull your stitches too tight, as it may affect the shape.
- Double-check your stitch counts at each row to avoid errors.
- When making picots, keep a consistent tension to achieve a uniform look.
Customization Ideas
- Use various colors or thread types to match different outfits.
- Experiment with the depth of the covers for a bolder style.
- Add small embellishments to the picot stitches for a personal touch.
How to Use or Display This Crochet Project
These collar tip covers can elevate everyday blouses or shirts, making them perfect for both casual and formal occasions. Gift them to a friend who loves to accessorize or wear them yourself for a unique twist on classic styles.
Care Instructions
Wash gently by hand in cold water and lay flat to dry to maintain the integrity of the crocheted fabric. Store in a cool, dry place away from direct sunlight to prevent fading or damage.
Frequently Asked Questions
-
Can I use a different yarn type?
Yes, just ensure the yarn is of a similar weight for best results. -
How do I ensure my stitches are even?
Focus on consistent tension and take breaks to refresh your hands. -
What are some other projects I can create?
You might enjoy trying projects like a picot lace sock cuff or a delicate camellia collar chain. -
Can I adjust the size?
Yes, by altering the initial chain length and adjusting the rows, you can customize your covers.
Final Thoughts
Creating picot lace collar tip covers is a delightful and rewarding project that adds style and flair to your wardrobe. With simple adjustments, you can personalize them to truly make them your own. Enjoy your crochet journey!



