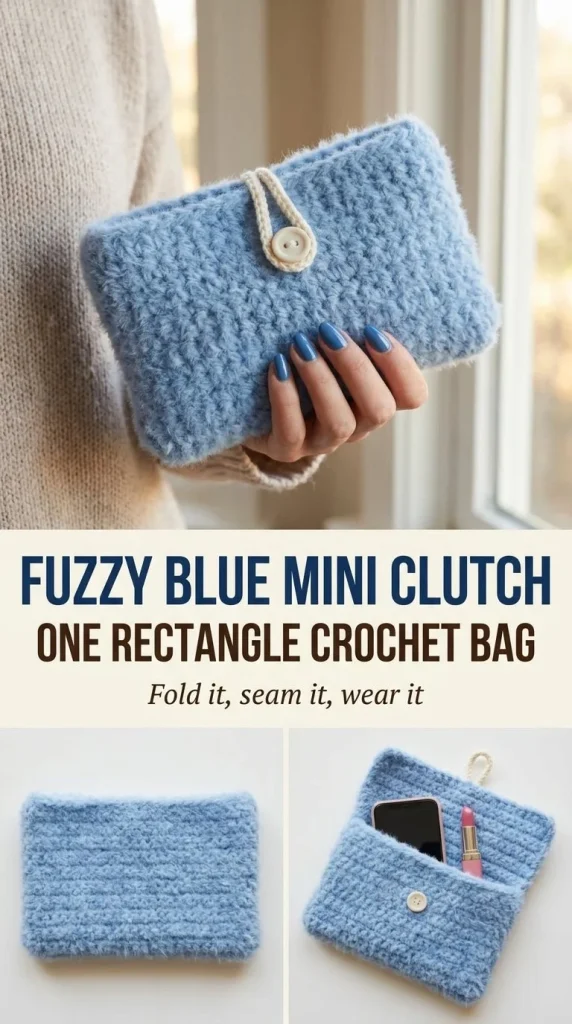
Creating your own accessories can be a delightful experience, and crocheting a fuzzy blue mini clutch is a perfect project for both newcomers and seasoned enthusiasts. This charming accessory works up quickly and can showcase your crochet skills beautifully. For those interested in a similar fun project, you might want to explore the mini blue seashell bag charm crochet pattern as well.
Skill Level
Confident Beginner: This project is suitable for confident beginners who are familiar with basic crochet stitches such as chaining and single crochet. It provides an opportunity to practice these skills while creating a stylish piece.
Materials
- Fuzzy or soft bulky powder-blue yarn
- 6mm hook
- Cream yarn for closure
- Tapestry needle
- Scissors
- Stitch markers (optional for help in counting rows)
Abbreviations — US Terms
- ch – chain
- sc – single crochet
- st(s) – stitch(es)
Special Stitches
There are no advanced or special stitches in this project; basic crochet techniques are enough to complete it.
Gauge
Gauge is not crucial for this project; however, you should aim for consistent tension to ensure a cohesive finished product.
Finished Size
The finished clutch’s dimensions will depend on your yarn and tension but will approximately measure as a small pouch. This allows for easy carrying of essentials.
Pattern Notes
- This clutch is worked in rows.
- The foundation chain is crucial for the clutch size.
- The work will be folded to form the pouch and flap.
- Make sure to secure all edges well for durability.
Crochet Instructions
Row 1
Start by chaining 25. In the second chain from the hook, work 1 single crochet (sc), and then sc across the chain. You should end with a total of 24 sc.
Rows 2-30
For these next rows, chain 1 and turn your work. Work 1 sc across the row. Repeat this process for a total of 29 more rows, which will bring the total count to 30 rows.
Total: 24 sc across 30 rows.
Forming the Clutch Body
Once you’ve completed your 30 rows, lay your rectangle flat. To form the pouch body, fold the bottom approximately two-thirds upward.
Securing the Edges
Using a tapestry needle, sew both side edges securely to hold the folded piece in place. Make sure the stitches are tight enough to prevent any unraveling.
Creating the Flap
Now, fold the remaining top section of your rectangle downward to create the flap of the clutch. This step is essential in giving it that classic clutch look.
Adding the Closure
With your cream yarn, attach it at the center edge of the flap. Chain 8–10 stitches to create a small closure loop. After reaching your desired length, secure the yarn back into the flap.
Attaching the Button
Finally, sew a suitable button to the front of the pouch if you wish to add a decorative touch, enhancing both function and style.
Tips for the Best Result
- To prevent uneven sides, ensure that your single crochet stitches are consistent in size.
- Use stitch markers at the beginning of each row if you’re having trouble keeping track of your rows.
- When sewing the sides, check that the edges align properly to keep the clutch looking neat.
Common Mistakes
Uneven Edges
Ensure you are maintaining even tension throughout your stitches. Uneven tension can lead to a pouch that is improperly shaped.
Miscounting Rows
Keep track of your rows by using a stitch marker or notepad. Miscounting can lead to a pouch that is too short or too long.
When you’re ready for your next crochet project, consider exploring other styles such as the mini blue shoulder bag crochet pattern, which presents a delightful variation on this theme.
Finishing
Once your clutch has been formed and any decorative elements added, weave in all loose ends using your tapestry needle. For the best results, you might want to block your finished piece slightly to even out any minor tension discrepancies.
Care
For best results, refer to the yarn label for specific washing and care instructions. Typically, hand washing and air drying are recommended to prevent any felting and to maintain the yarn’s softness.
Creating your fuzzy blue mini clutch will not only enhance your crochet skills but also provide you with a stylish accessory that you can take pride in! Happy crocheting!



