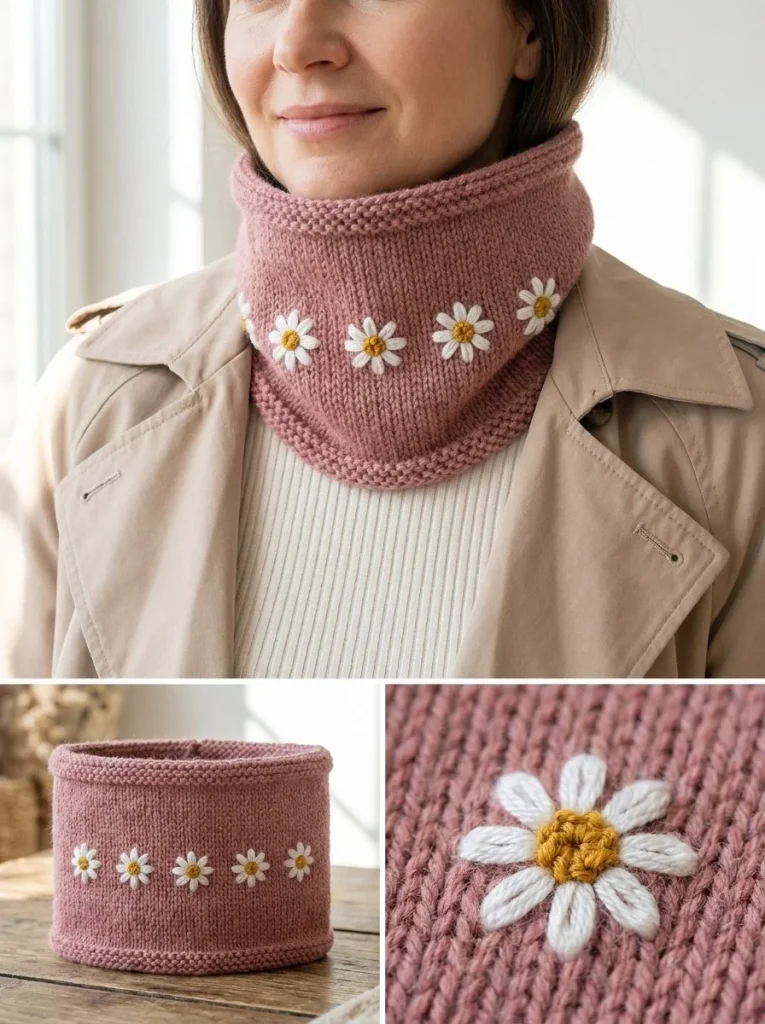
Creating a knitted neck warmer is not only a delightful project but also a practical accessory for those chilly days. The Daisy Embroidered Knit Neck Warmer Pattern combines cozy functionality with a charming floral touch. Perfect for both beginners and those with some knitting experience, this pattern allows you to create something cute and wearable. One key tip as you work on the neck warmer is to stay relaxed in your stitching; this will ensure the fabric remains stretchy and comfortable as you wear it.
Why You’ll Love This Crochet Pattern
- It’s beginner-friendly with straightforward instructions that are easy to follow.
- The floral embroidery adds a whimsical touch that elevates this cozy accessory.
- Ideal for gift-giving, making a thoughtful present for loved ones.
- Provides an enjoyable way to practice knitting skills while creating a practical item.
- You can easily customize the colors to match personal style.
Finished Size
The finished neck warmer measures approximately 22 inches (56 cm) in length, but this may vary slightly depending on your yarn, needle size, and tension.
Skill Level
This pattern is designed for beginner to intermediate knitters. The straightforward stitch patterns and simple embroidery make it accessible while still allowing for creativity.
Materials Needed
- Worsted (#4) yarn in dusty rose (200–230 yards / 183–210 meters)
- Small amounts of white and mustard-yellow yarn for embroidery
- US 7 (4.5 mm) knitting needles
- Tapestry needle suitable for yarn embroidery
- Scissors
Stitches and Abbreviations
- K: Knit
- P: Purl
Gauge and Tension Notes
While gauge is not critical for this project, maintaining consistent tension will help give your neck warmer a neat appearance and proper fit.
Pattern Notes Before You Start
You will be working back and forth in rows. The neck warmer is constructed as a simple tube, and it features decorative daisy embroidery on the front. Remember to leave enough space from the top and bottom borders when placing the flowers.
Step-by-Step Crochet Instructions
- Cast on 38 stitches using the dusty rose yarn.
- Row 1 (RS): Knit all stitches.
- Row 2 (WS): K4, P30, K4.
- Repeat Rows 1 and 2 until the piece measures 22 inches (56 cm) from the cast-on edge, finishing after a WS row.
- Bind off all stitches.
- Seam the cast-on and bind-off edges together using mattress stitch to form a tube.
- For the daisies, mark five flower centers evenly across the front half of the neck warmer, keeping at least 1 inch (2.5 cm) from the top and bottom borders.
- With white yarn, work six lazy-daisy petals around each marked center, with each petal about ½ inch (1.3 cm) long.
- Add two to three small French knots or compact straight stitches in mustard-yellow yarn at each center.
- Keep the embroidery tension relaxed to ensure the knit fabric remains stretchy.
Assembly and Finishing
Weave in all embroidery tails on the inside of the neck warmer. Lightly block the finished piece to shape it neatly without altering the stretch.
Helpful Tips
- When working with embroidery, use a light hand to avoid pulling the knitting too tightly.
- If you find the mattress stitch challenging, practice on a swatch first to ensure a neat seam.
- Experiment with spacing for the daisies to create a pattern that suits your style.
- If using multiple yarn brands, check the yarn weight to ensure consistency.
Common Mistakes to Avoid
- Be cautious with the tension in your knitting; too tight can result in a stiff fabric.
- Ensure correct counting of stitches to avoid any unexpected gaps or tight spots in your work.
- Remember to keep the embroidered sections from being placed too close to the edges.
Customization Ideas
- Change the yarn color to suit seasonal or personal preferences.
- Consider adding beads or sequins to the daisy centers for a touch of sparkle.
- Experiment with different types of embroidery stitches, such as satin stitches, for added texture.
How to Use or Display This Crochet Project
The finished neck warmer can be worn as a stylish accessory on a chilly day. It also makes a thoughtful gift, adding a personal touch to anyone’s winter wardrobe.
Care Instructions
To care for your neck warmer, hand wash it in cold water and lay it flat to dry. Avoid wringing or twisting as it may distort the shape.
Frequently Asked Questions
Q: Can I use other yarn weights?
A: While it’s best to stick with worsted weight for this pattern, you can experiment with other weights, but expect to alter the stitch counts.
Q: How do I secure loose yarn ends?
A: Use a tapestry needle to weave the yarn ends securely into the fabric of your work.
Q: What if my daisy petals are uneven?
A: Don’t worry! Handcrafted items often have charm in their imperfections. You can always trim petals to shape them more evenly.
Q: Is blocking necessary?
A: Blocking helps refine the shape and relax the fabric. It’s recommended for the best finished look.
By engaging with this delightful project, you’ll not only create a beautiful neck warmer but also gain confidence in your knitting skills. If you enjoyed this project, you might also love making the Cozy Oatmeal Shoulder Warmer or the Maple Leaf Cable Ear Warmer. Each project offers unique design elements and opportunities to showcase your creativity!



