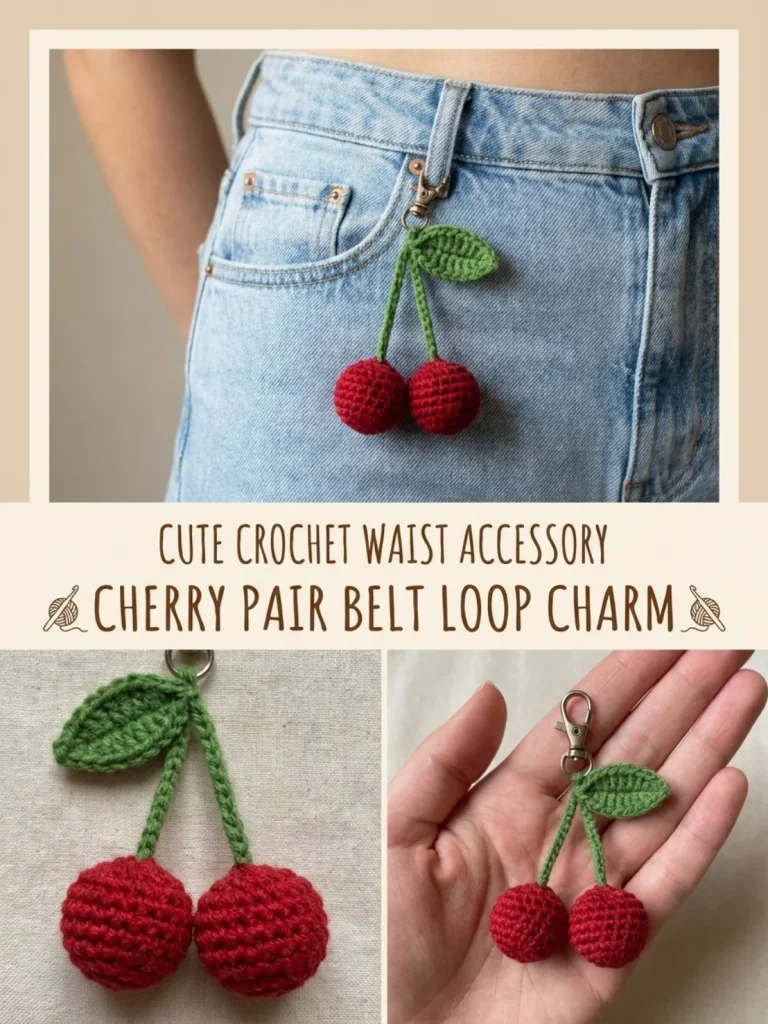
Crocheting small, charming accessories can elevate any outfit, and creating a Cherry Pair Belt Loop Charm is a delightful project perfect for both beginner and intermediate crocheters. These whimsical cherries not only showcase your crafting skills but also make an adorable addition to belts, bags, or keychains. As you work through the pattern, pay special attention to shaping the cherries—adding a bit of stuffing can give them a lovely plumpness that makes them truly pop!
Why You’ll Love This Crochet Pattern
- The pattern is beginner-friendly, making it a great starting point for new crocheters.
- You’ll create something practical and cute that can be gifted or kept for personal use.
- The project uses minimal materials and can be completed quickly.
- Crochet cherries add a delightful touch to accessories and can be easily customized.
Finished Size
The estimated finished size of the Cherry Pair Belt Loop Charm is about 3 to 4 inches, depending on your yarn, hook size, and personal tension.
Skill Level
This pattern is categorized as easy, making it suitable for beginners with basic crochet skills, as well as those looking to refine their techniques.
Materials Needed
- Sport-weight cotton yarn in cherry red and leaf green
- 2.25 mm crochet hook
- Small amount of fiberfill for stuffing
- Tapestry needle
- Scissors
- Optional: 1 small lobster clasp
Stitches and Abbreviations
- sc: single crochet
- sl st: slip stitch
- hdc: half double crochet
- dc: double crochet
- ch: chain
- sc2tog: single crochet two together (decrease)
Gauge and Tension Notes
While gauge is not crucial for this project, maintaining consistent tension will ensure that your cherries look uniform and neat. Aim for a relaxed stitch for ease during stuffing and assembly.
Pattern Notes Before You Start
The cherries are worked in rounds, starting from a magic ring. You will create three separate components: the cherries, stems, and leaves, which will ultimately be sewn together. Take your time when securing the stems to the cherries for a clean finish.
Step-by-Step Crochet Instructions
-
Make 2 cherries:
- With red yarn, create a magic ring and work 6 sc into the ring.
- Round 2: Work 2 sc in each stitch (12).
- Round 3: Sc in each stitch (12).
- Round 4: sc in next stitch, sc2tog around (8). Add a small pinch of stuffing.
- Round 5: sc2tog around (4). Fasten off, leaving a tail for sewing.
-
Make the stems (make 2):
- With green yarn, ch 14. Starting in the 2nd ch from hook, sl st in each chain across. Fasten off, leaving a sewing tail.
-
Create the leaf:
- With green yarn, ch 7. Starting in the 2nd ch from hook, work: sl st, sc, hdc, dc, sc, sl st. Fasten off.
-
Assembly:
- Place the two free stem ends together and sew them side-by-side to the top center of each cherry.
- Add a small hanging loop by chaining 8 with green, sl st back into the leaf base, or use the remaining thread.
-
Adjust the lengths of the cherry stems to hang slightly differently, folding and sewing behind the leaf if needed.
-
Weave in all ends securely.
Assembly and Finishing
Once all parts are assembled, ensure secure stitches where the stems meet the cherries and the leaf. This will help the charms hang properly and stay intact during use. Trim any excess yarn tails for a neat finish.
Helpful Tips
- When stuffing the cherries, use just a small pinch of fiberfill to maintain their shape without overstuffing.
- If the cherries seem too flat, gently reshape them after stuffing.
- For more embellishments, consider adding a cute charm or bead to the hanging loop.
- To ensure your stitches are uniform, count them as you go along.
Common Mistakes to Avoid
- Overstuffing the cherries: This can distort their shape, so add fiberfill gradually.
- Not securing loose ends: Weave in all ends to prevent unraveling in the wash.
- Crocheting too tightly: This can make it difficult to stuff and shape your cherries. Try to maintain relaxed tension.
- Forgetting to slip stitch in the correct chains for the stems: Follow the chain count precisely for even stems.
Customization Ideas
- Change the colors of the cherries to create a variety of fruit charms.
- Use different fibers like acrylic or bamboo to alter the texture and appearance.
- Consider adding beads or embellishments to the leaves for extra flair.
- Make additional charms using the same methods for a colorful keychain collection.
How to Use or Display This Crochet Project
The finished Cherry Pair Belt Loop Charm can be attached to belts, handbags, or backpacks, providing a sweet touch. They also make great gifts for friends or crafting enthusiasts.
Care Instructions
To clean your crochet charm, gently hand wash with mild soap and water. Lay it flat to dry and reshape if necessary. Store the charm in a cool, dry place to maintain its shape and freshness.
Frequently Asked Questions
-
Can I use different yarn weights?
- Yes, but adjust your hook size accordingly and be aware that final sizing may vary.
-
How can I attach the charm more securely?
- Use a stronger clasp if the lobster clasp feels too loose.
-
Is there a way to make the cherries bigger?
- Work additional rounds or use thicker yarn; just keep the shaping in mind.
-
Can these be made as holiday decorations?
- Absolutely! Change colors to suit any theme or occasion.
For more delightful crochet projects that are easy and fun, check out this beginner-friendly cherry blossom crochet hair comb pattern or try making a lovely cherry pearl flower ring for a matching piece.
The Cherry Pair Belt Loop Charm is not just a project; it’s a way to express your creativity and add a bit of joy to your everyday accessories!



