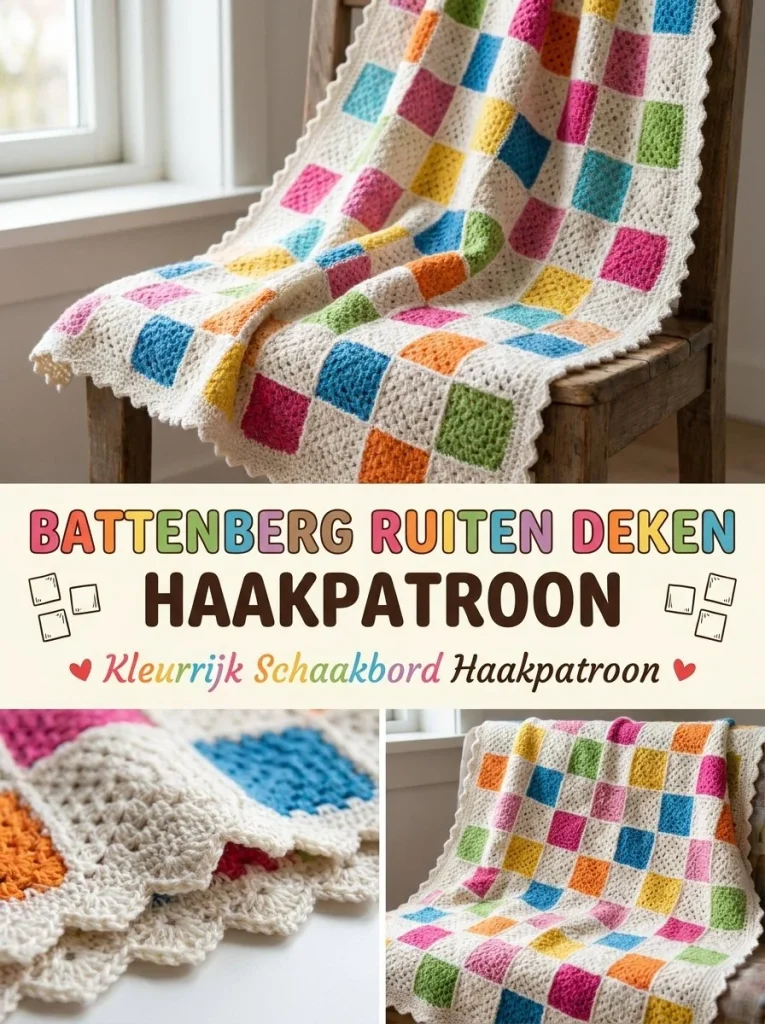
Building a vibrant and cozy Battenberg blanket using various bright colors can be a rewarding crochet project. By alternating colorful squares with off-white ones in a chessboard pattern, you can create a stunning visual effect that’s perfect for those looking to brighten their space. If you’re interested in more versatile crochet patterns, you might enjoy exploring items like a shawl-collar cozy crochet cardigan or a two-tone split crochet cardigan which feature intricate designs too.
Skill Level
This crochet project is ideal for confident beginners to intermediate crocheters. Basic granny square skills are applied, along with the technique for seamless joining, making it a great way to practice and enhance your crochet skills.
Materials
Here is a list of materials you will need to create your Battenberg blanket:
- Fingering yarn in various bright colors for the colored squares
- Off-white fingering yarn for the neutral squares
- 3mm crochet hook
- Tapestry needle
- Scissors
- Stitch markers (optional for organization)
- Measuring tape (helpful for ensuring dimensions)
Abbreviations — US Terms
You will need to be familiar with the following crochet abbreviations:
- ch – chain
- sl st – slip stitch
- sc – single crochet
- dc – double crochet
- st(s) – stitch(es)
- sp – space
- ch-sp – chain space
Special Stitches
Seamless Join Technique
This technique allows you to connect your granny squares without visible seams. It creates a smooth transition between pieces.
To execute a seamless join:
- Line up the squares you want to join.
- Insert your hook through the designated stitch of the first square and the corresponding stitch of the second square.
- Yarn over and pull through. Yarn over again and pull through two loops to create a slip stitch.
- Repeat this process across the edges where the two squares meet.
Gauge
While gauge is not critical for this project, it’s essential to maintain consistent tension in your crochet work to ensure the squares measure about 5 cm.
Finished Size
The finished blanket size will depend on how many squares you choose to crochet. Each square is approximately 5 cm, and the total size can be adjusted based on how many are arranged in rows and columns.
Pattern Notes
- This project is worked in rounds.
- Each granny square is made separately and joined later.
- Maintain a consistent color order throughout the piece.
- The project can be completed using rows of alternating colors according to the desired chessboard layout.
Crochet Instructions
Part 1 – Granny Squares
Each granny square will consist of solid stitches worked in rounds. Here’s how to create them:
Round 1
- Create a magic ring.
- Chain 3 (this counts as your first dc).
- Work 2 dc into the ring.
- Chain 1, then work 3 dc into the ring.
- Chain 1 again, and repeat the sequence of 3 dc followed by a chain 1 for a total of 4 times.
- To finish the round, join with a sl st into the top of the initial chain-3.
Total: 12 dc and 4 ch-1 spaces.
Round 2
- Slip stitch into the first ch-1 space.
- Chain 3 (counts as your first dc).
- Work 2 dc in the same ch-1 space.
- Chain 1, then work 3 dc in the next ch-1 space.
- Continue this sequence around, always chaining 1 between sets.
- Join with a sl st into the top of the chain-3.
Total: 24 dc and 4 ch-1 spaces.
Round 3
- Slip stitch into the first ch-1 space.
- Chain 3, and work 2 dc in the same space.
- In the next ch-1 space, work (3 dc, ch 1, 3 dc) to form a corner.
- Continue with 3 dc in the next sp, then make a corner in the succeeding ch-1 space.
- Repeat this around, ensuring each corner forms properly, and finish with a sl st into the chain-3.
Total: 36 dc and 4 ch-1 spaces.
Part 2 – Joining Squares
Once you have crocheted the desired number of squares:
- Position the squares in a chessboard pattern.
- Use the seamless join technique outlined above to join squares together, ensuring you alternate colors appropriately across rows and columns.
Part 3 – Border
To finish the blanket:
- Attach the off-white yarn to a corner of your joined squares.
- Chain 1 and work 1 sc around the entire edge of the blanket.
- For each corner space, work 3 sc to ensure a smooth curve.
- After completing the sc round, proceed with a picot edge by chaining 3, slipping into the base of the chain to form a small loop.
- Repeat this technique around the blanket’s outer edge.
Tips for the Best Result
- Use stitch markers to keep track of your rounds.
- Regularly check the size of your squares throughout to ensure they remain consistent.
- Ensure to weave in all ends securely to avoid unraveling.
Common Mistakes
Uneven Square Sizes
This can occur if tension varies between squares. Always check your gauge during earlier squares to maintain consistency across the project.
Joining Shows Seams
Ensure you’re using the seamless join method correctly to prevent visible seams.
Care
If you’re using delicate fingering yarn, hand wash your blanket in cold water and lay it flat to dry. Always refer to your yarn label for specific care instructions.
With vibrant colors and a classic pattern, your Battenberg blanket will not only enhance your living space but will also provide warmth and comfort. Happy crocheting!



